How to Enable or Disable Search Index in Vista and Windows 7
This will show you how to Enable or Disable the Search Index. You may want to disable it to get more accurate search results, or to stop your hard drive from running so much.
The Index keeps track of the files on your computer and stores information about the files, including the file name, date modified, and properties like author, tags, and rating. The index is used to make searching for files in Vista much faster. Instead of looking through your entire hard disk for a file name or file property, Vista scans the index, which allows most results to appear in a small fraction of the time that a search without the index would take.
The Index keeps track of the files on your computer and stores information about the files, including the file name, date modified, and properties like author, tags, and rating. The index is used to make searching for files in Vista much faster. Instead of looking through your entire hard disk for a file name or file property, Vista scans the index, which allows most results to appear in a small fraction of the time that a search without the index would take.
The Index will run slowly in the background during low or idle computer usage to keep itself updated and current from the changes you make to the files from the locations that you have listed in the index. If you do a lot of changes in these indexed locations, then your search results will not always be accurate until the index has finished updating itself. This can cause the hard drive to run a lot, especially for the first week or so after installing Vista. If you do not do a lot of searches or need very accurate search results, then disable the index to allow Vista to default to using the full non-index search of the drive. The searches will take a bit longer since it is a non-indexed search, but it will cut down on the hard drive running as much and will give accurate search results.
- Disabling the index may also impact some Microsoft programs, like MS Office Outlook or Windows Media Player, that use the Index when they search.
- Disabling the index in Windows 7 will cause you to no longer be able to do searches in Libraries. To be able to search in libraries, the Windows Search service needs to be Started and set to Automatic. Libraries require it's included folders to also be added to the index to be tracked properly even though they will still open properly.
- Disabling the index in Windows 7 will cause you to no longer be able to use Arrange by in Libraries.
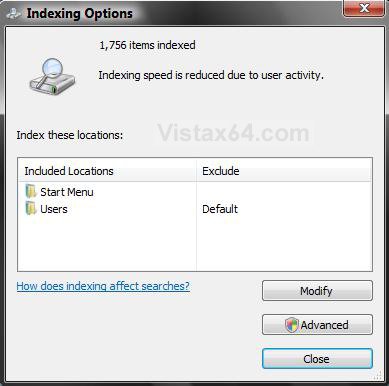
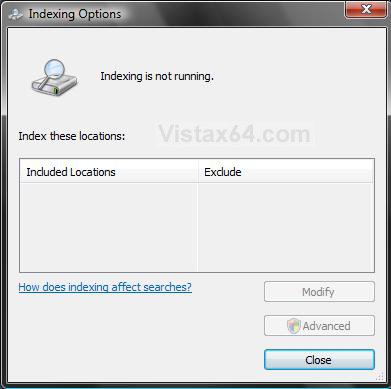
EXAMPLE: Index Enabled and Disabled
 OPTION ONE
NOTE: This will enable or disable the Index for Windows completely. It will not affect the regular non-indexed search feature in Windows.
1. Open the Start Menu, then type services in the search box and press Enter.
2. If prompted by UAC, then click on Continue (Vista) or Yes (Windows 7).
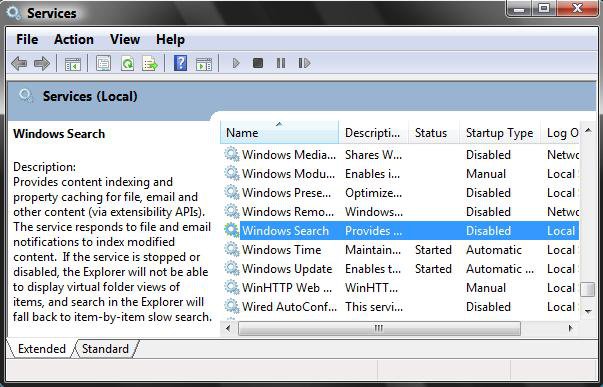
3. Scroll down and right click on Windows Search, then click on Properties. (see screenshot below)
4. To Disable the Index
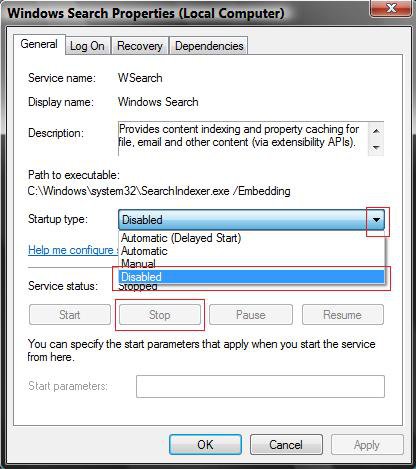
A) Click on the Stop button. (see screenshot below step 6)
B) Next to Startup type, click on the drop down menu arrow and click on Disable.
C) Click on Apply.
D) Go to step 6.
5. To Enable the Index
A) Next to Startup type:, click the drop down menu arrow and click on Automatic. (See screenshot below step 6)
B) Click on Apply.
C) Click on the Start button.
NOTE: If the Windows Search service will not start, then leave it set to Automatic and see: How to Fix the Start Error For Windows Search Service to Enable the Index
6. Click on OK.
7. Close the Service window.
 OPTION TWO
NOTE: This will only enable or disable the Index for the drive you selected.
1. Open the Start Menu.
2. Click on the Computer button on the right dark side.
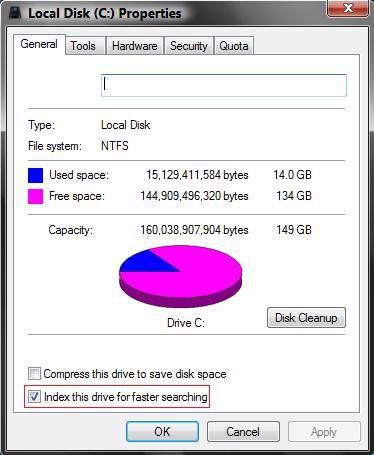
3. Right click on the hard drive that you want to enable or disable Index on, and click on Properties.
4. To Disable the Index
A) Uncheck the Index this drive for faster searching box. (see screenshot below step 6)
B) Go to step 6.
5. To Enable the Index
A) Check the Index this drive for faster searching box. (see screenshot below step 6)
NOTE: Step 5 in the OPTION ONE section above will need to be set to enabled for this to work to.
6. Click on Apply.
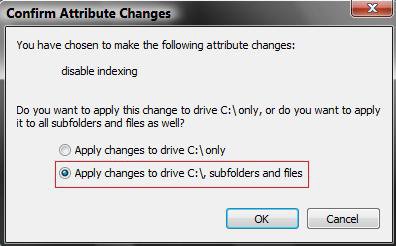
7. Select (dot) Apply changes to drive, subfolders, and files. (see screenshot below)
8. Click on OK.
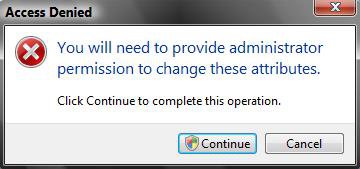
9. Click on Continue in the Access Denied window. (see screenshot below)
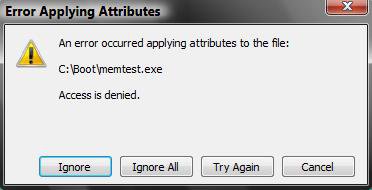
10. Click on the Ignore All button for the Error Applying Attributes window. (see screenshot below)
NOTE: Vista does not like any attempt to mess with the boot files. This is why you get this error and should select ignore all to skip changing these files.
11. This may take a while to finish depending on the size of your hard drive, so sit back, kick the feet up and relax a bit.
12. When finished, click on OK to close drive properties window. (see screenshot below step 6)
That's it,Shawn
Related Tutorials
- How to Open and Change Search Options in Vista
- How to Use the Indexing Options in Vista
- How to Fix the Start Error For Windows Search Service to Enable the Index in Vista
- How to Add or Remove the Internet Explorer Search Box in Vista
- How to Use Advanced Search Options in Vista
- How to Create a Search Desktop Shortcut on Vista
- How to Use the Find Window to Find Text on a Page
- How to Restore the Search Context Menu Item after Installing the Vista SP1
- How to Restore the Start Menu Search Button after Installing the Vista SP1
- How to Use the Advanced Query Language to Improve Windows Search Results
- How to Have More Accurate Search Results in Windows 7 and Vista
- How to Enable or Disable Search "Indexer Backoff" in Windows 7
Attachments
Last edited by a moderator:

