How to Add and Remove a Item in the"New" Context Menu
The New menu is located in the Context (right click) menu and Windows Explorer File menu. This will show you how to add and remove a item of your choice to the New menu.
In the root and root folders of C: drive, the only New context menu item available is Folder.
- To restore or remove New from the context menu, see: How to Restore or Remove New from the Context Menu in Vista
- If you are missing any of the default menu items in the New context menu, then see: How to Restore Missing Default New Context Menu Items in Vista
- A good free program for advanced users to use to disable or remove context menu items is ShellExView.
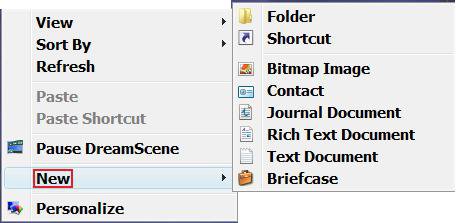
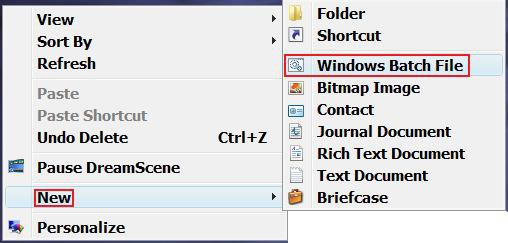
EXAMPLE: Context menu New menu Items Before (Default) and After
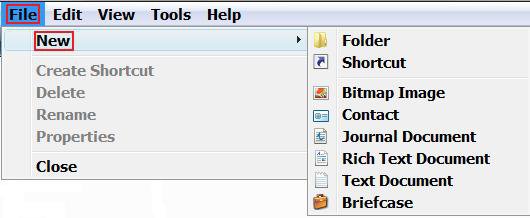
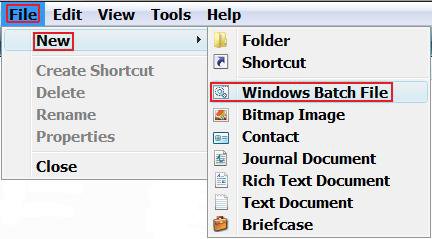
EXAMPLE: File menu New menu Items Before (Default) and After
Before you make changes to the registry, you should backup the ShellNew key under the file extension you will be changing. (See step 6 below)
1. To Backup Registry Key
1. To Backup Registry Key
A) Right click ShellNew and click Export.
B) Save the exported REG file to where you want it.
NOTE: This is the back file.
2. To Restore Registry KeyA) Right click on the exported REG file and click Merge.
B) Confirm the action to restore the registry key back to the same as the REG file.
Here's How:
1. Open the Start Menu.
2. In the white line (Start Search) area, type regedit and press Enter.
3. If prompted, click on Continue in the UAC prompt.
4. In regedit, go to:
NOTE: Go to the key of the file extension (left pane) of the item you want to add to the New menu.
HKEY_CLASSES_ROOT\(File Extension)
FOR EXAMPLE: For a New Batch File, go to (.bat) : (See screenshot below)
HKEY_CLASSES_ROOT\.bat
For an existing file extension that you want to remove from the New Menu, skip this and go to to Option One (step 8) instead.
5. In the left pane, right click on the file extension (EX: .bat) and click on New and Key.
6. Type ShellNew and press Enter. (See screenshot below)
 Option One
7. To Add a Blank New Item
NOTE: This will create a new blank (no content) file of the file extension.
A) In the right pane, right click on a empty area and click on New and String Value. (See screenshot below step 6)
B) Type NullFile and press Enter. (See screenshot below)
C) Continue to step 9, or go to step 13.
8. To Remove the Blank New Item or Already Existing Item
A) In the left pane of the file extension, right click on ShellNew and click on Delete. (See screenshot above)
NOTE: To just hide it instead to make it easy to restore again later if you wanted, right click on ShellNew and click on Rename. Rename it to ShellNew*. To unhide it, just remove the * from the name.
B) Continue to step 9, or go to step 13.
 Option Two
9. To Add a New Item with Content or Data
A) Do step 7 first.
NOTE: This will create a new file of the file extenstion with content or data the you will enter in step D below.
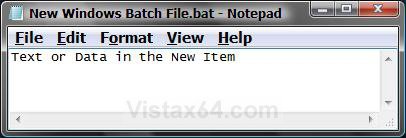
EXAMPLE: When you right click on the created New item and click Edit, you will have the content you added in it.
B) In the right pane, right click on a empty area and click on New and String Value. (See screenshot above)
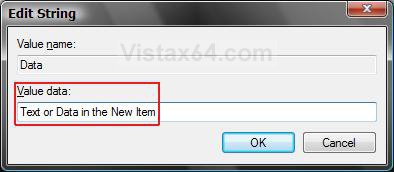
C) Type Data and press Enter. (See screenshot below)
D) In the right pane, right click on Data and click on Modify.
E) Type in the Text or Data content that you want the New item to always have when created and click on OK. (See screenshot below)
F) You should now see something like this. (See screenshot below)
G) Continue to step 11, or go to step 13.
10. To Remove a New Item with Content or Data
A) In the right pane, right click on Data and click Delete. (See screenshot above)
NOTE: To just hide it instead to make it easy to restore again later if you wanted, right click on ShellNew and click on Rename. Rename it to ShellNew*. To unhide it, just remove the * from the name.
B) Continue to step 11, or go to step 13.
 Option Three
11. To Add a New Item that is a Copy of Another File -
WARNING: This will override step 7 and 9, so you will need to choose to do either those steps or this step.
NOTE: This will create a new file of the file extension that is a copy of the file you will specify in step 11D below.
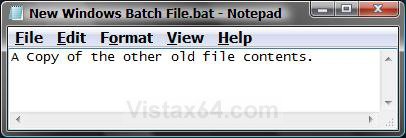
EXAMPLE: When you right click on the created New item and click Edit, you will have the copied content of the file you chose.
A) In the right pane, right click on a empty area and click on New and String Value. (See screenshot below step 6)
B) Type FileName and press Enter. (See screenshot below)
C) In the right pane, right click on FileName and click on Modify.
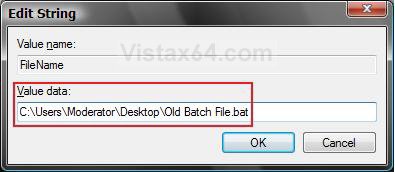
D) Type in the full path of the file you want copied and click on OK. (See example screenshot below)
NOTE: If you add the file you want copied into C:\Windows\ShellNew , then you will just need to type the name of the file instead. (EX:Old Batch File.bat)
WARNIING: The file you want copied must have the same file extension.
E) You should see something like this now. (See screenshot below)
F) Go to step 13.
12. To Remove a New Item that is a Copy of Another File
A) In the left pane, right click on ShellNew and click Delete. (See screenshot above)
NOTE: To just hide it instead to make it easy to restore again later if you wanted, right click on ShellNew and click on Rename. Rename it to ShellNew*. To unhide it, just remove the * from the name.
13. Close regedit.
14. Log off and Log on, or restart the computer to apply the changes.
That's it,
Shawn
Related Tutorials
- How to Expand the Context (Shortcuts) Menu in Vista
- How to Customize the Context Menu for the Start Menu in Vista
- How to Customize the Send To Context Menu in Vista
- How to Customize the Recycle Bin Context Menu in Vista
- How to Add COPY TO FOLDER and MOVE TO FOLDER to the Context Menu in Vista
- How to Add Encrypt and Decrypt to the Context Menu in Vista
- How to Fix Cannot Rename and or Create a New Folder in Vista
- How to Add Take Ownership to the Context Menu in Vista
- How to Restore the Search Context Menu Item after Installing the Vista SP1
- How to Add Flip 3D to the Context Menu in Vista
- How to Restore or Remove New from the Context Menu in Vista
- How to Enable or Disable the Context Menu in Vista
- How to Remove or Show Drives in the Vista and Windows 7 "Send To" Context Menu
- How to Add View and Print File Directory to the Context Menu in Vista
- How to Add or Remove Copy as Path from the Vista Context Menu
- How to Add or Remove Send To from the Vista Context Menu
- How to Fix the New Folder Context Menu Item in Vista
- How to Add System Properties to Computer Context Menu in Vista
- How to Restore Missing Default New Context Menu Items in Vista
- How to Restore or Remove "Restore Previous Versions" from the Vista Context Menu
- How to Fix the New Shortcut Context Menu Item in Vista
Attachments
Last edited:

