How to Shrink and Create a Partition with Disk Management in Vista
It is possible in Vista to repartition your hard disk by using the Shrink feature in Disk Management. You can shrink an existing partition (volume) to create unallocated disk space, from which you can Create a new partition (volume). For more information, see: Windows Help and How-to: Partition and Understanding Disk Partitioning
[TABLE=class:-grid,-width:-700][TR][TD]
Partition Type
[/TD]
[TD]
Description
[/TD][/TR]
[TR][TD]
Primary Partition
[/TD]
[TD]
A type of partition created on a hard drive that can host an operating system and functions as though it were a physically separate hard drive. Also called a volume. Only up to four primary partitions, or 3 primary partitions and 1 extended partition can be created on a single hard drive. Primary partitions can be used to install and start an operating system. If you want to create more than three partitions, the fourth partition is created as an extended partition. See: Windows Help and How-to: What are system partitions and boot partitions? and The Storage Team at Microsoft - File Cabinet Blog : Understanding the error message "There is not enough space available on the disk(s) to complete this operation" when you create a volume
[/TD][/TR]
[TR][TD]
Extended Partition
[/TD]
[TD]
A type of partition on a hard drive that should be used if you want to create more than four Primary partition. Extended partitions can contain multiple logical drives that can be formatted and have drive letters assigned to them. An extended partition is a container that can hold one or more logical drive. Logical drives function like primary partitions except that they cannot be used to start an operating system. This option has been removed in Disk Management for Vista. For how, see: The Storage Team at Microsoft - File Cabinet Blog :How to create an extended partition in Windows Vista (Click Yes for Security Information)
[/TD][/TR][/TABLE]
You will not lose any data on the partition (volume) that you are shrinking. You must be logged on as an administrator to perform these steps.
The default location for Disk Management is C:\Windows\System32\diskmgmt.msc.
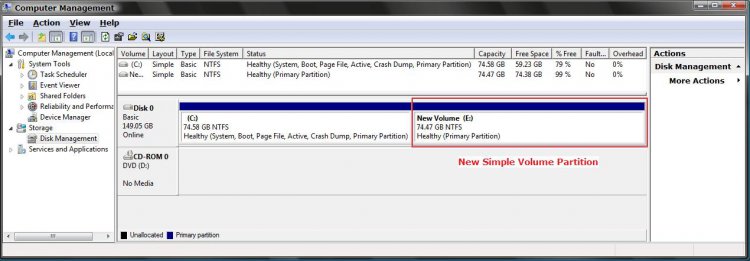
EXAMPLE: Before and After with a New Partition Volume
 STEP ONE
1. Open the Control Panel. (Classic View)
A) Click on the Administrative Tools icon.
B) Click on Computer Management.
2. Click on Continue in the UAC prompt.
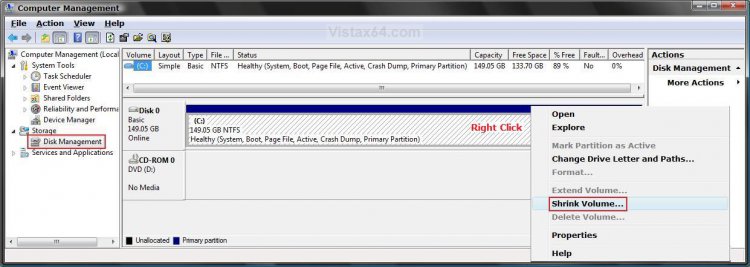
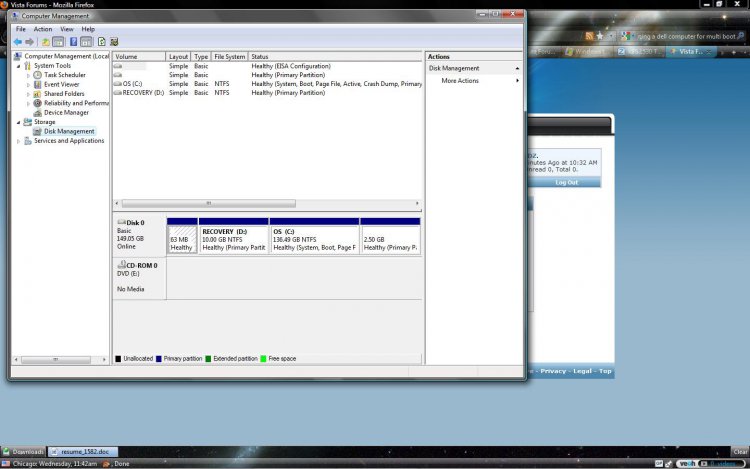
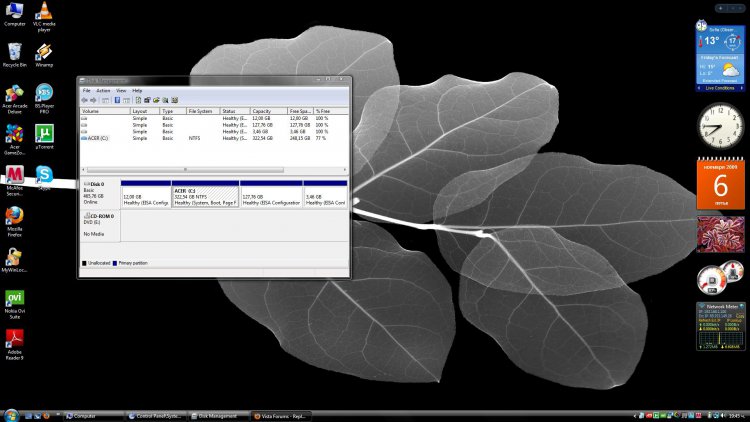
3. In the left pane, click on Disk Management under Storage. (See screenshot below step 4)
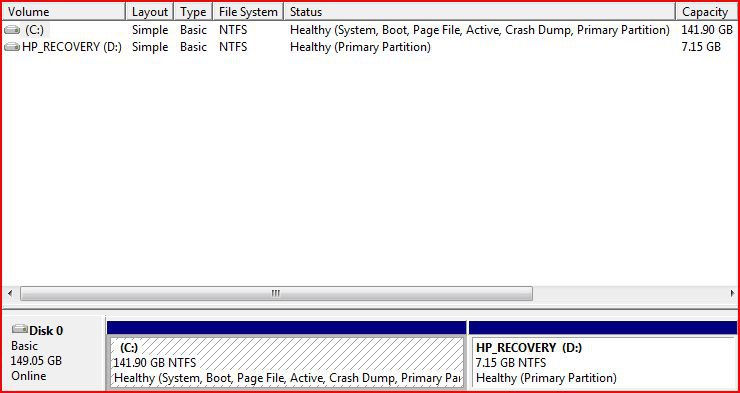
4. Right click on the volume (EX: C:\ ) your want to shrink and click on Shrink Volume.
5. You will now see this for a moment. (See screenshot below)
NOTE: It is verifying that there is enough free space on the disk to create a new partition.
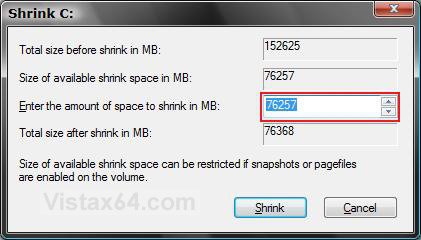
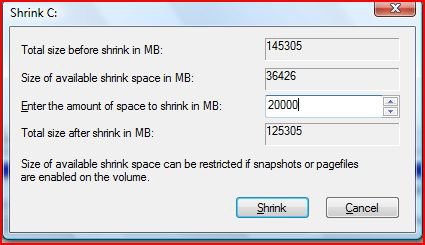
6. Enter the amount of space in MB (1024 MB = 1 GB) to shrink by, from the available free space on this volume, for the new partition and click Shrink. (See screenshot below)
NOTE: The value in the Total Size Before Shrink box indicates the current size of the partition and the value in the Size of Available Shrink Space indicates the maximum size that you can allocate to the new second partition.
The size of the available space can be restricted by the amount of space currently allocated to on the hard drive for the virtual memory page file, System Restore max size, and hibernation files. The location of the files on the hard drive plays a big part here because these files are marked as unmovable, and Disk Management is unable to relocate them. As such, if these unmovable files are located in the middle of the total amount of free space on the disk, then only the amount of free space on the other side (to the right) of these files will actually be available for the new partition. This will result in you showing that you have x amount of free space, but not being able to use it for your partition. The only way around this is to use a 3rd party hard drive partition management program, or setup the partition when installing Vista.
If you wish to force the partition to shrink, then see: the How-To Geek: Working Around Windows Vista's "Shrink Volume" Inadequacy Problems
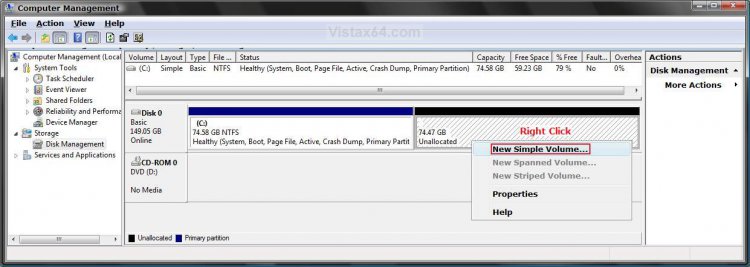
7. After a few minutes, you will see the new unallocated (unformated) partition. (See screenshot below)
 STEP TWO
8. Right click on the new Unallocated partition and click on New Simple Volume. (See screenshot below)
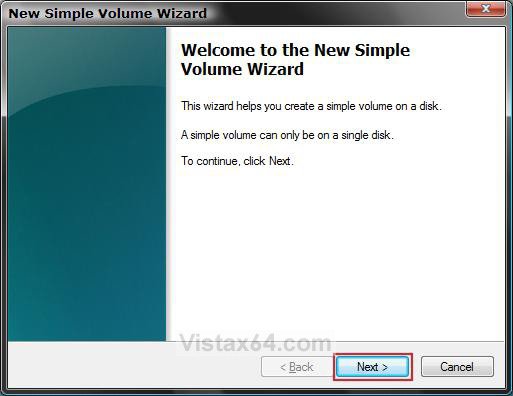
9. The New Simple Volume Wizard will now appear. Just click on Next. (See screenshot below)
NOTE: This wizard will make the new unallocated partition usable when finished.
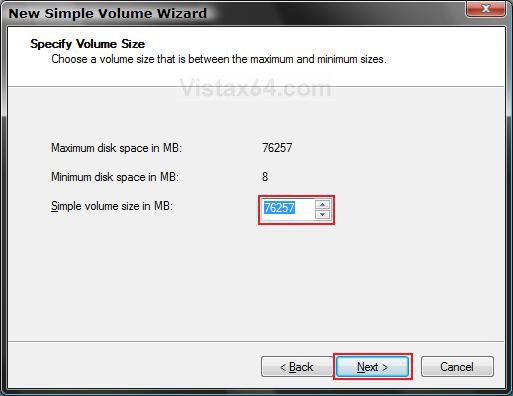
10. Enter the volume size you want for the new partition and click Next. (See screenshot below)
NOTE: Unless you are going to shrink this new partition, you should use the Maximum disk space in MB.
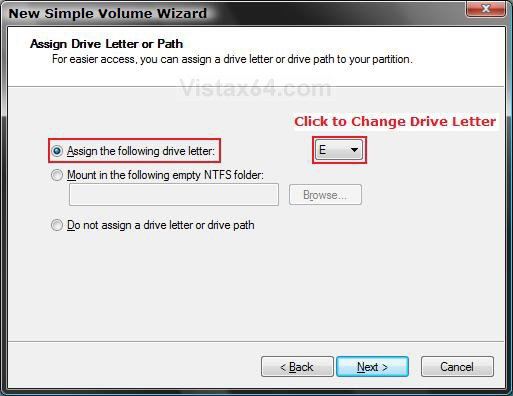
11. Dot Assign the following drive letter. (See screenshot below)
A) Select a drive letter for the new partition.
B) Click on Next.
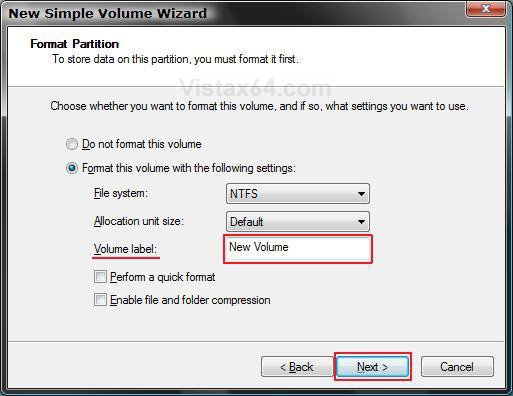
12. Dot Format this volume using the following settings. (See screenshot below)
NOTE: This may take a while to format the new partition volume.
A) Enter a name for the new partition under Volume label.
B) To save time, check Perform a quick format.
C) Click on Next.
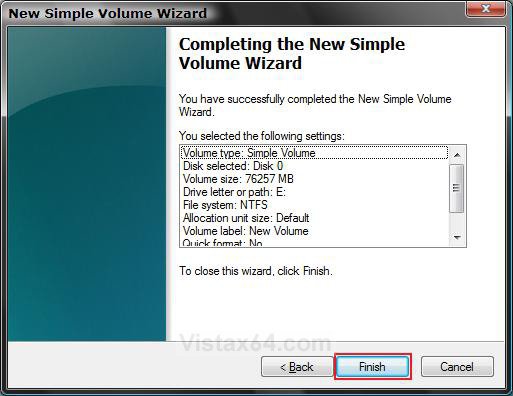
13. Click on Finish when the Succesfully Completed window pops up. (See screenshot below)
14. You will now see the Disk Management console with the new partition volume ready to be used. (See screenshot below)
15. Close Computer Management.
16. Click on Computer in the Start Menu and see your new partition volume. (See screenshot below)
That's it,
Shawn
Related Tutorials
- How to Delete and Extend a Partition with Disk Management in Vista
- How to Change a Drive Icon in Vista
- How to Add, Change, or Remove a Drive Letter in Vista
- How to Change the Default Boot Partition in Vista
- How to Show or Remove Drive Letters from Displaying in Vista
- How to Rename a Drive in Vista
- How to Disable or Enable Low Disk Space Warning in Vista
- How to Increase Hard Drive Performance in Vista
- How to Restrict or Unrestict Drive Access in Vista
- How to Hide or Unhide a Drive in Vista
- How to Create a Drive Shortcut in Vista
- How to Mount or Dismount a Drive or Partition to a Folder in Vista
- How to Convert a FAT or FAT32 Volume to NTFS in Vista
Last edited by a moderator:


