How to Add Take Ownership to the Context Menu in Vista
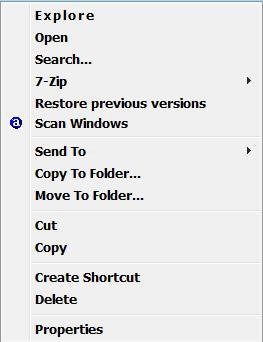
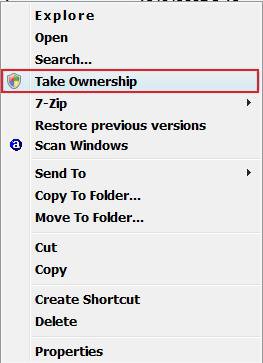
This will add Take Ownership to the Context (right click) menu for all folders, files, and drives in Vista and Windows 7.
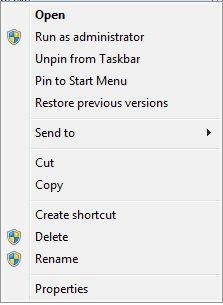
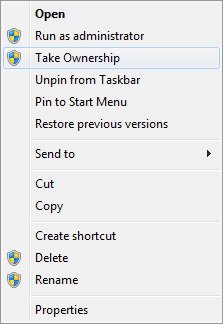
Application files, (EX: EXE, CMD, MSI) will still have Run as administrator instead of Take Ownership in the context menu.
When you use take ownership on a folder, it will take ownership of all the files and subfolders inside the folder to.
Application files, (EX: EXE, CMD, MSI) will still have Run as administrator instead of Take Ownership in the context menu.
When you use take ownership on a folder, it will take ownership of all the files and subfolders inside the folder to.
- To manually take ownership of items in Vista, see: How to Take Ownership of a Item in Vista
- To restore TrustedInstaller as the owner for a protected system resource, see: How to Restore TrustedInstaller as Owner of a File in Vista
This Take Ownership context menu item needs to be used while logged on to an administrator account for it work.
 STEP ONE
1. To Add Take Ownership
A) Click on the Download button below to download the file below.
Add_Take_Ownership.reg
B) Go to step 3.
2. To Remove Take Ownership
A) Click on the Download button below to download the file below.
Remove_Take_Ownership.reg
3. Click on Save, and save the .reg file to the Desktop.
4. Right click on the downloaded .reg file and click on Merge.
5. Click on Run, Continue (UAC-Vista) or Yes (UAC-Windows 7), Yes, and OK when prompted.
6. When done, you can delete the downloaded .reg file if you like.
After you have taking ownership of the file, you may still need to "Allow" your user account "Full Control" of the file before you will have full permission to access it. See steps 11 to 22 in the tutorial below for how.
 STEP TWO
1. Right click on a folder, file, or drive.
NOTE: When you use Take Ownership on a folder, it will take ownership of all the files and subfolders within that folder to.
Do not take ownership of the drive that you have Windows installed on. If you do, you will end up having to reinstall Windows.
2. Click on Take Ownership. (See Example at top)
3. Click on Continue in the UAC prompt.
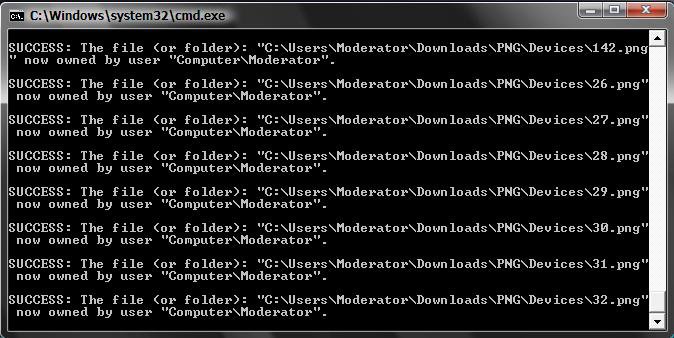
4. You will see a command window pop-up and then go away when it's finished. (See example screenshot below)
5. The folder or file has been taken ownership of.
NOTE:
B) It will have your user name listed as the owner.
After you have taking ownership of the file, you may still need to "Allow" your user account "Full Control" of the file before you will have full permission to access it. See steps 11 to 22 in the tutorial below for how.
That's it,Shawn
Related Tutorials
- How to Expand the Context (Shortcuts) Menu in Vista
- How to Customize the Context Menu for the Start Menu in Vista
- How to Customize the Send To Context Menu in Vista
- How to Customize the Recycle Bin Context Menu in Vista
- How to Add Encrypt and Decrypt to the Context Menu in Vista
- How to Add and Remove a New Menu Item in Vista
- How to Add COPY TO FOLDER and MOVE TO FOLDER to the Context Menu in Vista
- How to Take Ownership of a Item in Vista
- How to Restore the Search Context Menu Item after Installing the Vista SP1
- How to Add Flip 3D to the Context Menu in Vista
- How to Restore or Remove New from the Context Menu in Vista
- How to Enable or Disable the Context Menu in Vista
- How to Restore or Remove the Security Tab in Vista
- How to Remove or Show Drives in the Vista and Windows 7 "Send To" Context Menu
- How to Add View and Print File Directory to the Context Menu in Vista
- How to Add or Remove Copy as Path from the Vista Context Menu
- How to Add or Remove Send To from the Vista Context Menu
- How to Add or Remove Turn Aero On or Off from the Vista Context Menu
- How to Add System Properties to Computer Context Menu in Vista
- How to Restore TrustedInstaller as Owner of a File in Vista
- How to Restore or Remove "Restore Previous Versions" from the Vista Context Menu
- How to Add Empty Folder and Subfolders to the Vista Context Menu
Attachments
Last edited by a moderator:

