How to Restore the Encrypted File System (EFS) Certificate in Vista, Windows 7, and Windows 8
This will show you how to restore the Encrypted File System (EFS) Certificate by importing the backup EFS Certificate you made. The EFS certificate is used to encrypt or decrypt a file or folder in Windows. You can lose access to encrypted files if you install a new operating system, upgrade your current one, or if your current operating system fails.
The Encrypt feature is only available in the Vista Business, Ultimate, Enterprise, Windows 7 Professional, Ultimate, Enterprise, and Windows 8 Pro and Enterprise editions.
The Encrypt feature is only available in the Vista Business, Ultimate, Enterprise, Windows 7 Professional, Ultimate, Enterprise, and Windows 8 Pro and Enterprise editions.
You must have a backup of the Encrypted File System (EFS) Certificate in order to be able to restore it. It would be best to save this backup file to your computer before proceeding.
If you lost the EFS certificate backup, or do not have one, then you could see if the 30 day free trial of the Advanced EFS Data Recovery program may be able to decrypt the files.
Here's How:
1. Do one of the following:
A) To recover encrypted files stored on an external hard disk, connect the hard disk to the new computer.
B) If your operating system fails and you need to recover encrypted files that are stored on a different partition from your failed operating system, move the encrypted files to a computer that is working, or install a functional operating system on the current computer.
2. Insert the removable media that your certificate and key are saved on.
3. Press the Windows + R keys to open the Run dialog, type certmgr.msc, and press Enter.
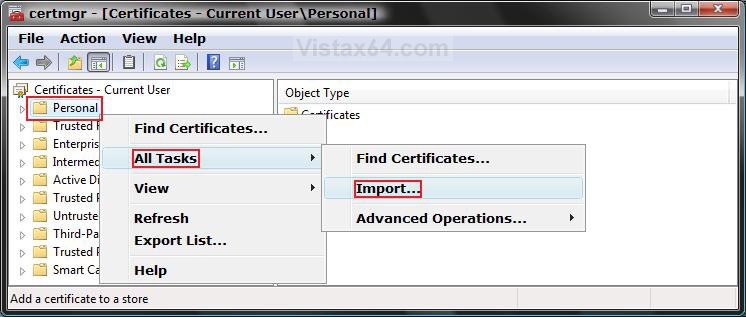
4. In the left pane, right click on the Personal folder. (See screenshot below)
5. Click/tap on All Tasks and Import.
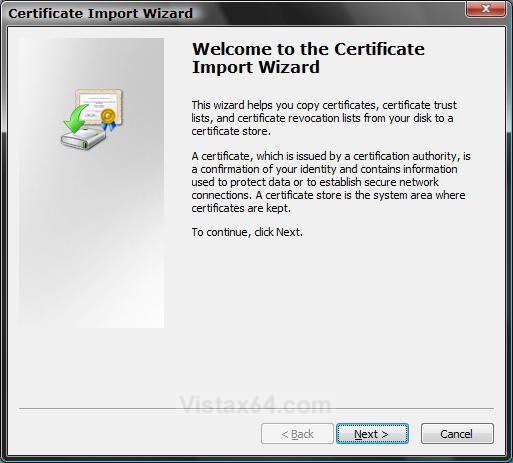
6. Click/tap on Next in the Import Wizard Welcome. (See screenshot below)
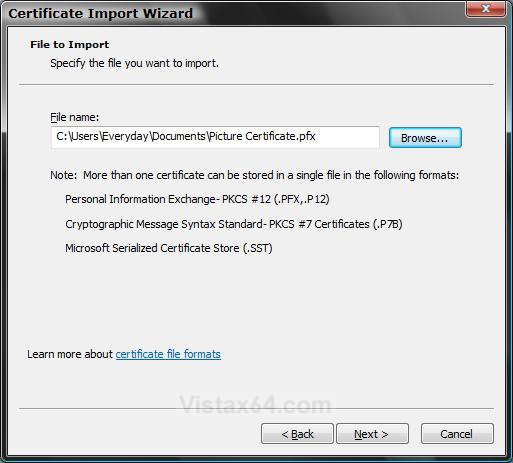
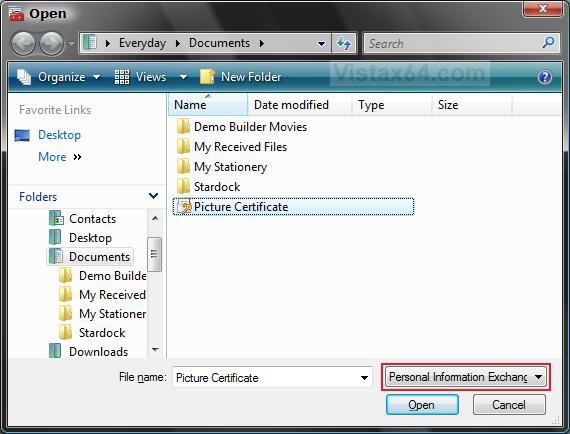
7. Type the location of the file that contains the certificate, or click/tap Browse and navigate to the file's location, then click on Next. (See screenshots below)
NOTE: If you have navigated to the right location but don't see the certificate you are importing, then in the list next to the File name box, click on Personal Information Exchange.
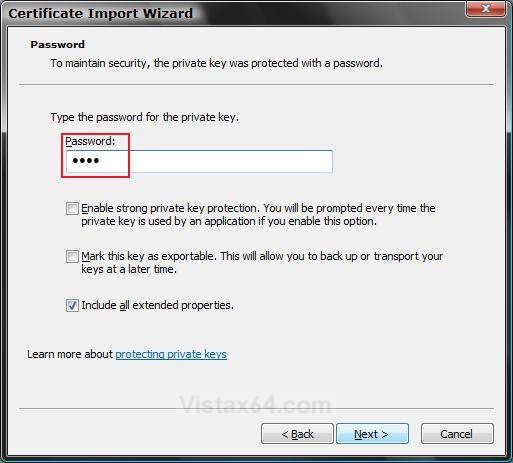
8. Type the password given to the backup when it was created, and click/tap on Next. (See screenshot below)
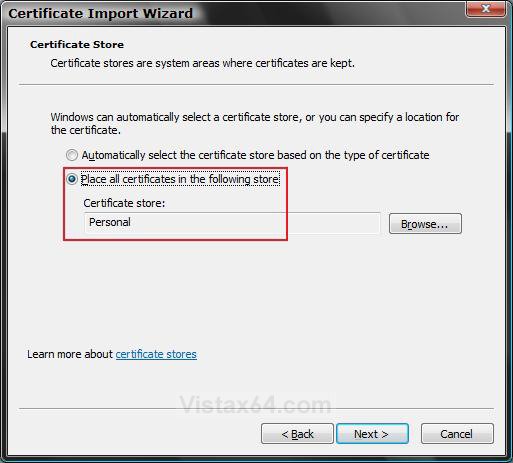
9. Dot Place all certificates in the following store, confirm that the Personal store is indicated, and click/tap on Next.
(See screenshot below)
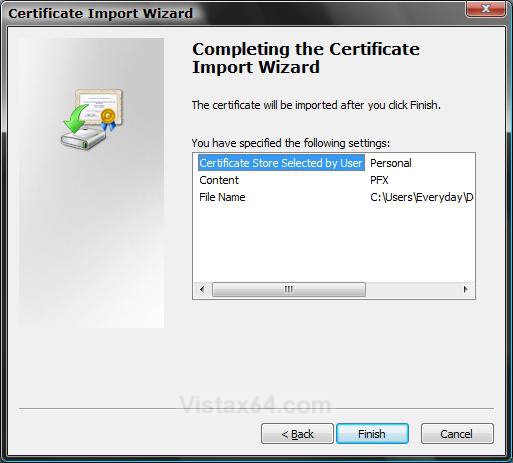
10. Click/tap on Finish. (See screenshot below)
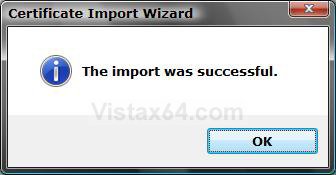
11. Click/tap on OK. (See screenshot below)
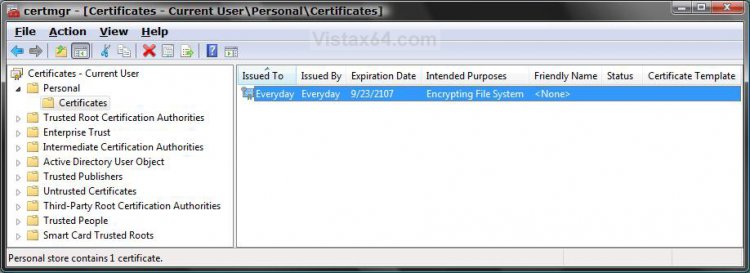
12. Certmgr should now look something like this. (See screenshot below)
That's it,Shawn
Related Tutorials
Attachments
Last edited:

