How to Use and Create Stationery in Windows Mail
Stationery is a background image for messages. This will show you how to Create and Use stationery in Vista Windows Mail. Stationery uses the .HTM file extension.
The default stationery folder location used by Windows Mail is:
NOTE: AppData is a hidden folder, see Option Two here: How to Hide or Show Hidden Files and Folders in Vista
C:\Users\(user-name)\AppData\Local\Microsoft\Windows Mail\Stationery
NOTE: AppData is a hidden folder, see Option Two here: How to Hide or Show Hidden Files and Folders in Vista
C:\Users\(user-name)\AppData\Local\Microsoft\Windows Mail\Stationery
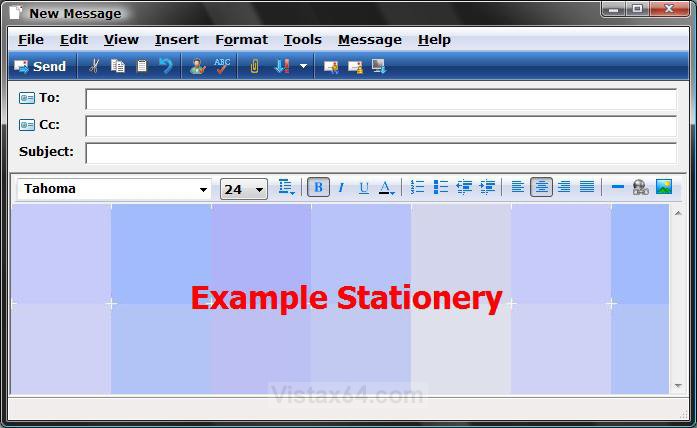
EXAMPLE: Stationery
 OPTION ONE
1. Open Windows Mail.
2. In Windows Mail Main Window
NOTE: You can also click this in a compose Message window to open a New Message window with the selected stationery.
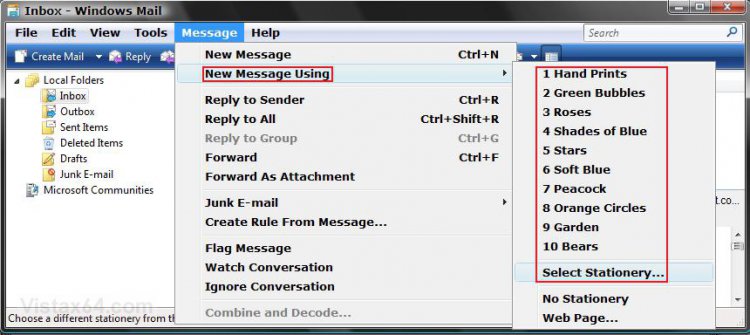
A) Click on Message. (See sceenshot below)
B) Click on New Message Using.
C) Select a stationery listed, or click on Select Stationery to choose from another location. (See step 4)
3. In a Compose Message Window
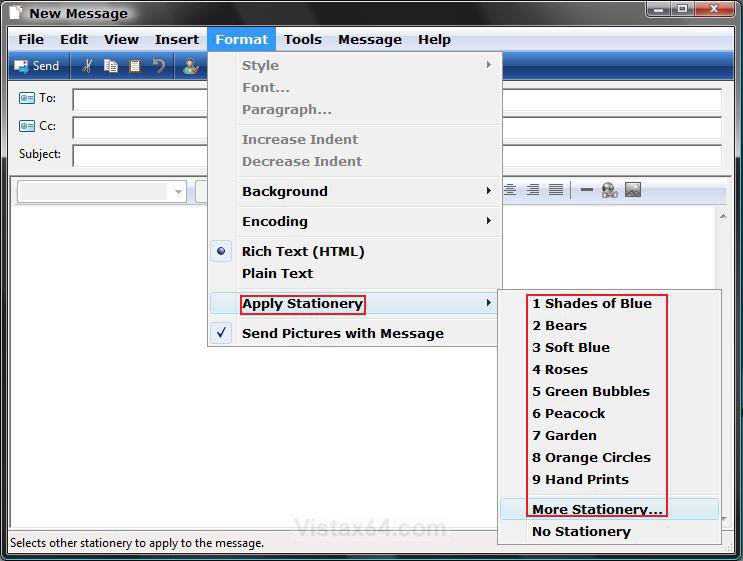
A) Click on Format.
B) Click on Apply Stationery.
C) Select a stationary listed, or click on More Stationery to choose from another location. (See step 4)
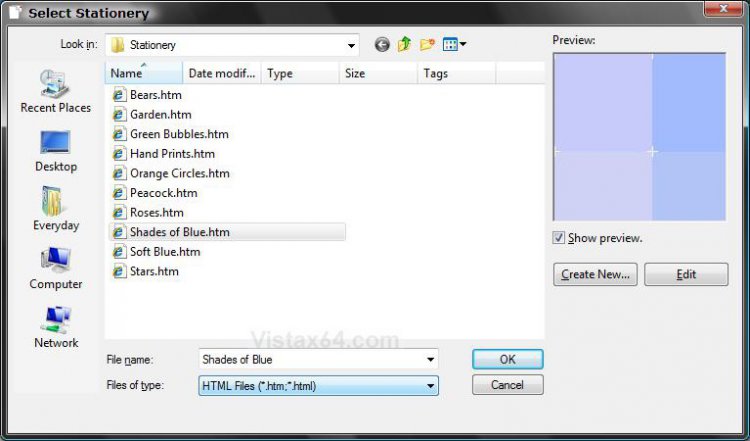
4. For Select Stationery or More Stationery
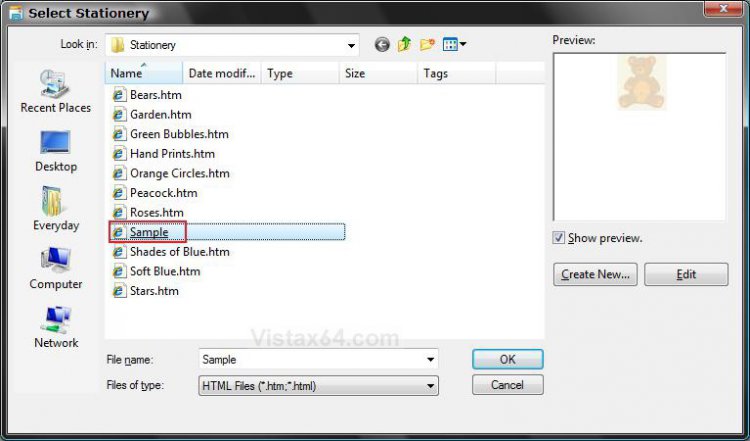
A) Select the stationery you want from it's location. (See screenshot below)
B) Click on OK.
 OPTION TWO
5. Click on the Create New button. (See screenshot above)
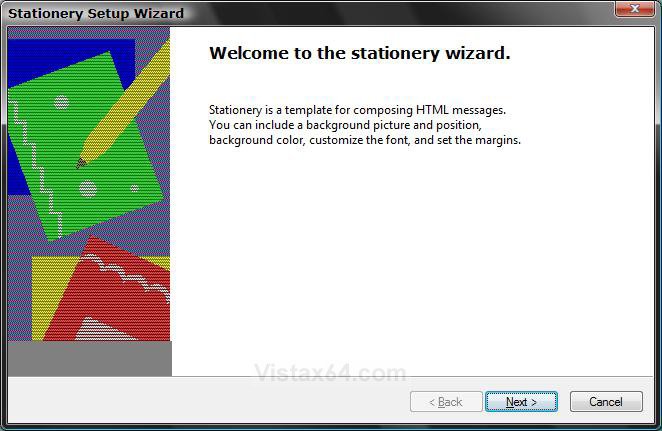
6. Click on Next in the Stationery Wizard window. (See screenshot below)
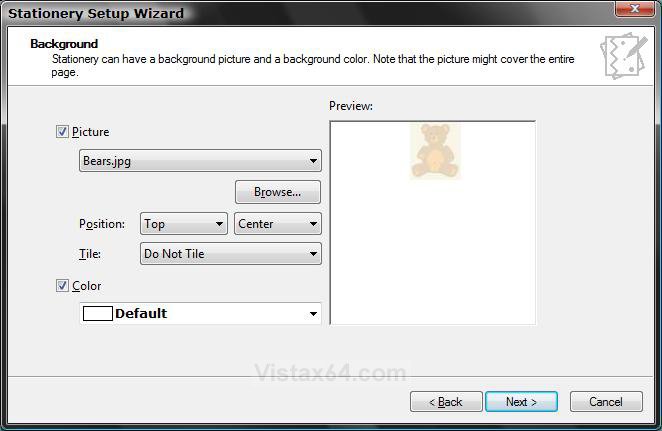
7. To Choose a Picture
A) Check Picture and select a picture for the background. (See screenshot below)
NOTE: Click Browse to use a .BMP, .GIF, .JPG, .WMF, .WBM, and .ART image of your own.
B) Select a Postion and Tile effect for the image.
8. To Choose a Background Color
A) Check Color and choose a color.
9. Click on Next.
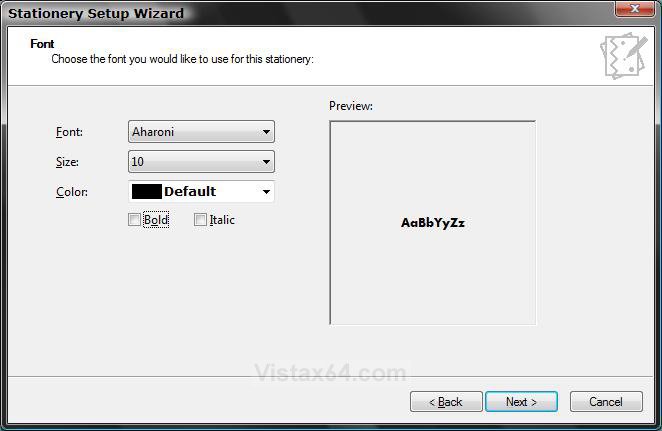
10. Choose the font you would like to use in this stationery. (See screenshot below)
NOTE: See the preview window to see how it will look.
A) Select a Font style.
B) Select a Size for the font.
C) Select a Color for the text.
D) Select if you want a Bold or Italic font.
NOTE: By default it will be set as Normal if nothing is dotted.
11. Click on Next.
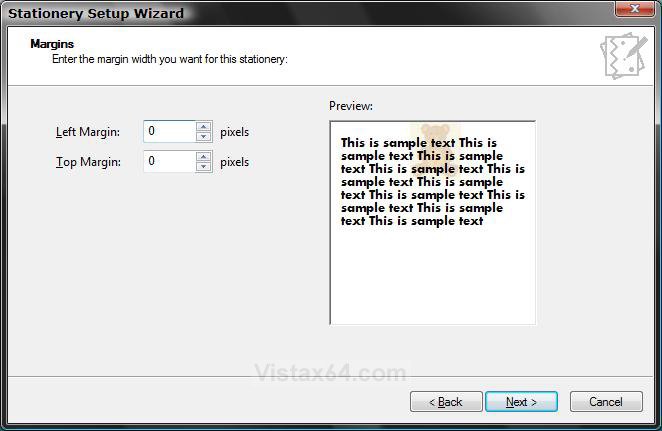
12. Enter the margin width you want for this stationery. (See screenshot below)
A) Adjust the Left Margin and Top Margin to the location you want it.
NOTE: See the preview window to see how it will look.
13. Click on Next.
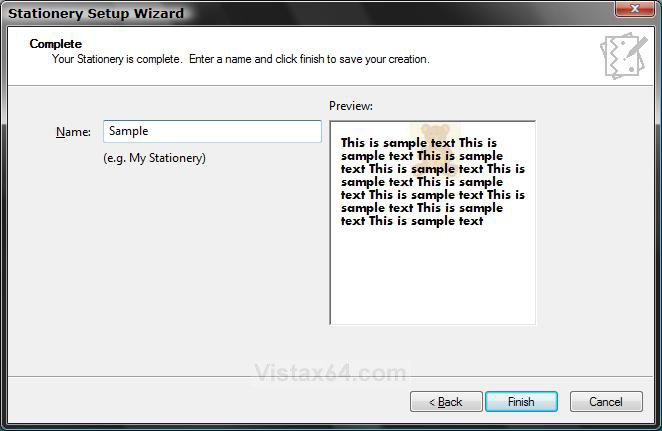
14. Type in a name for this stationery. (See screenshot below)
NOTE: This stationery will be saved at the default hidden location:
C:\Users\(user-name)\AppData\Local\Microsoft\Windows Mail\Stationery
15. Click on Finish.
16. You will now see the new stationery file listed under the Select Stationery window. (See screenshot below)
17. Select a stationery (ex: Your new one) you want to use with your new message, and click on OK. (See screenshot above).
18. A New Message window will now open with the stationery selected in step 17.
That's it,Shawn
Attachments
Last edited:

