How to Open and Use Private Character Editor in Vista, Windows 7, and Windows 8
You can use Private Character Editor (PCE) to create your own special characters, which you can then insert into documents by using Character Map. You can create up to 6,400 unique characters (such as special letters and logos) for use in your font library. PCE contains basic tools for creating and editing characters, along with more advanced options. For more information, see: Windows Help and How-to: Private Character Editor
- The Private Character Editor EXE file is located at:
C:\Windows\System32\eudcedit.exe - The Private Character folder location is at:
C:\Users\(User Name)\AppData\Local\Microsoft\Windows\EUDC
NOTE: This is a hidden system file. For how to see it, see: How to Hide or Show Hidden Files and Folders in Vista
Here's How:
1. Press the Windows + R keys to open the Run dialog, type eudcedit.exe, and press Enter.
2. If prompted by UAC, then click/tap on Continue (Vista) or Yes (Windows 7/8).
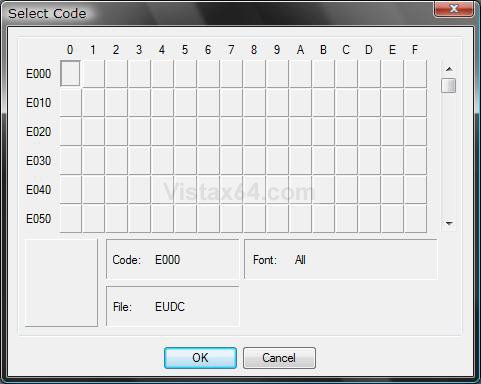
3. Select a code box for the character, and click/tap OK. (See screenshot below)
NOTE: A code is just a location of the character. Think of it like a spreadsheet. If you have already created a character and saved it, you will see it in one of the code boxes.
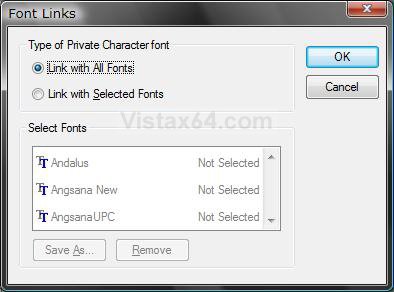
4. Click/tap on File on the menu bar, and click/tap on Font Links. (See screenshot below)
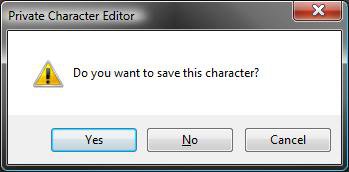
5. Click/tap on Yes to save. (See screenshot below)
6. To Link with All Fonts
NOTE: To link a private character to all the fonts installed on your computer.
A) Dot Link with All Fonts, and click/tap OK. (See left screenshot below step 7)
NOTE: This will have this character available in the Font selection TT All Fonts (Private Characters in Character Map.
B) Go to step 10 below.
7. To Link with Selected Fonts
NOTE: To link a private character to a specific font installed on your computer.
A) Select (dot) Link with Selected Fonts. (See left screenshot below)
B) Under Select Fonts, click on the font you want to link the character to. (See left screenshot below)
C) Click/tap on Save As. (See left screenshot below)
D) Enter a file name for the private character. (See right screenshot below)
E) Click/tap on Save (See right screenshot below), and click/tap on OK (See left screenshot below).
8. How to Use Private Character Editor Tools
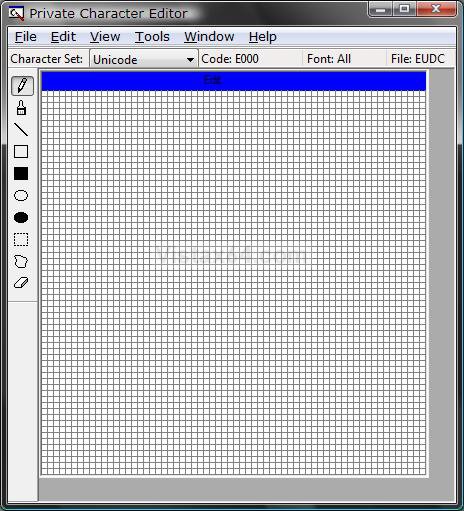
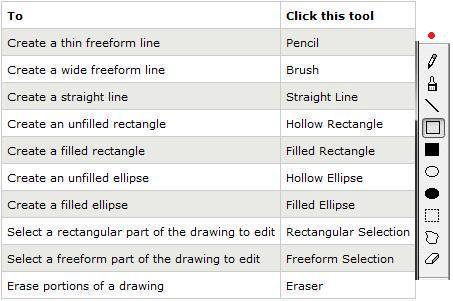
A) Select a tool, from the toolbar to the left, to create your private character. (See screenshot below step 4)
NOTE: To select a tool when the toolbar is hidden, click/tap on the Tools menu, point to Item, and then click the tool you want.
Using the Toolbar:
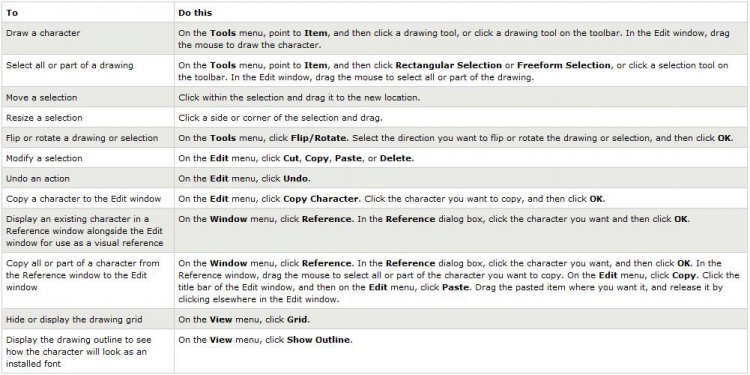
Using the Drawing Tools:
9. To Save the Private Character
A) Click/tap on the Edit menu.
B) Click/tap on the option you want to do. (See table below)
[TABLE=class:-grid,-width:-700][TR][TD]Menu Option
[/TD]
[TD]
Description
[/TD][/TR]
[TR][TD]
Save Character
[/TD]
[TD]
Click to save in the current code box.
[/TD][/TR]
[TR][TD]
Save Character As
[/TD]
[TD]
Click to select a code box to save in. (see screenshot below step 4)
[/TD][/TR][/TABLE]
10. The private character will now be available to be used with Character Map.
That's it,
Shawn
Attachments
Last edited:

