How to Use Sticky Notes in Vista
Sticky Notes is a Tablet PC accessory that you can use to create short handwritten or voice notes for your desktop or whatever. A sticky note can contain only writing, only a voice recording, or both writing and a voice recording. The small, yellow notes are arranged in a stack on the desktop, similar to paper sticky notes. For more information, see: Windows Help and How-to: Sticky Notes
Sticky Notes is not avaliabe in the Vista Home Basic edition.
The Sticky Notes EXE file location is at: C:\Windows\System32\StikyNot.exe
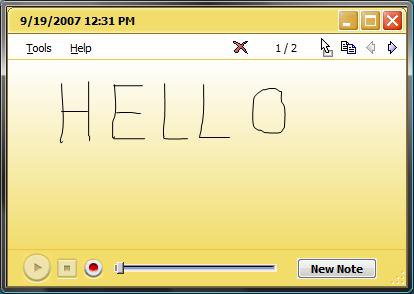
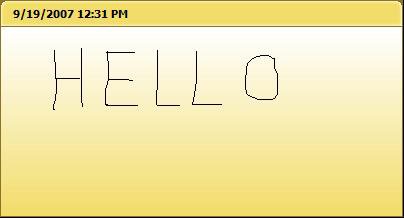
EXAMPLE: A Sticky Note
 OPTION ONE
1. Open the Start Menu.
2. Click on All Programs, Accessories, Tablet PC, and Sticky Notes.
NOTE: If you do not have the Tablet PC folder, then you will need to check Tablet PC Optional Components in Windows Features.
3. To Have Sticky Notes Open at Startup
NOTE: This will allow you to leave Sticky Notes to yourself or others.
A) Click on Tools and click Options. (See screenshot below)
B) Check Open at Startup.
 OPTION TWO
1. Click on the New Note button.
NOTE: Do not click on the New Note button if you want to add to your current written or voice note.
2. Move your mouse pointer, or tablet pen, on the note and click and hold the left or right mouse button and write a message on the note.
 OPTION THREE
NOTE: You can also use a microphone to record a voice note. The sticky notes voice feature is an additional way to retain information. You can record a new voice note or add your voice to a written note.
1. Click on the New Note button.
NOTE: Do not click the New Note button if you want to add a voice recording to your current written message.
2. Click on the Record button. (See screenshot below)
3. Say your voice message into the microphone.
NOTE: You only speak until the time runs out on the time bar.
4. Click on the Stop button.
 OPTION FOUR
NOTE: You can quickly create a written note and add writing to a voice note. If you need more writing space, you can resize the Sticky Notes window. All notes are automatically saved and remain in the stack of sticky notes until you delete them.
1. To Remove a Ink Stroke
NOTE: You must be using a tablet pen for this.
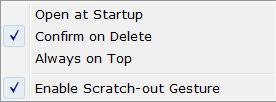
A) Tap the Tools menu, point to Options, and then tap Enable Scratch-out Gesture. (See screenshot below)
B) Using the tablet pen, make a scratch-out gesture over the ink stroke that you want to erase.
2. To Go to Previous and Next Notes
A) Click on the Previous and Next icons. (See screenshot below)
NOTE: The count 1/2 will tell you what note you are viewing of how many there are in the stack.
3. To Delete a Sticky Note
A) Click on the X icon. (See screenshot above)
OR
B) Click on Tools and Delete This Note.
 OPTION FIVE
NOTE: This allows you to make a .emf Paintbrush Picture file of the currently open note.
1. Click on the Drag and Drop icon and hold it, then drag the note and drop it in the the location you want the file. (See screenshot below)
A) Go to step 3.
OR
2. Click the Copy icon, and right click in the area you want the file and click on Paste.
3. When you open the file in Paint, you can convert the .emf Paintbrush Picture file to the image type you want. (See screenshot below)
 OPTION SIX
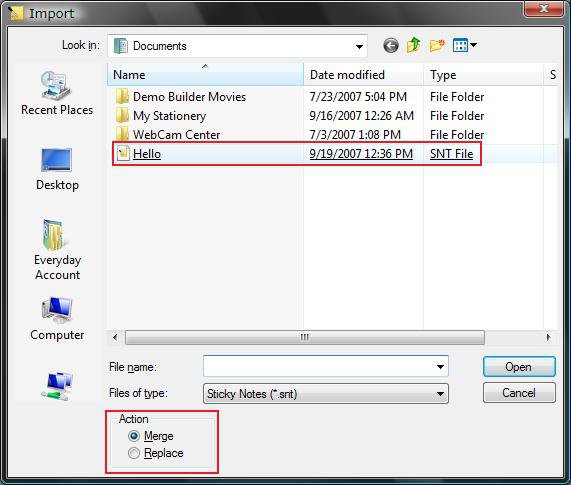
NOTE: When you import a stack of sticky notes, you either add the imported notes to your current stack or replace your current stack with the imported one. You can import a stack that you previously exported or that you copied to your Tablet PC from a different computer.
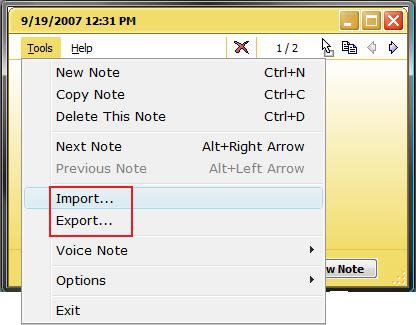
1. Click on Tools and click Import. (See screenshot below)
2. Navigate to where you saved the Sticky Notes. (See screenshot below)
A) Highlight the .snt file.
B) Choose if you want to Merge with your current stack of Sticky Notes or Replace them.
C) Click on Open.
 OPTION SEVEN
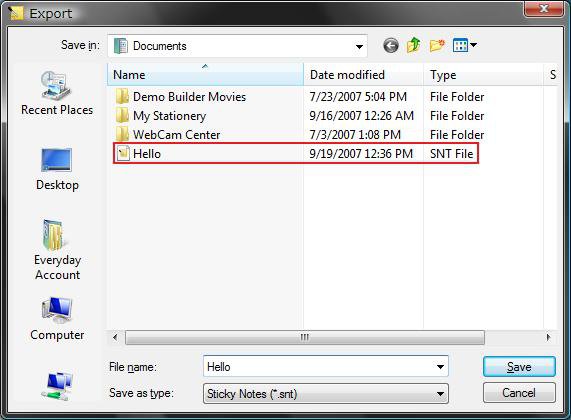
NOTE: When you export your stack of sticky notes, you save a copy of the stack by specifying a file name and location. You can do this to create a backup copy or to make the stack available for copying to a different computer. After you export the stack, it remains unchanged on your desktop.
1. Click on Tools and click Export. (See screenshot below)
2. Navigate to where you want to save the stack of Sticky Notes. (See screenshot below)
A) Type in a name.
B) Click on Save.
That's it,
Shawn
Attachments
Last edited by a moderator:

