How to Use Hard Disk Drive Space Quota in Vista
This will show you how to setup a Hard Disk Drive Space Quota to allow you to set maximum space usage limits for user accounts with a warning or deny message when the user reaches the usage limits you set. For more information, see Managing Disk Quotas (Windows).
Here's How:
1. Open the Start menu.
2. Click on the Computer button.
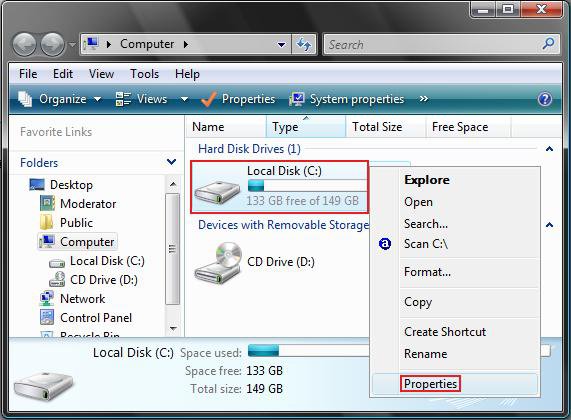
3. Right click on the C:\ drive and click on Properties. (See screenshot below)
NOTE: You can also put a quota on any hard drive or separate partition you have installed.
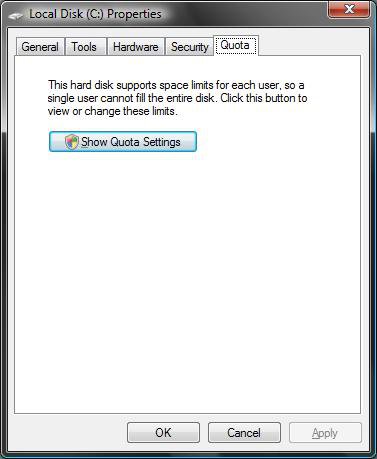
4. Click on the Quota tab and click on the Show Quota Settings button. (See screenshots below)
5. Click on Continue in the UAC prompt.
6. To Enable Quota
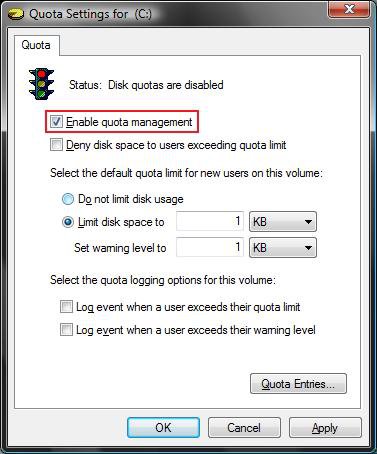
A) Check Enable quota management. (See screenshot above)
B) Set the settings to what you want.
C) Click on Apply.
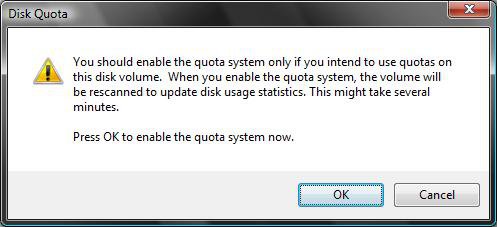
D) Click on OK for the Enable confirmation prompt. (See screenshot below)
E) Continue to step 8.
7. To Disable Quota
A) Uncheck Enable quota management. (See screenshot below step 5)
B) Click on OK.
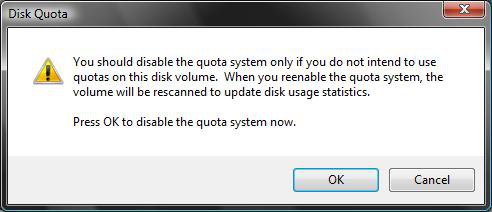
C) Click on OK for the Disable confirmation prompt. (See screenshot below)
D) Close the window and Stop. Your done.
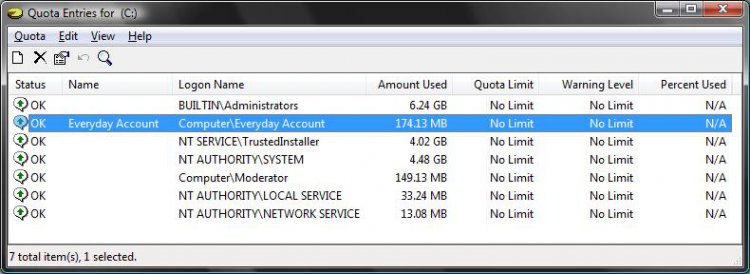
8. Click the Quota Entries button. (See right screenshot below step 5)
NOTE: This will let you see how much the individual accounts are using, and let you set limits on these individual
accounts.
9. To Add or Remove a Quota Limit on Individual User Accounts
A) Right Click on a user account and click Properties. (See screenshot below)
NOTE: The user accounts will be the ones that are computer name/user name under Logon Name.
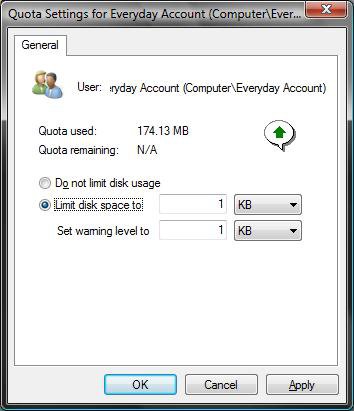
10. Set the settings to what you want. (See screenshot below step 11)
11. Click on OK.
12. Close the window in the screenshot below step 9 above.
13. Click on OK for both windows in step 5 above.
That's it,Shawn
Attachments
Last edited:

