How to Customize the Start Menu in Vista
This will show you how to set and use the Customize options for both the Normal and Classic Start menu. These will allow you to customize how links, buttons on the right side, icons, and menus look and behave in the selected Start menu.
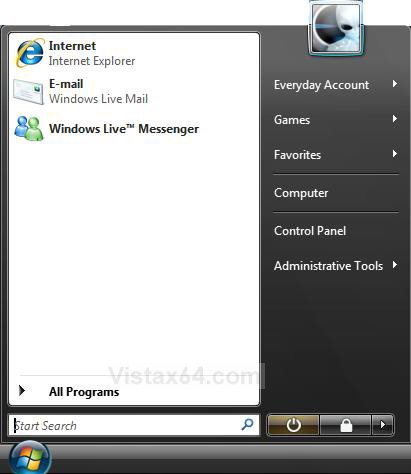
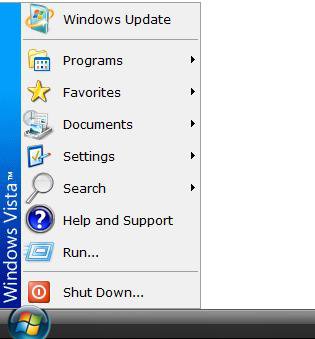
EXAMPLE: The Normal Start Menu and Classic Start Menu
 OPTION ONE
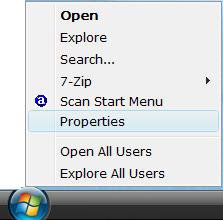
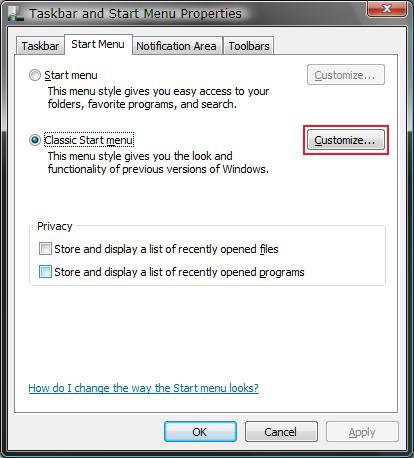
1. Right click the Start button and click on Properties. (See screenshot below)
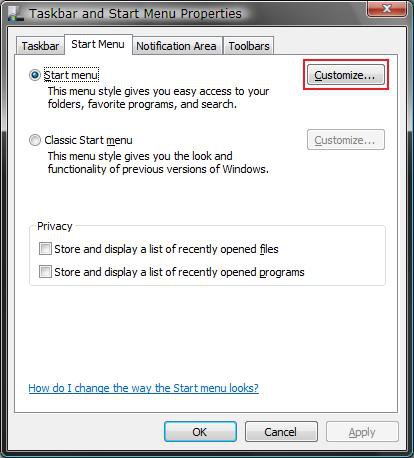
2. Click on the Customize button. (See screenshot below)
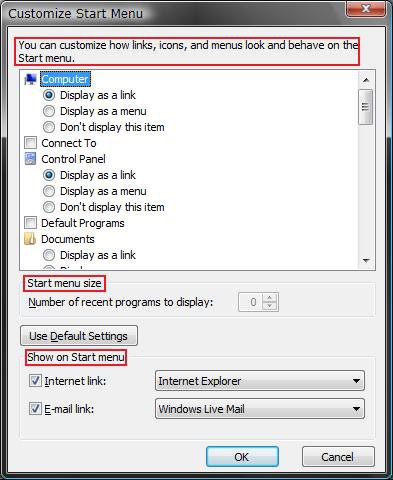
3. Select the options you want. (See screenshot below)
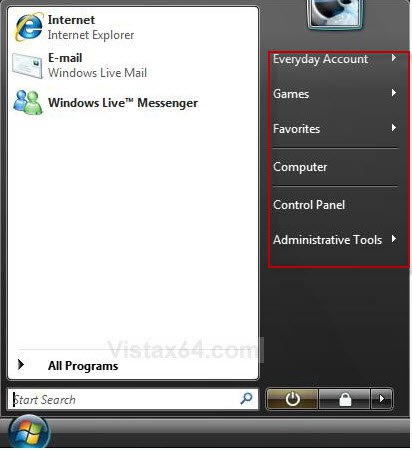
- The Top section - Allows you to select the buttons and how they open on the dark right side of the Start menu. You can also customize how icons and menus appear in the Start menu.
- Start Menu Size - Allows you to change how many recent programs will be displayed in the white left side of the Start menu.
NOTE: For more, see:How to Use the Recent Items List in Vista - Show on Start Menu - Choose if you want a Internet or E-mail shortcut displayed on the Start Menu. You can click on the drop down menu by each one to select which program you want to use for each if you have more than one installed.
NOTE: If the Internet Explorer or Windows Mail option is grayed out, then this just means that they are not set as the default program.
4. Click on OK when done.
5. Click on OK. (See screenshot below step 2)
 OPTION TWO
1. Right click on the Start button and click on Properties. (See screenshot below)
2. Click on the Customize button. (See screenshot below)
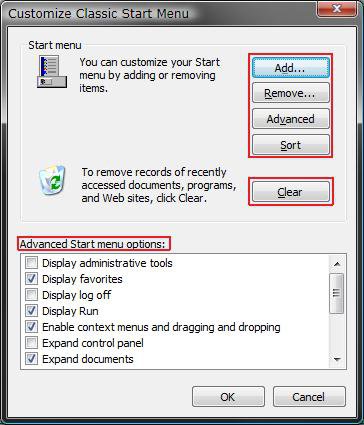
3. Select the options you want. (See screenshot below)
A) Add, Remove, Advanced, Sort buttons - Allows you to add or remove items from the Classic Start Menu.
NOTE: For more, see: How to Add or Delete a Shortcut or Folder From the Start Menu in Vista
B) Clear button - Clears the recently opened documents, programs, and web sites. These are not displayed in the Classic Start menu.
NOTE: For more, see: How to Use the Recent Items List in Vista
C) Advanced Start Menu Options - Allows you to select the buttons and how they open on the dark right side of the Start menu. You can also customize how icons and menus appear in the Start menu.
4. Click on OK when done.
5. Click on OK. (See screenshot for step 2 above)
That's it,Shawn
Related Tutorials
- How to Pin a Program to the Start Menu in Vista
- How to Add or Delete a Shortcut or Folder From the Start Menu in Vista
- How to Change the Start Menu to Classic View in Vista
- How to Turn the Recent Items List On or Off in Vista
- How to Customize the Context Menu for the Start Menu in Vista
- How to Pin a Folder to the Start Menu in Vista
- How to Change Power Button settings for the Start Menu and Case in Vista
- How to Remove or Show the Start Menu Shutdown Options in Vista
- How to Turn On or Off the Run Command Window in Vista
- How to Add or Remove Switch User from the Start Menu in Vista
- How to Add or Remove Lock and Switch User from the Start Menu in Vista
- How to Add or Remove Log Off from the Start Menu in Vista
- How to Restore the Administrative Tools Shortcuts in Vista
- How to Display Small or Large Icons in the Vista Start Menu
- How to Enable or Disable the All Programs List in the Vista Start Menu
- How to Add or Remove Help from the Normal and Classic Vista Start Menu
- How to Restore the Start Menu Search Button after Installing the Vista SP1
- How to Enable or Disable Pin to Start Menu in Vista
- How to Enable or Disable the Taskbar and Start Menu Properties Window in Vista
- How to Restore Missing Default Start Menu Shortcuts in Vista
- How to Fix the Games Explorer Link in the Vista Start Menu
- How to Enable or Disable "Highlight Newly Installed Programs" in Vista Start Menu
- How to Disable or Enable "Context Menus" and "Dragging and Dropping" in the Start Menu
Attachments
Last edited by a moderator:




 - while I'm stuck on Vista for now