How to Change a Shortcut Folder or File Icon in Vista
This will show you how to change a shortcut folder or file icon to a icon of your choice. To change a regular file icon you must make a shortcut of it first, then you can change the icon for the shortcut.
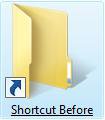
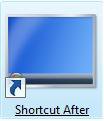
EXAMPLE: Before and After Icon Change
Here's How:
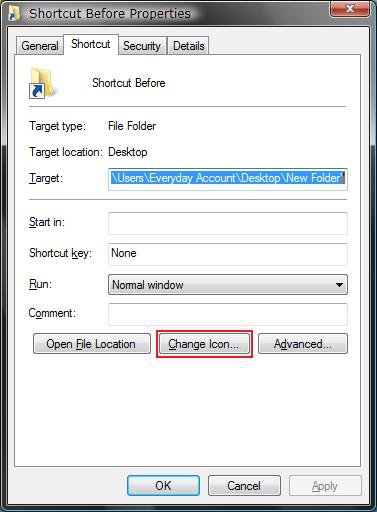
1. Right click on the shortcut folder or file, then click on Properties.
2. Click on the Shortcut tab. (See screenshots below)
3. Click on the Change Icon button.
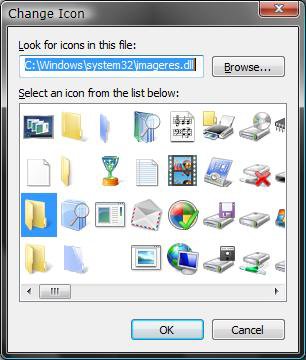
4. To Select an Available Icon in Vista
A) Select a icon here. (See screenshot below)
OR
B) Click on Browse and navigate to another icon available in Vista.
NOTE: Some common icon locations in Vista.
- C:\Windows\System32\imageres.dll (Recommended one to use)
- C:\Windows\System32\shell32.dll
- C:\Program Files\Internet Explorer\iexplore.exe
C) Go to step 6C.
5. To Create a Icon of Your Choice to Use
NOTE: You will only be able use Views set up to Medium Icons with these to have the shortcut icon display properly.
A) Open the Start menu and click on All Programs, Accessories, then Paint.
NOTE: Paint is located at C:\Windows\System32\mspaint.exe if you do not have the shortcut for it.
B) Take a screenshot of the image you want to use for the icon of the URL shortcut.
NOTE: You can press the PrtScrn key for a screenshot of the entire desktop, or ALT+PrtScrn keys for just the current open window.
C) Go to the Paint window and Paste this image into Paint.
NOTE: You can do this by pressing the CTRL+V keys while in Paint.
D) Make any adjustments to the image you want in Paint.
NOTE: It is best to not use a large size image to avoid distortion when Vista sizes it down automatically for the icon later.
E) Save this image in Paint as a 24-bit Bitmap (*.bmp;*.dib) file in the Save as type drop down menu to a location of your choice.
F) Now save this same .bmp image in Paint again, but change the file extension from .bmp to .ico manually in the File name field.
NOTE: You will need to save this to a location where you can keep this for the URL shortcut's usage.
G) Close Paint.
H) Continue to step 6 to use the icon.
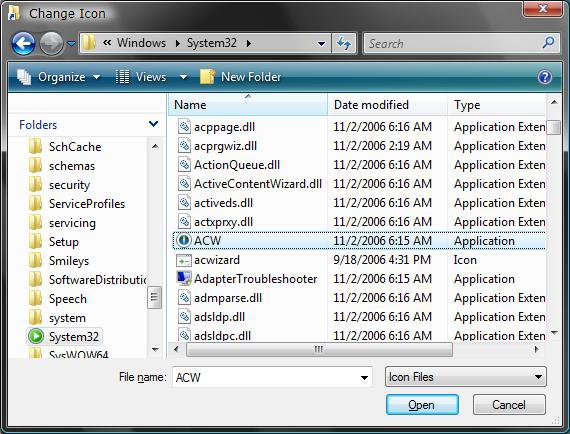
6. To Select a Icon of Your Choice
A) Click on the Browse button. (See screenshot below step 4B)
NOTE: For the best icon size results, use a 256x256 bit .ico (Icon) file in Vista.
B) Navigate to where you have the icon saved. (See screenshot below)
C) Select the icon and click Open.
D) Click OK to apply. (See screenshot below step 4B)
That's it,
Shawn
Related Tutorials
- How to Change a Folder Preview Picture in Vista
- How to Change a Folder Icon in Vista
- How to Change the Open Folder Icon in Vista
- How to Change a Icon in the Control Panel in Vista
- How to Remove or Change the Shortcut Arrow and Name in Vista
- How to Change a Default Open Window Size for a Shortcut in Vista
- How to Create a Keyboard Shortcut for a Program in Vista
- How to Remove the Shortcut Prefix On a Shortcut Name in Vista
- How to Change the Target Path Location of a Shortcut in Vista
- How to Create a Desktop Internet Shortcut without the E Icon in Vista
- How to Change a Drive Icon in Vista
- How to Restore and Change a Desktop Icon in Vista
- How to Change the Desktop Control Panel Icon in Vista
- How to Rebuild the Icon Cache in Vista
- How to Hide a Folder or Shortcut Icon in Vista
- How to Change a File Extension Type Icon in Vista
- How to Change the Vista Default Folder Icon
Attachments
Last edited by a moderator:

