How to Display Information About Previous Logons During User Logon in Vista and Windows 7
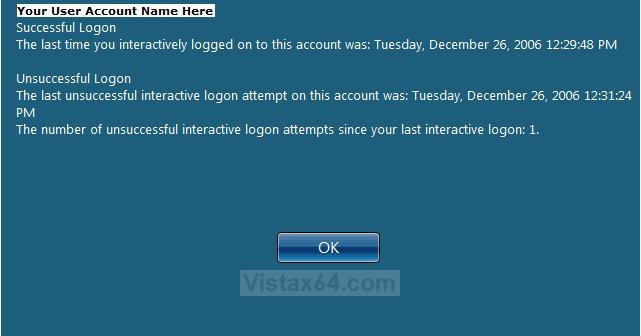
This will show you how to display the previous number of successful and unsuccessful logon attempts, with the date and time, display when logging on. You would then just click Ok to continue to logon and start Vista or Windows 7.
This can be useful if you need to keep track of how many logon attempts where made to your system.
EXAMPLE: (After you logon)
 METHOD ONE
1. Open the Local Group Policy Editor.
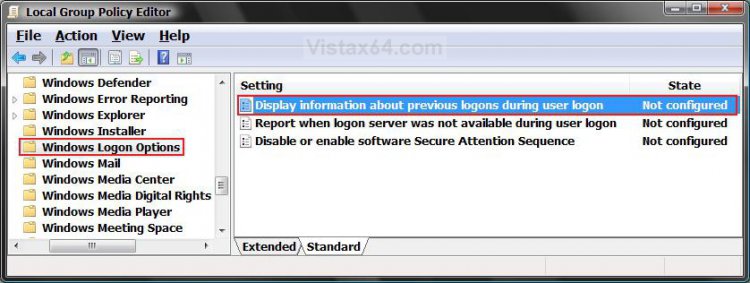
2. In the left pane, click on Computer Configuration, Administrative Templates, Windows Components, and Windows Logon Options. (See screenshot below)
3. In the right pane, right click on Display information about previous logons during user logon and click on Properties.
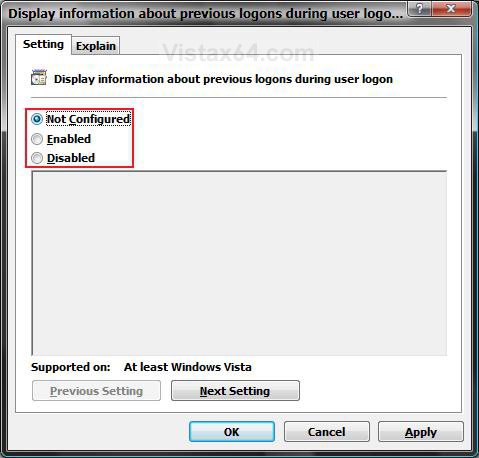
4. To Not Display Logon Information
A) Dot Disabled or Not Configured and click OK. (See screenshot below step 3)
B) Go to step 6.
5. To Display Logon Information
A) Dot Enabled and click on OK.
6. Close the Local Group Policy Editor window.
 METHOD TWO
1. To Display Logon Information
A) Click on the download button below to download the file below.
Logon Information.reg file.
B) Go to step 3.
2. To Not Display Logon Information
A) Click on the download button below to download the file below
Undo_Logon_Information.reg
3. Click on Save, and save the .reg file to the Desktop.
4. Right click on the downloaded .reg file and click on Merge.
5. Click on Run, Continue (UAC-Vista) or Yes (UAC-Windows 7), Yes, and then OK when prompted.
7. Log off and log on or restart the computer to apply the changes.
8. When done, you can delete the downloaded .reg file if you like.
 METHOD THREE
1. Open the Start Menu, then type regedit in the search box and press Enter.
2. If prompted by UAC, then click on Continue (Vista) or Yes (Windows 7)
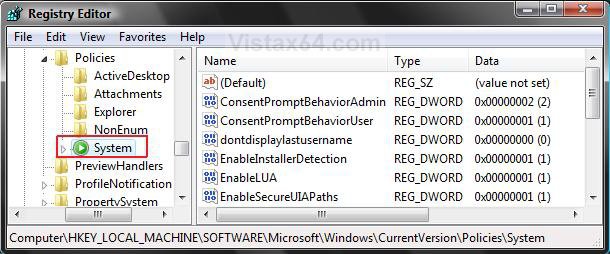
3. In regedit, navigate to the location below. (See screenshot below step 4)
HKEY_LOCAL_MACHINE\SOFTWARE\Microsoft\Windows\CurrentVersion\Policies\System
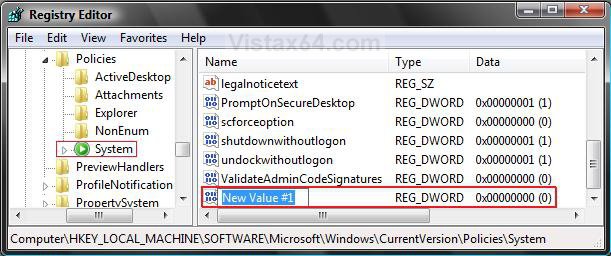
4. In the right pane, right click on a empty area and click on New and DWORD (32-bit) Value.
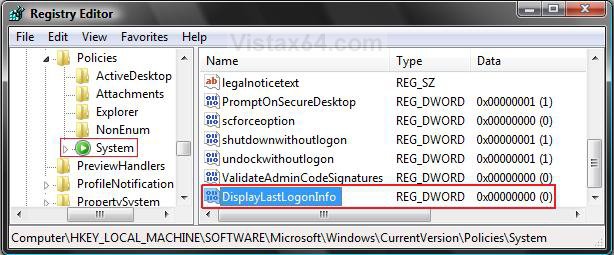
5. Type DisplayLastLogonInfo and press Enter. (See screenshots below)
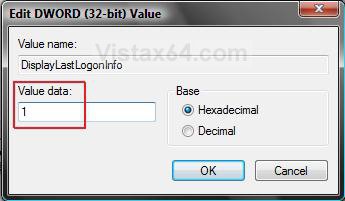
6. In the right pane, right click on DisplayLastLogonInfo and click on Modify.
7. To Display Last Logon Information
A) Type 1 and click on OK. (See screenshot below step 7)
B) Go to step 9.
8. To Undo Logon Information
A) Type 0 (number zero) and click on OK.
NOTE: You can also right click on DisplayLastLogonInfo and click on Delete. (See screenshot below step 6)
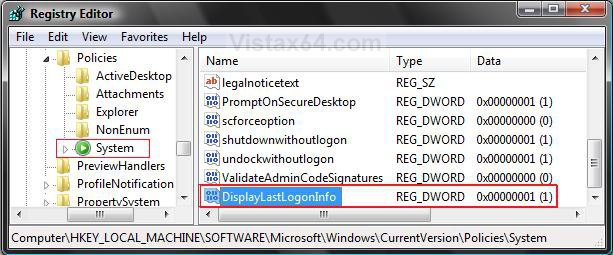
9. This is how the registry should now look. (See screenshot below)
10. Close regedit.
11. Log off and log on, or restart the computer to apply the changes.
That's it,Shawn
Related Tutorials
- How to See Vista Boot Information at Startup
- How to See Windows Vista Current License Information
- How to See the About Windows Vista and System Information
- How to Change the Number of Logon Entries Allowed to be Saved in the Logon Cache in Vista
- How to Make Vista Require a Username and Password at Logon
- How to Change or Stop Password Expiration in Vista
- How to See What the System Uptime is in Vista
- How to Display a Logon Message Title and Text in Vista
- How to Hide a User Account in Vista
- How to Logon Automatically at Startup in Vista
- How to Enable or Disable Ctrl+Alt+Delete Secure Logon in Vista
- How to Set Vista Account Lockout when a User Fails to Logon
- Enable or Disable Detailed Logon, Logoff, and Shutdown Status Messages in Vista
- How to Change the "Welcome" Text Message at Log On in Windows 7 and Vista
- How to Set a Default User Logon Picture for All Users in Vista and Windows 7
- How to Fix Windows 7 Logon Screen Showing Only "Other User" and Last Logged On User Icon
Attachments
Last edited:

