How to Create a YUMI MultiBoot USB Flash Drive for Windows
How It Works: YUMI (Your Universal Multiboot Installer) enables each user to create their own custom Multiboot UFD containing only the distributions they want, in the order by which they are installed.
This can also be used for memtest86+, matrixium, antiviruses, and many other OS other than window.
This tutorial will teach you how to create a bootable USB so you can install (most) operating systems without a dvd/cd drive, along with several repair tools.
Basic Essentials to create a MultiSystem Bootable USB Drive
- USB Flash or USB Hard Drive
- PC that can boot from USB
- Windows XP/Vista/7 to create the Bootable USB
- YUMI-0.0.6.7.exe
- Your selection of ISO Files
Step 1)
Download an .ISO version of your installation (available through various sources [Microsoft, Apple, etc., or just from within the tool itself.])
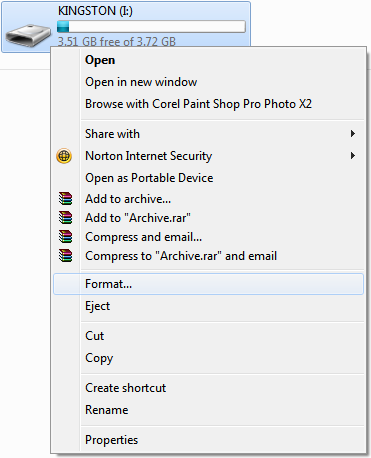
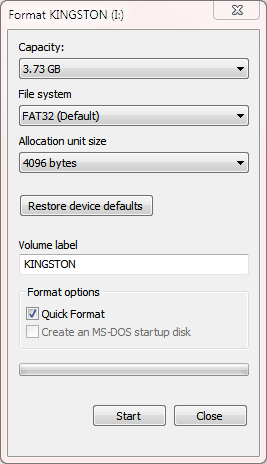
Step 2)Plug in your USB and open up "My Computer". Right click the USB, and select the "Format" button.
Recommended options: FAT32, quick format.
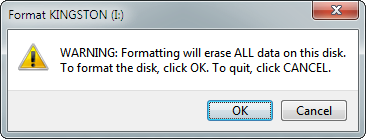
Now, continue at the warning prompt.
And then press 'Ok'
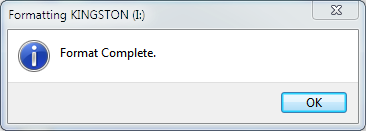
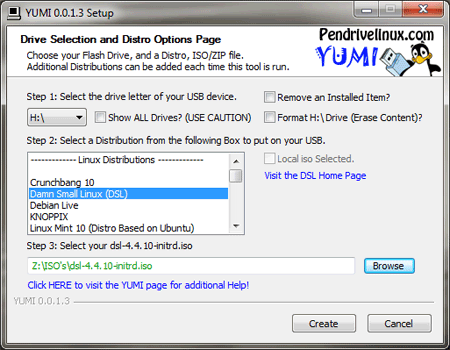
Step 3) Once the format is complete, open up this tool called 'YUMI'
Step 4) Using 'YUMI', select the drive letter of your USBMake sure you chose the correct USB by opening up 'My Computer' and reading the Drive Letter)
Step 5) There is a large list of possible operating systems, along with a built in DOWNLOAD feature! Select the operating system you want to download, and then browse for your .ISO file.
Step 6) Press "Create" and wait for 'YUMI' to do all the work.* * * If using the USB on the same computer, SKIP TO STEP 9) * * *
Step 7) Once its completed, safely eject the USB.
Step 8) Insert the USB into the computer you want to install it on.
* * * * * * * * * * * * * * * * * *
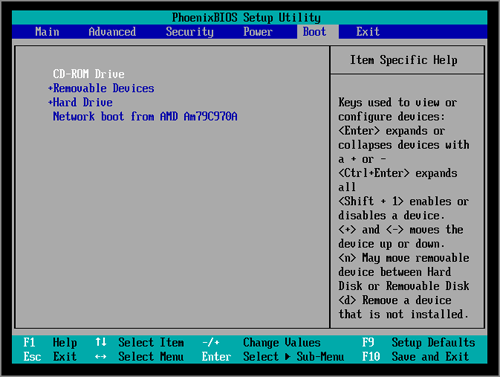
Step 9) Restart your computer, and press [F8] or [F11] or [Esc] depending on your computer, at the first screen.
Step 10) Temporarily set the USB/Removable Devices to be listed first in the hard drive Boot Priority order list in the BIOS.
*** After you are finished installing Vista from the USB, make the Vista hard drive (or partition) listed first in the hard drive Boot Priority order list in the BIOS. ***
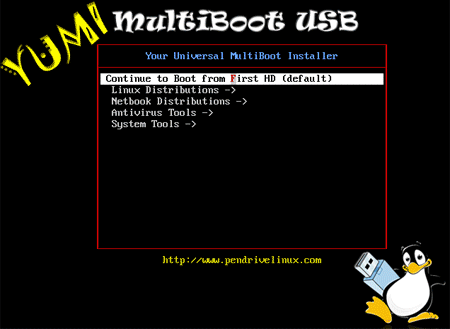
Step 11) You will now be prompted by YUMI on whether to continue with the regular start from hard drive, or to install an operating system. scroll down to your choice, and press enter. from here, scroll down to select the operating systems you have installed on the USB, and press enter once again.
Step 12) Your installation will now continue regularly, as if on a CD.- Now that you are finished installing Vista from the USB, make the Vista hard drive (or partition) listed first in the hard drive Boot Priority order list in the BIOS. (Step 10)
[*]If you have no use for the old windows files, you can clear up some space by going into
Start > All Programs > Accessories > System Tools > Disk Cleanup
and selecting the drive in which the old windows files are in, and then checking the box that says 'Old Windows Files' and clicking 'Go'
* * * * * * ENJOY YOUR NEW OPERATING SYSTEM. * * * *
Attachments
Last edited by a moderator:

