How to Connect a Printer to a Wireless Router
This Tutorial will show you how to connect a printer to a wireless router to allow more computers on your wireless network to access a single printer.
This will work with most modern Printers and Wireless routers that can be connected by USB. Some settings may vary with different Routers and Printers.
Here's How:
1. First connect the Printer to the Wireless Router by usb cable and switch on the Printer.
2. Installl te printer drivers on all computers that are to have acces to the printer.
3. With each computer proceed as follows:
A. Open the Start Menu.
B. Click on the Control Panel button.
C. Click on Printer.
D. Right click on your Printer Icon and click on Properties.
E. Click on the Ports tab.
F. Remove the tick from the Enable bidirectional support box.
G. Click on add port, highlight Standard TCP/IP Port, and click on new port.
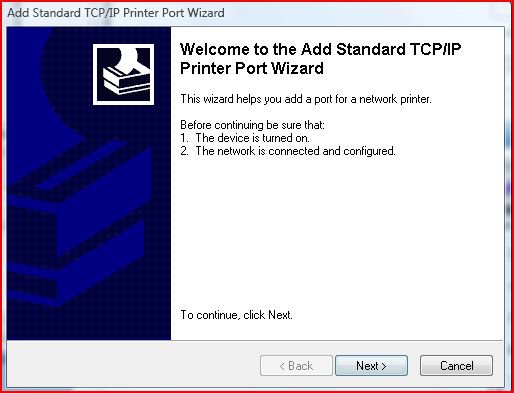
H. This will open the Add Standard TCP/IP Printer Port Wizard.
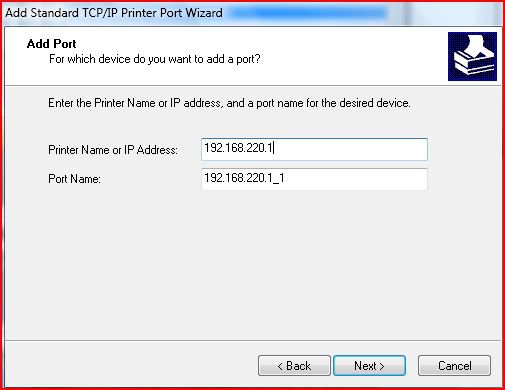
I. Click on Next, Give in the IP for your Router, The port name will be filled out automatically
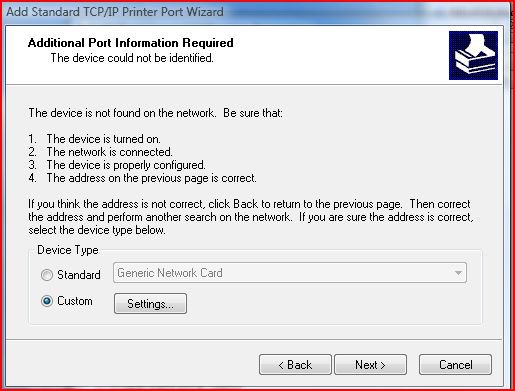
J. Click on Next. Vista will try to find your printer. Wait for this to fail and click on Custom in the new window and then on settings
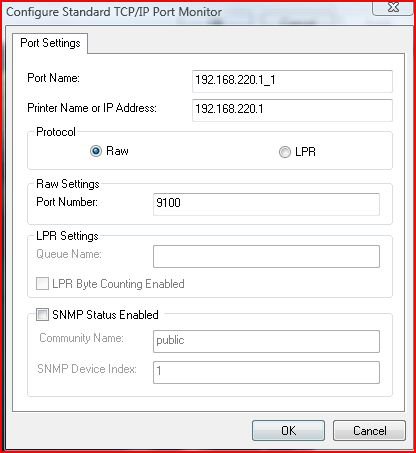
K. In the new window check that Raw and port number 9100 is selected.
L. Click on OK, Next, Finish, Close, Apply and Close.
Thats it the Printer is now set up!!

Attachments
Last edited by a moderator:

 I suppose there is only one way to find out and that's to try it