How to Open and Use File Signature Verification in Vista and Windows 7
File Signature Verification is used to check the integrity of critical operating system files by verifying if they have been digitally signed.
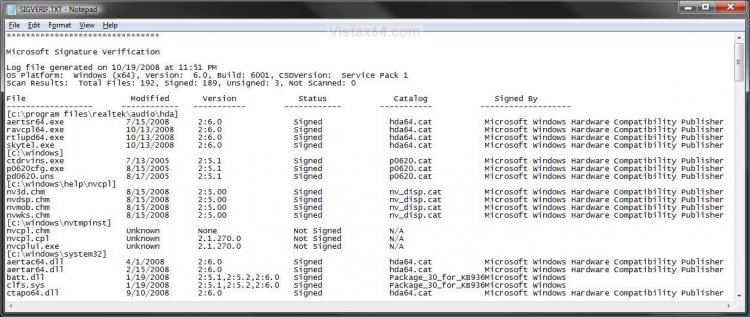
Any critical files that are not digitally signed are displayed in a results list. A complete list of the system files checked is available in a log file stored at:
C:\Users\Public\Documents\SIGVERIF.TXT.
C:\Users\Public\Documents\SIGVERIF.TXT.
Any file that is not digitally signed should be verified by you to see if it is safe. Some unsigned files by just be beta drivers, while others good be malware. Use Google to look up the file to help see what program the file belongs to help you decide if it is safe. If the file turns out to be unsafe, then you might consider uninstalling the program it belongs to.
Here's How:
1. Open the Start Menu.
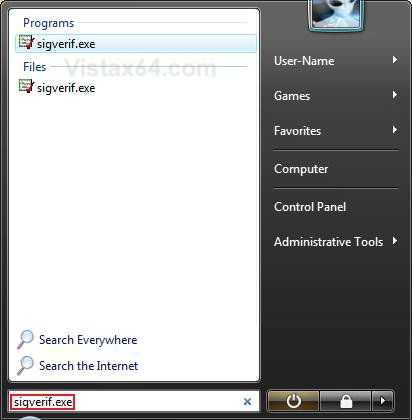
2. In the white line (Start Search) area, type sigverif.exe and press Enter. (See screenshot below)
NOTE: The sigverif.exe file is located at C:\Windows\System32\sigverif.exe.
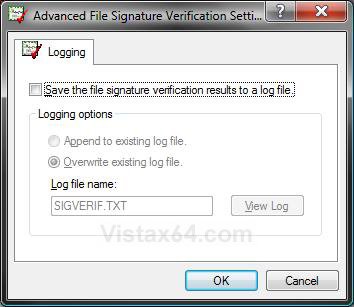
3. To Enable or Disable the Log FileNOTE: This log file will contain the complete list of the system files checked in File Signature Verification. Without this log file, the only results you will see will be the critical operating system files without a digitally signed signature (step 6).
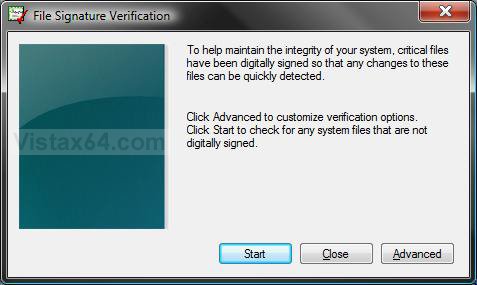
A) Click on the Advanced button. (See screenshot below)
B) To Enable the Log File -
- Check the Save the file signature verification results to a log file box. (See screenshot below)
- Dot the Logging option that you want.
- Click on OK.
- Go to step 4
C) To Disable the Log File -
- Uncheck the Save the file signature verification results to a log file box. (See screenshot above)
- Click on OK.
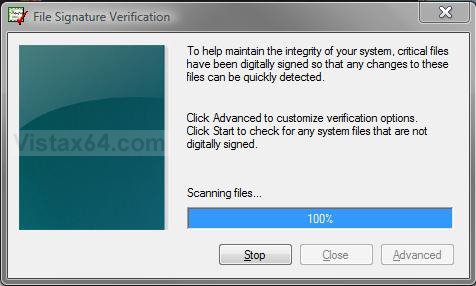
5. It will now scan your system files. (See screenshot below)
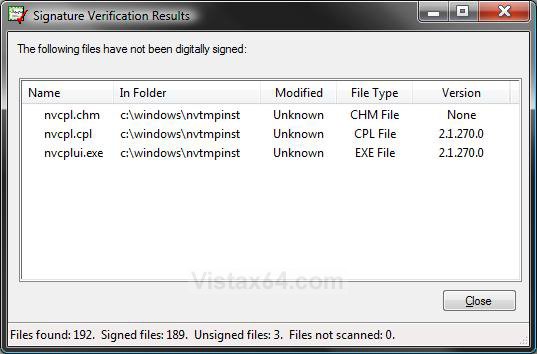
6. When finished, you will get a list of any system files that are not digitally signed. (See screenshot below)NOTE: Notice that my unsigned files turned out to be safe NIVIDIA video drivers.
A) Click on CLOSE when done.
7. To See the Log File
NOTE: You will not have a log file unless you enable it in step 3. The log file will show you a complete list of the system files checked.
A) Click on the Advanced button. (See screenshot below step 3A)
B) Click on the View Log button. (See screenshot below step 3B)
C) Click on the CLOSE button. (See screenshot below step 3B)
D) Close the SIGVERIF.TXT file window when done. (See screenshot below)
8. Click on CLOSE when done. (See screenshot below step 3A)
That's it,
Shawn
Attachments
Last edited:

