How to Turn Internet Explorer InPrivate Filtering On or Off
InPrivate Filtering in IE8 and IE9 helps prevent the websites you visit from automatically sharing details about your visit with other websites. This will show you how to turn InPrivate Filtering to off, Automatically block (on), or Choose content to block or allow (on) in the current Internet Explorer browsing session. When turned on, InPrivate Filtering will only stay on in the current Internet Explorer browsing session. When you close all instances of Internet Explorer, InPrivate Filtering will be turned off by default.
Today websites increasingly pull content in from multiple sources, providing tremendous value to consumer and sites alike. Users are often not aware that some content, images, ads and analytics are being provided from third party websites or that these websites have the ability to potentially track their behavior across multiple websites. InPrivate Blocking provides users an added level of control and choice about the information that third party websites can potentially use to track browsing activity.
Because InPrivate Blocking is designed to watch for and block only third-party content that appears with a high frequency across sites you visit, no content is blocked until such levels are detected, nor is any such content blocked which is served directly by the site you are visiting. Depending on your web browsing activity and sites visited, the amount of time it can take before such content is automatically blocked can vary widely.
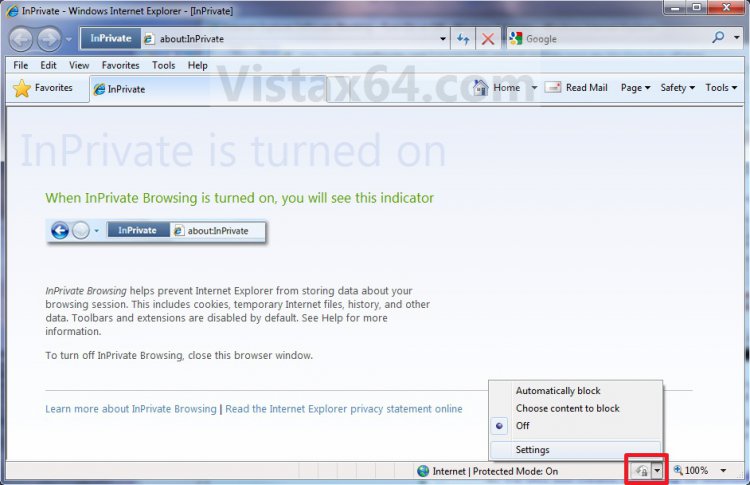
EXAMPLE: InPrivate Filtering Set to On (Auto or Choose) and Off
NOTE: This will be displayed in the status bar at the bottom of a Internet Explorer window to show you what the status of InPrivate Blocking is.
Here's How:
1. Open Internet Explorer.
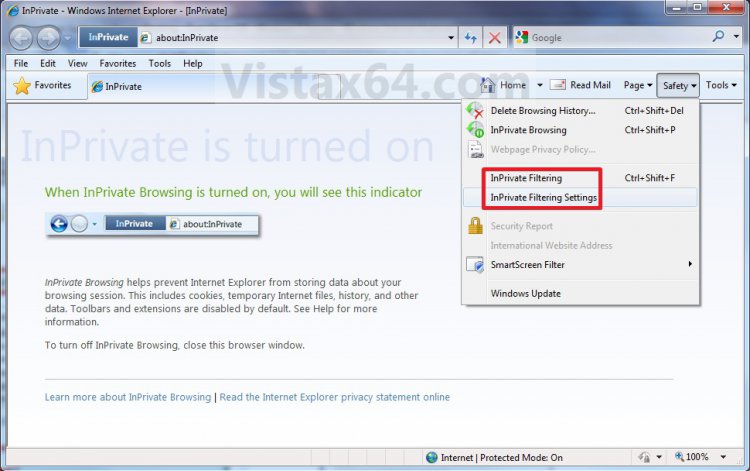
2. Click on the Safety Command Bar icon button and click on InPrivate Filtering Settings. (See screenshot below)
A) Go to step 4, 5, or 6.
OR
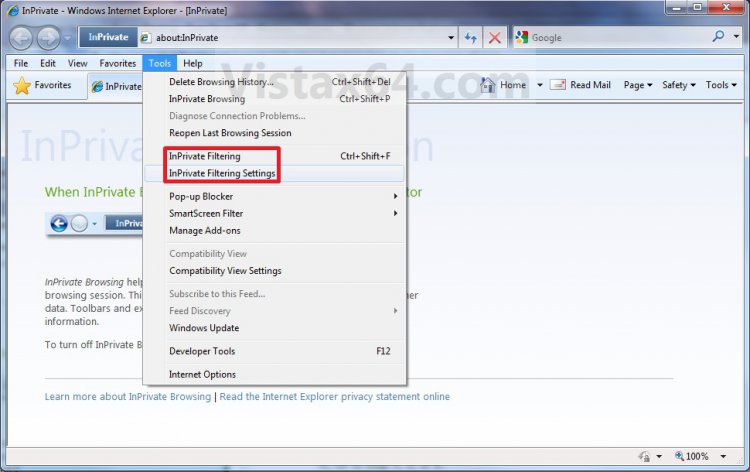
3. Click on the Tools Menu Bar item and click on InPrivate Filtering Settings. (See screenshot below)
A) Go to step 4, 5, or 6.
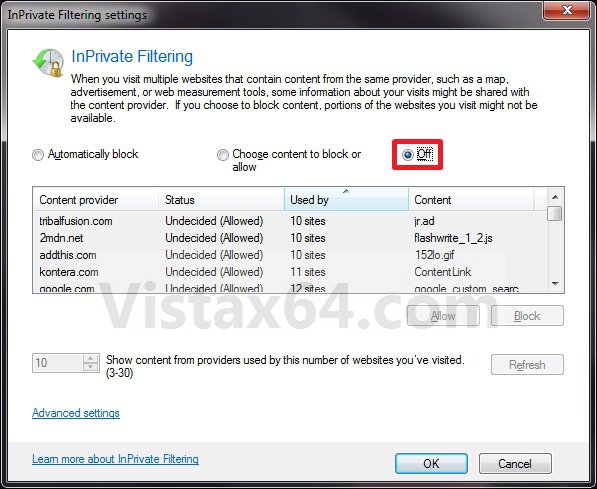
4. To Turn Off InPrivate Filtering
A) Select (dot) Off. (See screenshot below)
B) Go to step 7.
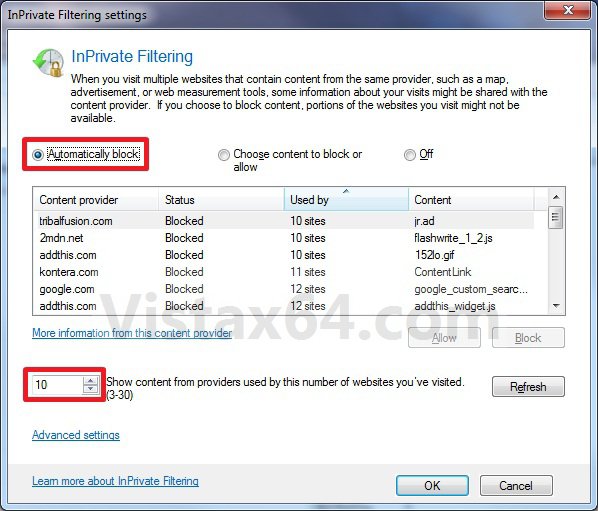
5. To Turn On InPrivate Filtering to Automatically Block
A) Select (dot) Automatically block. (See screenshot below)
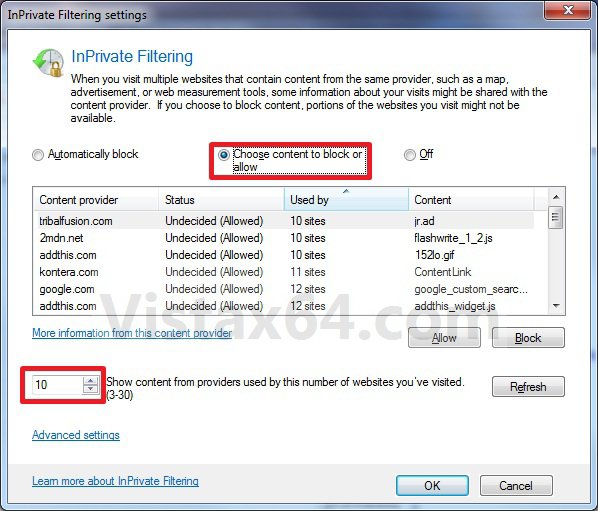
B) Type in a number (3 to 30) in the Show content from providers used by this number of websites you’ve visited box, and click on the Refresh button. (See screenshot above)
NOTE: This is to set the number of websites you visit that share the same third-party content before they are put in the list to be blocked. The default is 10 websites.
6. To Turn On InPrivate Filtering and Choose Content to Block or Allow
A) Select (dot) Choose content to block or allow. (See screenshot below)
B) Type in a number (3 to 30) in the Show content from providers used by this number of websites you’ve visited box, and click on the Refresh button. (See screenshot above)
NOTE: This is to set the number of websites you visit that share the same third-party content before they are put in the list to be allowes or blocked by you. The default is 10 websites.
C) Select a listed third-party content provider website and click on the Allow or Block button for what action you want for that website. (See screenshot below step 6A)
NOTE: Repeat this step until you have set each listed content provider website to be allowed or blocked.
7. Click on OK. (See screenshots below step 4A, 5A, or 6A)
8. After you have your settings set the way you want them above, you can click on the InPrivate Filtering icon drop down menu arrow in the status bar to quickly select to turn InPrivate Filtering to Off, Automatically block, Choose content to block or allow mode. (See screenshot below)
NOTE: You can also click on the icon below to quickly turn InPrivate Filtering on or off.
That's it,
Shawn
Attachments
Last edited:

