How to Create a Safely Remove Hardware Shortcut in Vista
This will show you how to create a Safely Remove Hardware shortcut that you can assign a keyboard shortcut to. This can make it easier to remove external devices like a USB drive or memory card.
- If you would like to create a keyboard shortcut key for this shortcut, then see: How to Create a Keyboard Shortcut for a Program in Vista
- If you would like to place this shortcut in Quick Launch so you can also use the Quick Lauch keyboard shortcut, then see: How to Use Quick Launch in Vista
EXAMPLE: Safely Remove Hardware Taskbar Icon
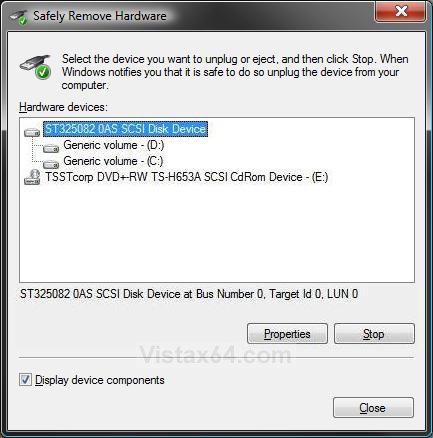
EXAMPLE: Safely Remove Hardware Window
 METHOD ONE
1. Click on the download button below to download the
Safely_Remove_Hardware .zip file.
2. Click on Save and save the Safely_Remove_Hardware .zip file to the Desktop.
3. Right click on the Safely_Remove_Hardware .zip file (on desktop) and click on Open.
4. Click on Allow in the UAC prompt.
5. Extract the Safely Remove Hardware shortcut to the desktop.
6. You can now move the new Safely Remove Hardware shortcut where you like for easy use.
7. When done, you can delete the Safely_Remove_Hardware .zip file if you like.
 METHOD TWO
1. Right click on a empty area of the desktop.
2. Click on New and Shortcut.
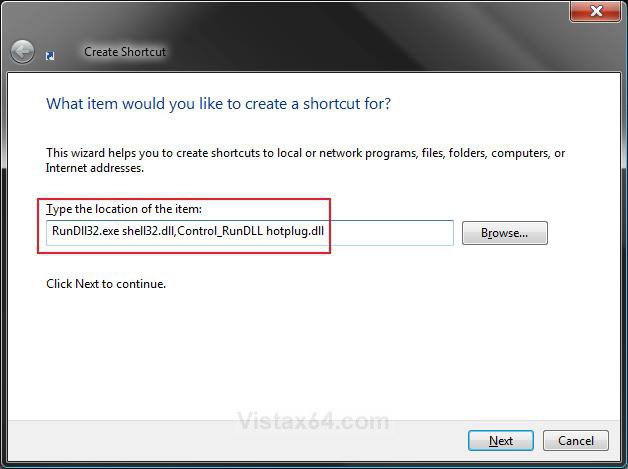
3. Type RunDll32.exe shell32.dll,Control_RunDLL hotplug.dll into the location field. (See screenshot below)
4. Click on the Next button.
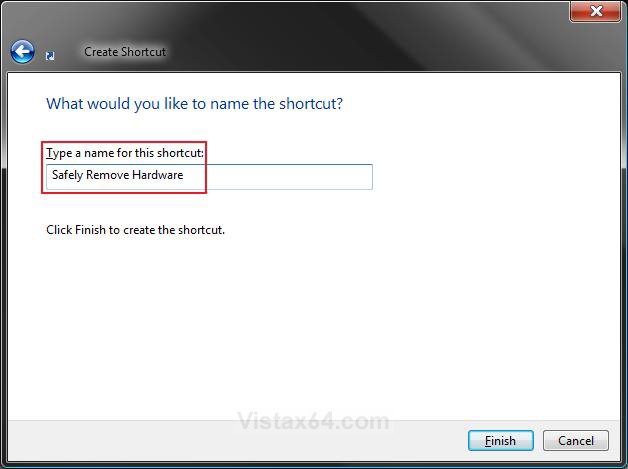
5. Type Safely Remove Hardware for the name. (See screenshot below)
NOTE: You can name it anything you would like though.
6. Click on the Finish button.
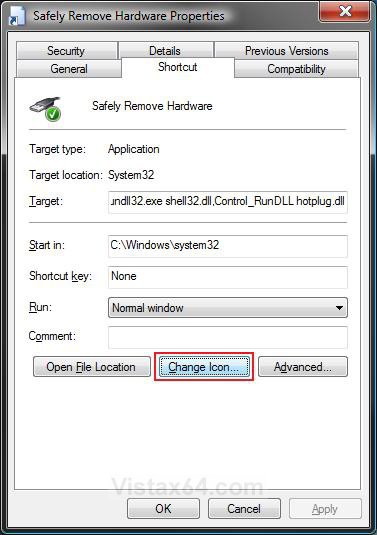
7. Right click on the new Safely Remove Hardware shortcut (on desktop) and click on Properties.
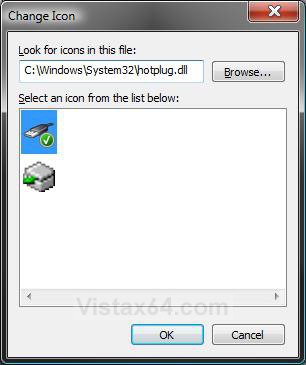
8. Click on the Change Icon button. (See screenshot below)
NOTE: For more on how to change a shortcut folder or file icon, see: How to Change a Shortcut Folder or File Icon in Vista
9. Browse to C:\Windows\System32\hotplug.dll and select hotplug.dll. (See screenshot below step 11)
10. Click on the icon highlighted in blue below.
NOTE: If you have your own icon you would rather use, then just navigate to where you have it saved. Vista needs a 256 bit icon for best viewing results.
11. Click on OK.
12. Click on OK to apply. (See screenshot for step 8)
13. You can now move the new Safely Remove Hardware shortcut to wherever you like for easy use.
That's it,Shawn
Attachments
Last edited:


