How to Change Vista Disk Check Press Any Key Timeout Value at Startup
This will show you how to change the Disk Check (chkdsk) timeout value for how long you have for the To skip checking, press and key within 10 second(s) option to what you want instead.
This can be helpful if you would like to have more or less than the default 10 seconds to press a key to cancel chkdsk from running at startup when scheduled.
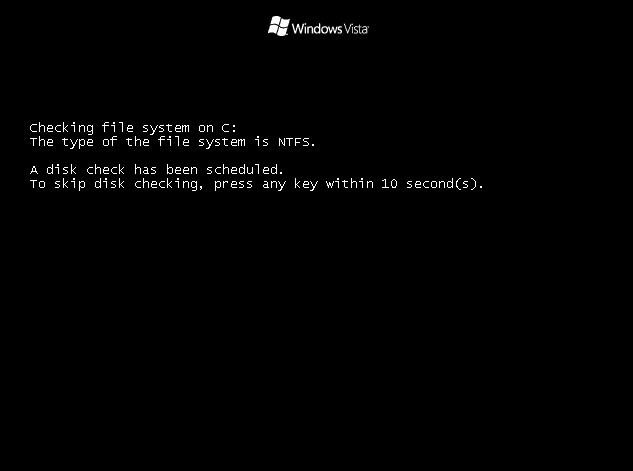
EXAMPLE: Default Disk Check (chkdsk) Startup Screen with Default 10 Seconds
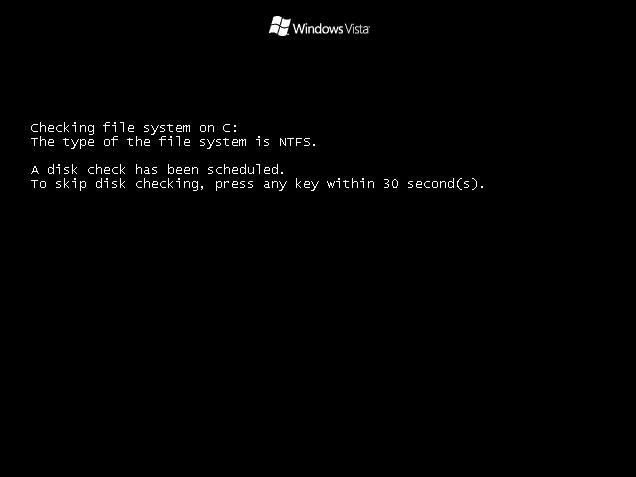
EXAMPLE: Changed Disk Check (chkdsk) Startup Screen with 30 secondsNOTE: You can set whatever time you want below instead though.
Here's How:
1. Open the Start Menu.
2. In the white line (Start Search) area, type regedit and press Enter.
3. Click on Continue in the UAC prompt.
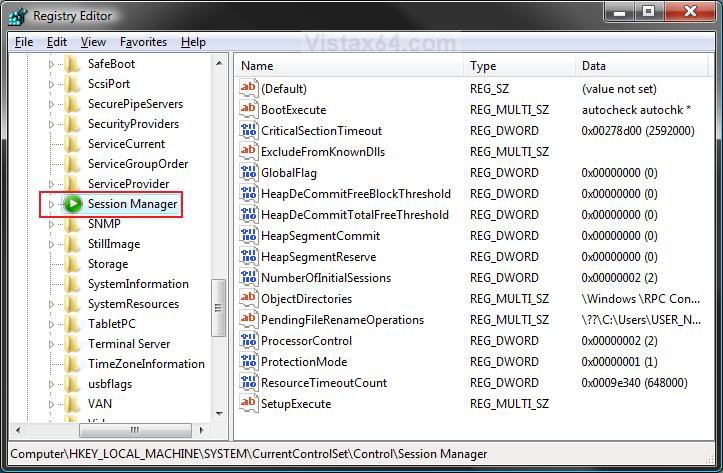
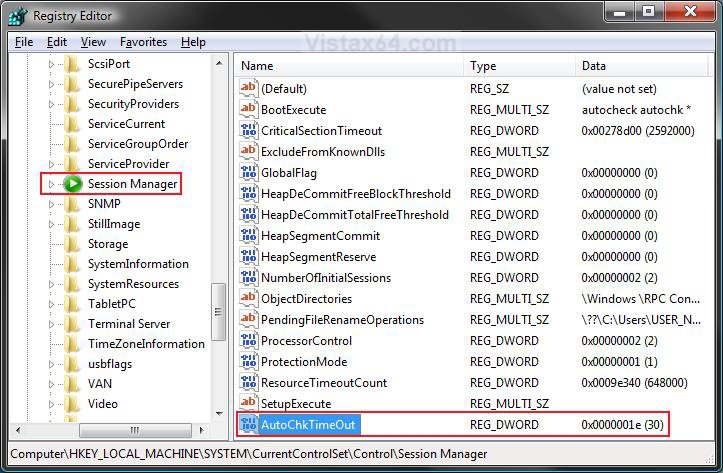
4. In regedit, go to: (See screenshot below)
HKEY_LOCAL_MACHINE\SYSTEM\CurrentControlSet\Control\Session Manager
5. To Change the Default Disk Check Startup Timeout Value
A) In the right pane, right click on a empty area and click on New and DWORD (32-bit) Value. (See screenshot above)
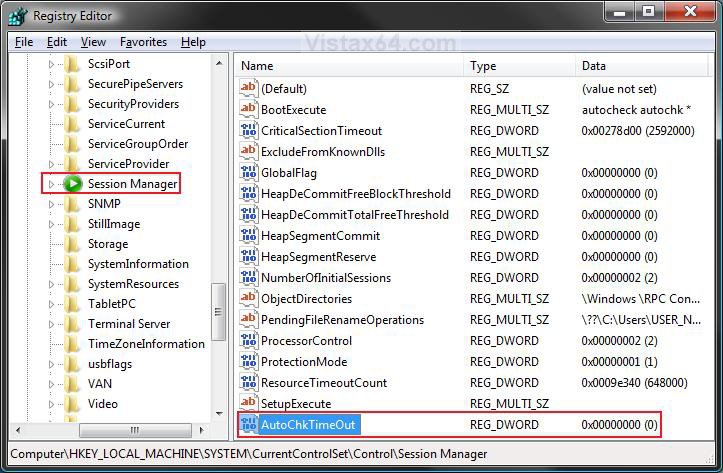
B) Type AutoChkTimeOut and press Enter. (See screenshot below)
C) Right click on AutoChkTimeOut and click on Modify.
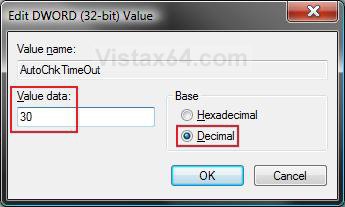
D) Dot Decimal and enter how many seconds (0 to 259,200) you want for the timeout value, then click OK. (See screenshot below)
NOTE: Entering 0 (number zero) will give you the default 10 seconds to cancel chkdsk.
E) The registry will now look similar to this one with 30 seconds selected. (See screenshot below)
F) Go to step 7.
6. To Restore the Default Disk Check Startup Timeout Value
A) In the right pane, right click on AutoChkTimeOut and click on Delete. (See screenshot above)
B) Click on Yes to confirm the deletion.
7. Close regedit.
NOTE: You can now run the chkdsk /f command to schedule a chkdsk to run at startup to confirm the change if you like.
That's it,Shawn
Attachments
Last edited by a moderator:

