How to Add or Remove a Custom Windows Mail Title Name in Vista
This will show you how to add or remove a custom title name instead of the default Windows Mail name in the Vista Windows Mail title bar.
Sometimes a OEM, or when you install some software, they will have or place a custom Windows Mail title bar name instead.
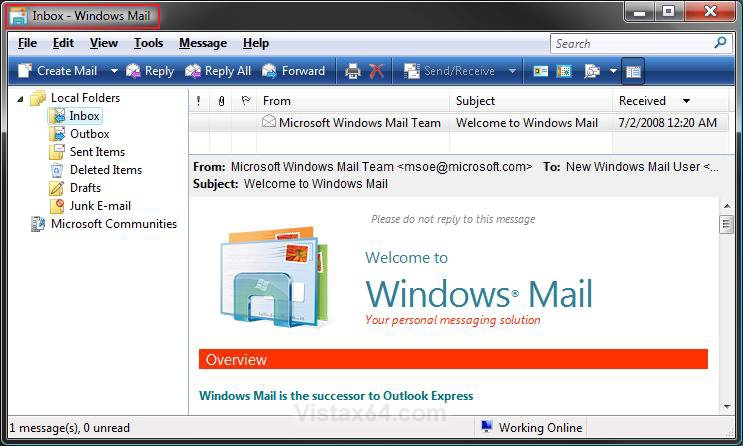
EXAMPLE: Windows Mail Default Title Bar Name
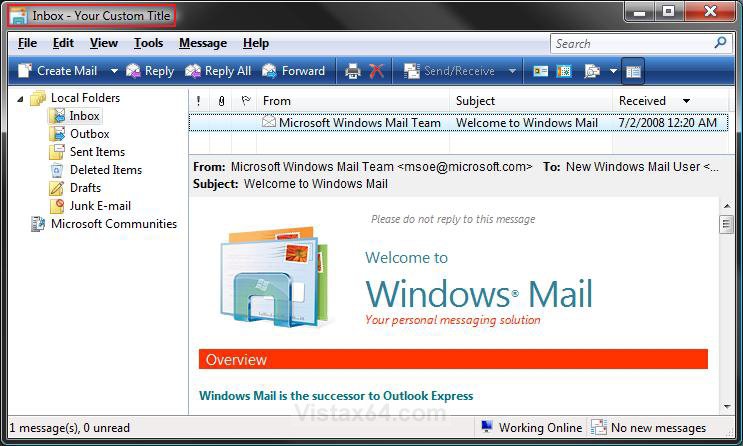
EXAMPLE: Windows Mail with Custom Title Bar Name
Here's How:
1. Open the Start Menu.
2. In the white line (Start Search) area, type regedit and press Enter.
3. Click on Continue in the UAC prompt.
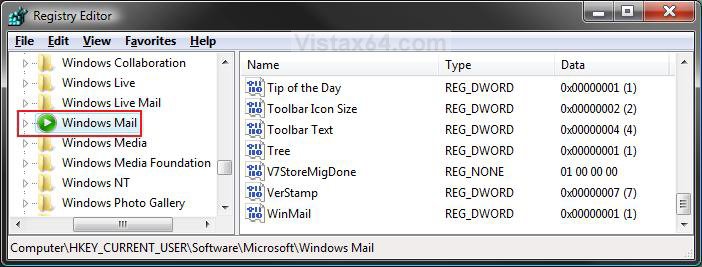
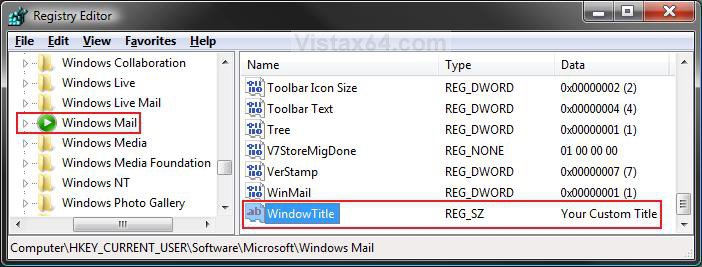
4. In regedit, go to: (See screenshot below)
HKEY_CURRENT_USER\Software\Microsoft\Windows Mail
5. To Add a Custom Title Name
A) In the right pane, right click on a empty area. (See screenshot above)
B) Click on New and String Value.
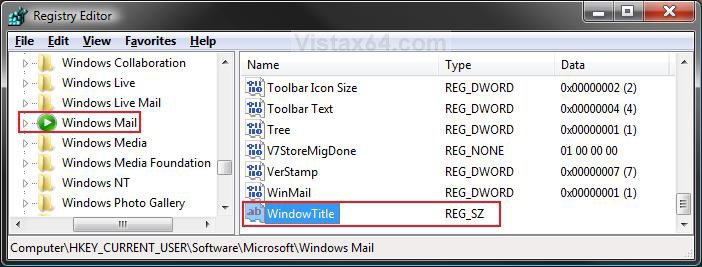
C) Type WindowTitle and press Enter. (See screenshot below)
D) Continue to step 8.
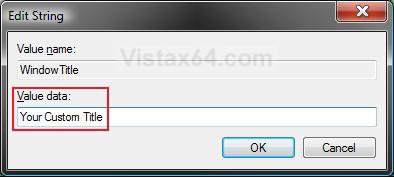
6. To Change the Custom Title Name
A) In the right pane, right click on Window Title and click on Modify. (See screenshot above)
B) Type in whatever you want to see in the Windows Mail title bar. (See screenshot below)
NOTE: You will see this in the Data column for the WindowTitle Name in the registry. (See screeshot below step 6E)
C) Click on OK to apply.
D) The registry will now look similar to this.
E) Go to step 8.
7. To Remove the Custom Title Bar
A) In the right pane, right click on WindowTitle and click on Delete. (See screenshot above)
B) Click on Yes in the confirmation prompt.
8. Close regedit.
9. Close and re-open Windows Mail to see the change.
That's it,Shawn
Attachments
Last edited:

