How to Reset the Last Backup Listing for Vista Back Up Files
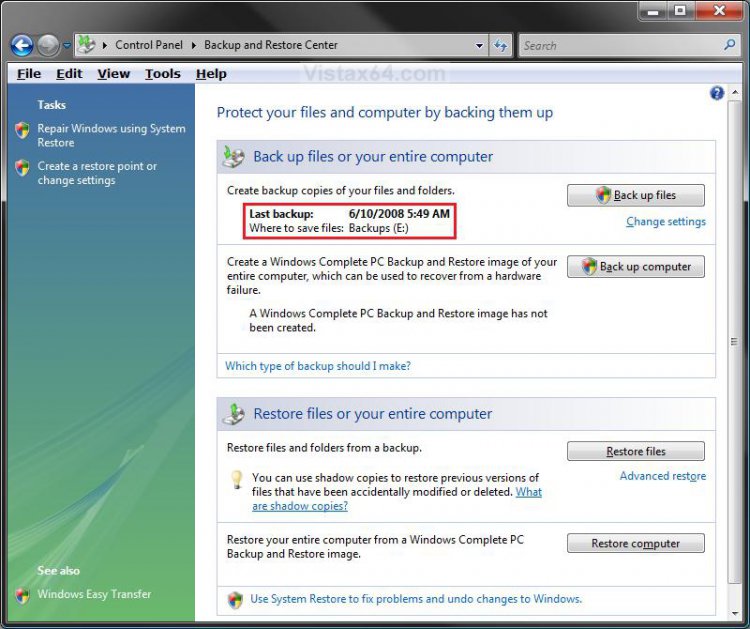
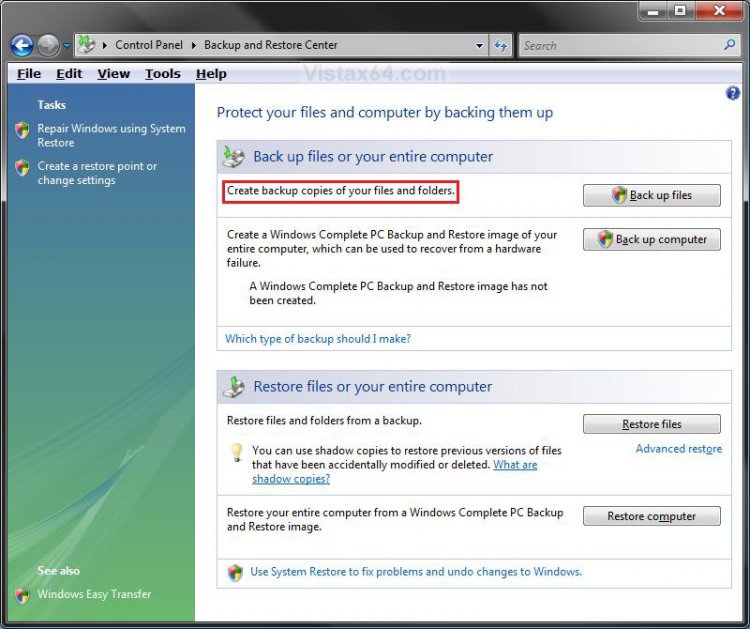
This will show you how to reset the Last Backup listing so the old or deleted Back Up Files will no longer be displayed with it's time, date, and location in the Backup and Restore Center.
This only removes the backup from the list, not the backup files themself. To delete the backup files see below:
Backups are saved in this format: (backup location)\(computer name)\Backup Set (year-month-day) (time)
Backups are saved in this format: (backup location)\(computer name)\Backup Set (year-month-day) (time)
- If the backup was done on Local Disk D: at 9/7/2007 1:00:50 PM (It uses 24 hour time), then the full backup file path would be: D:\Computer\Backup Set 2007-09-07 130050
- You would right click the folder Backup Set 2007-09-07 130050 and click on Delete to delete that backup.
- To see what your computer name is, see: How to Change the Computer Name in Vista
Once this is reset you will not be able to restore this unless you backed up the registry WindowsBackup key in OPTION TWO below first. Right click on the WindowsBackup key (folder) and click on Export, then save this exported REG file to where you like as the backup. To restore this backup, right click on the REG file and click on Merge and approve.
EXAMPLE: Backup and Restore Center with a Last Back Up Files
EXAMPLE: Backup and Restore Center Reset to no Last Back Up Files
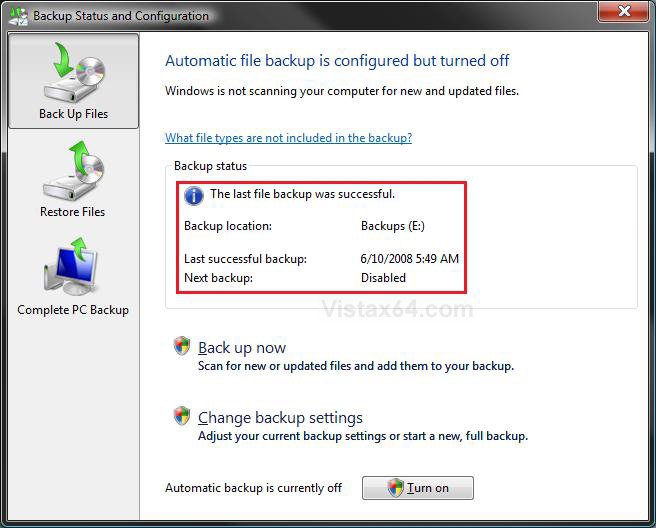
EXAMPLE: Backup Status and Configuration with a Last Back Up Files
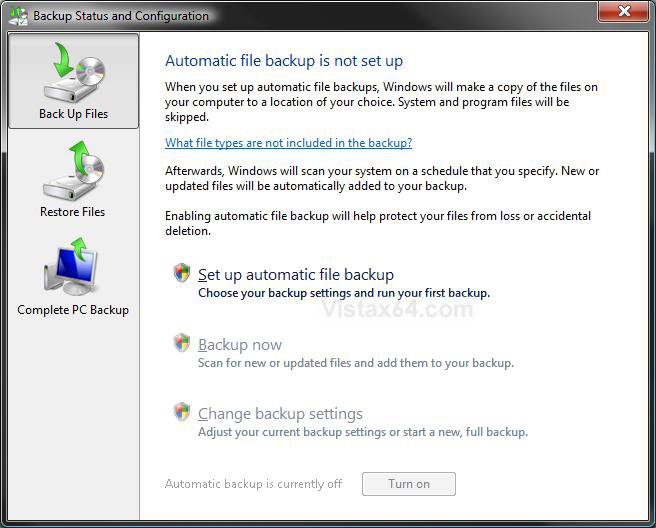
EXAMPLE: Backup and Restore Center Reset with no Last Back Up Files
 OPTION ONE
1. To Reset the Last Back Up Files Listing
A) Click on the download button below to download the file below.
Reset_Last_Back_Up_Files.reg
2. Click on Save, and save the .reg file to the Desktop.
3. Right click on the downloaded .reg file and click on Merge.
4. Click on the Run button in the Security Warning pop-up.
5. Click on Continue (UAC), Yes, and then OK when prompted.
6. When done, you can delete the downloaded .reg file.
 OPTION TWO
WARN: If you wish to backup this registry key, then right click on WindowsBackup (left pane), and click on Export. This saved exported reg file is your backup. To restore the registry key and this last Back Up Files listing, right click on the exported reg file (backup) and click on Merge and approve.
1. Open the Start Menu.
2. In the white line (Start Search) area, type regedit and press Enter.
3. Click on Continue in the UAC prompt.
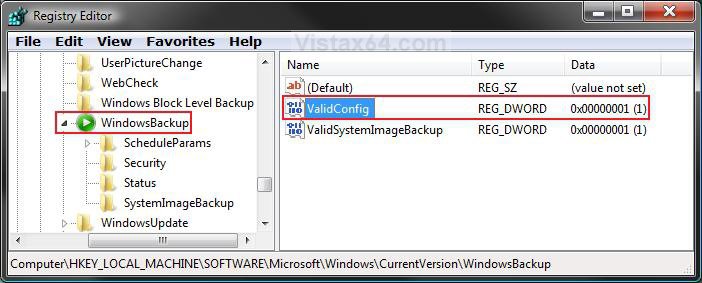
4. In regedit, go to: (See screenshot below)
Code:
HKEY_LOCAL_MACHINE\SOFTWARE\Microsoft\Windows\CurrentVersion\WindowsBackup5. In the right pane, right click on ValidConfig and click on Delete. (See screenshot above)
6. Click on Yes to confirm deletion.
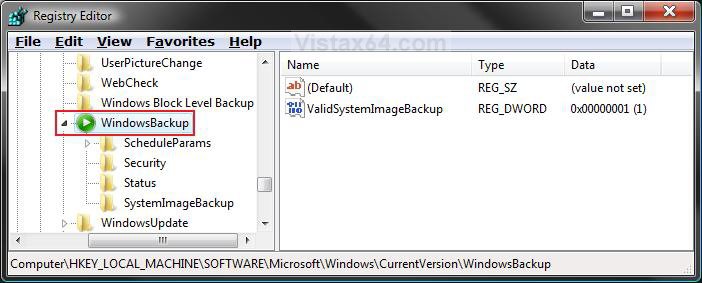
7. The registry will now look like this. (See screenshot below)
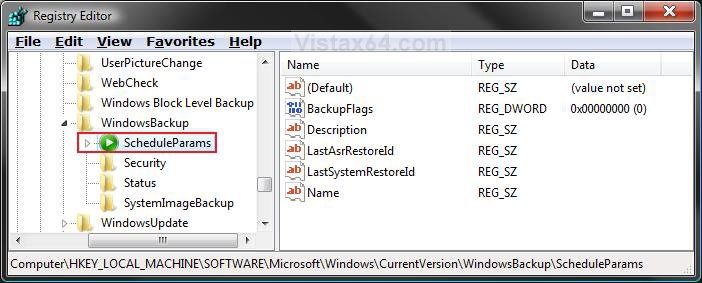
8. In the left pane, right click on ScheduleParams and click on Delete. (See screenshot below)
9. Click on Yes to confirm deletion.
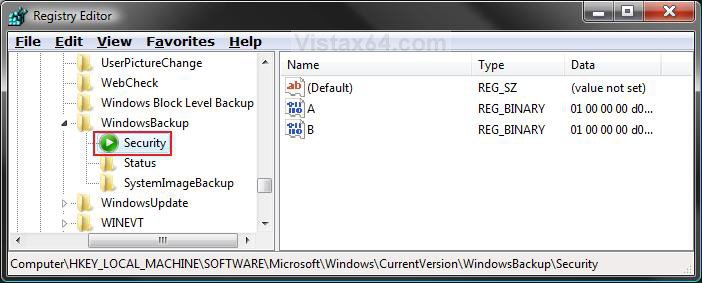
10. In the left pane, right click on Security and click on Delete. (See screenshot below)
11. Click on Yes to confirm deletion.
12. In the left pane, right click on Status and click on Delete. (See screenshot below)
13. Click on Yes to confirm deletion.
14. The registry will now look like this. (See screenshot below)
That's it,
Shawn
Related Tutorials
- How to Create a Complete Computer Backup and Restore Image in Vista
- How to Restore the Complete Computer from a Complete Backup and Restore Image in Vista
- How to Backup Files with Optional Automatic Backups in Vista
- How to Restore Backup Files in Vista
- How to Reset the Last Backup Listing for Vista Complete PC Backup
- How to Enable or Disable Backup Status and Configuration in Vista
- How to Extract Vista System Image Files Using Virtual PC 2007
- How to Manually Extract Files from a Backup in Vista and Windows 7
Attachments
Last edited:

