How to Create a "Network Connections" Shortcut in Vista
This will show you how to create a shortcut to the Network Connections folder to quickly see all of your internet, network, or other computer connections made by your network adapter(s).
When you install a network adapter in your computer, Vista creates a connection for it in the Network Connections folder. A Local Area Connection is created for an Ethernet network adapter. A Wireless Network Connection is created for a wireless network adapter.
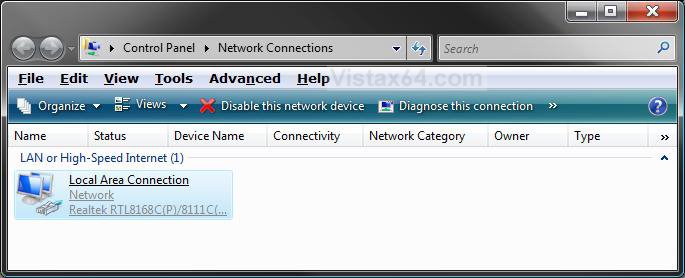
NOTE: This is the window that will open when you click on this shortcut to see all of your network adapter(s) connections.
 OPTION ONE
1. Right click on the Network icon in the Notification area and click on Network and Sharing Center. (See screenshot below)
A) Go to step 3.
OR
2. Open the Control Panel (Classic View) and click on the Network and Sharing Center icon.
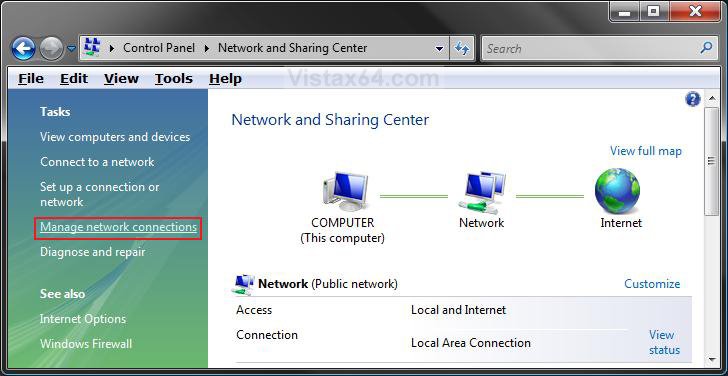
3. Click on the Manage network connections link in the left green pane. (See screenshot below)
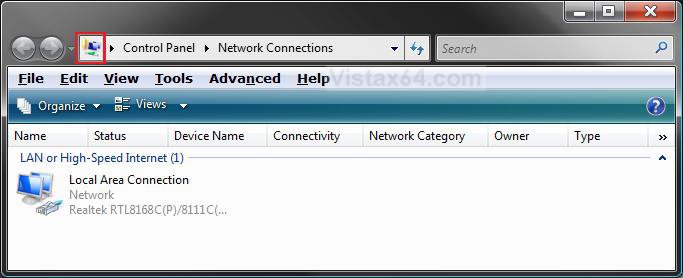
4. Left click and hold on the little icon in the far left of the Windows Explorer address bar. (See the icon boxed in red in the screenshot below)
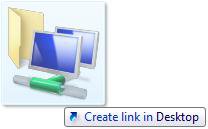
5. Drag the icon to a empty space on the desktop and release the left mouse button. (See screenshot below)
NOTE: You can also right click on a connection and click on Create Shortcut, then click on Yes to create it on the desktop.
6. This is your new Network Connections shortcut. Move it to where you like for easy use.
 OPTION TWO
1. Right click on a empty space on the desktop and click on New and Shortcut.
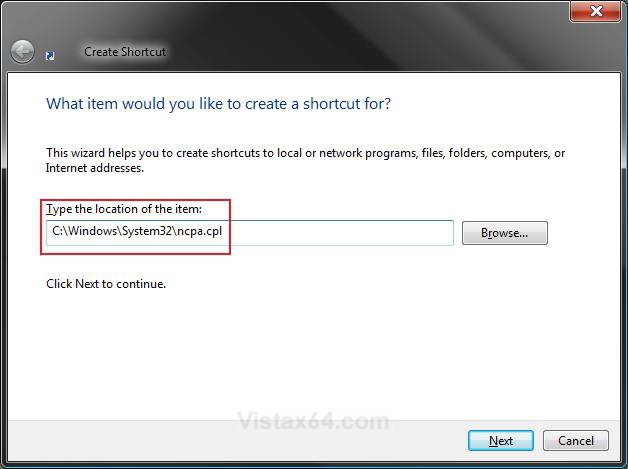
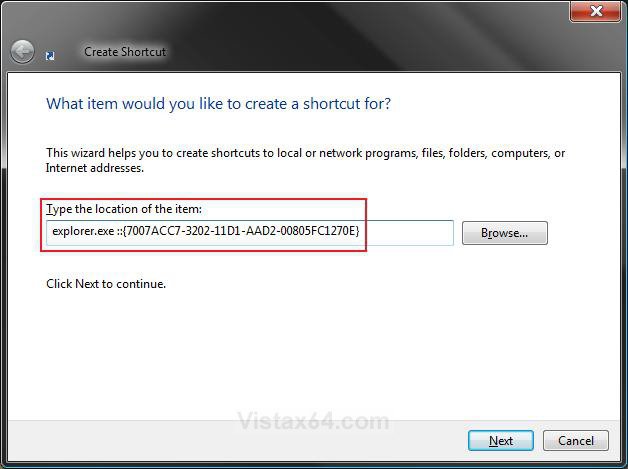
2. Copy and paste either location below, and click Next. (See screenshots below)
NOTE: You can type either one of these options. It's your choice for which one you wish to use, but they will both open the Network Connections folder.
C:\Windows\System32\ncpa.cpl
OR
explorer.exe ::{7007ACC7-3202-11D1-AAD2-00805FC1270E}
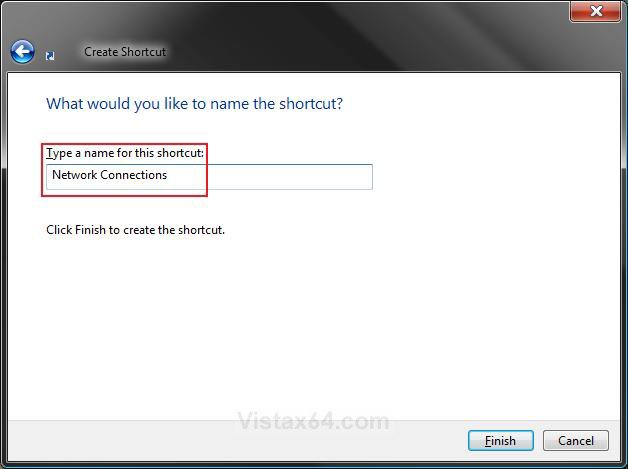
3. Type in Network Connections for the name of the shortcut and click Finish. (See screenshot below)
NOTE: You can type any name that you wish though.
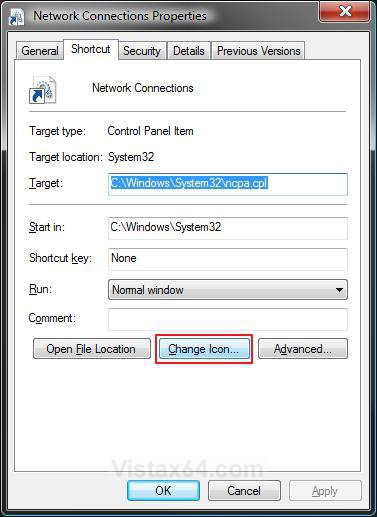
4. Right click on the new Network Connections shortcut, on the desktop, and click on Properties.
5. Click on the Shortcut tab and click on the Change Icon button. (See screenshot below.
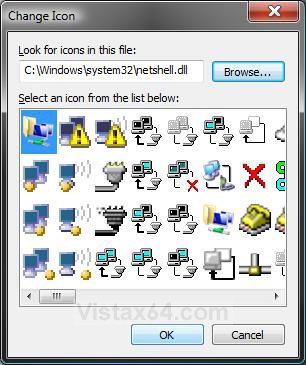
6. Click on the Browse button and scroll down a bit and click on netshell.dll (netshell) and click on Open. (See screenshot below step 7)
7. Select the icon boxed in blue in the screenshot below and click OK.
8. Click on OK. (See screenshot below step 5)
That's it,
Shawn
Related Tutorials
- How to Change the Network Location Type in Vista
- How to Turn Network Discovery On or Off in Vista
- How to View and Browse a Computer or Device on a Network in Vista
- How to Enable or Disable the Receive Window Auto Tuning Level in Vista
- How to Change or Disable the QoS Reserved Bandwidth Limit in Vista
- How to Create a Local Area Network Connection Status Shortcut in Vista
- How to Delete a Network Connection in Vista
Attachments
Last edited by a moderator:

