How to Enable or Disable Pin to Start Menu in Vista and Windows 7
This will show you how to enable or disable Pinned Programs and Folders in the Start Menu pin area and the Pin to Start Menu context menu item for all users on the computer.
This does not apply to the Classic Start menu in Vista.
This does not apply to the Classic Start menu in Vista.
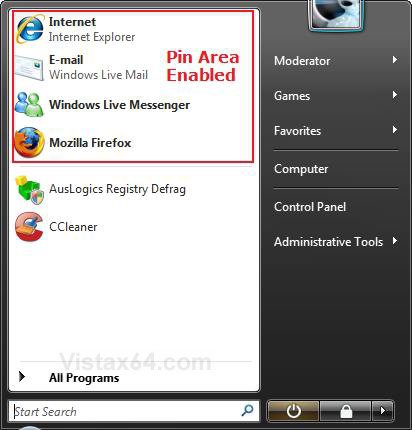
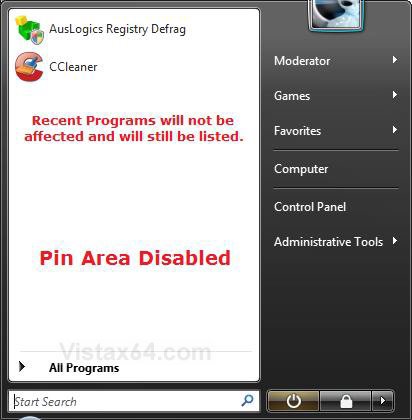
This does not affect the Recent Programs list in the Start menu. If you have this enabled, they will still be listed.
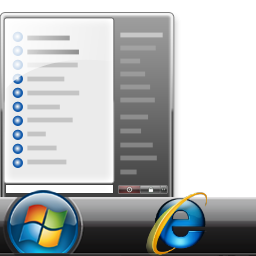
NOTE: Notice how the lower half Recent Programs list in the enabled Start menu pin area is not affected when the Pin area is disabled. Only the Pinned Programs and Folders are removed at the top. If you do not have Recent Programs enabled, then the left white side of the Start menu (right screenshot) will be completey blank instead if this.
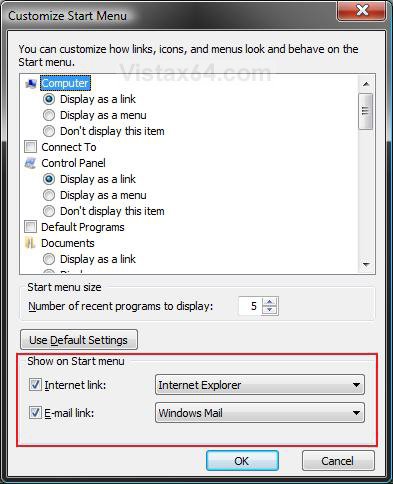
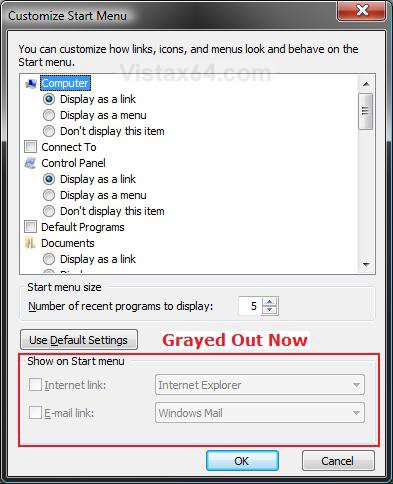
EXAMPLE: Customize Show on Start menu with Pin area Enabled and Disabled NOTE: When the Pin area is disabled, these options boxed in red will be grayed out.
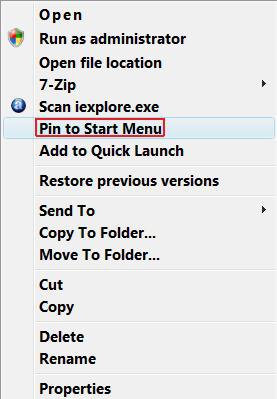
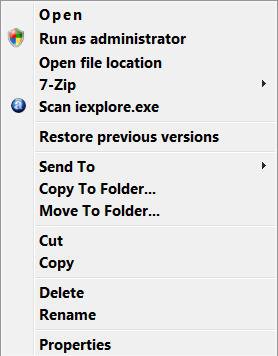
EXAMPLE: Context Menu with Pin area Enabled and DisabledNOTE: When the Pin area is disabled, the Pin to Start Menu context menu item is removed.
 OPTION ONE
1. Open the all users, specific users or groups, or all users except administrators Local Group Policy Editor for how you want this policy applied.
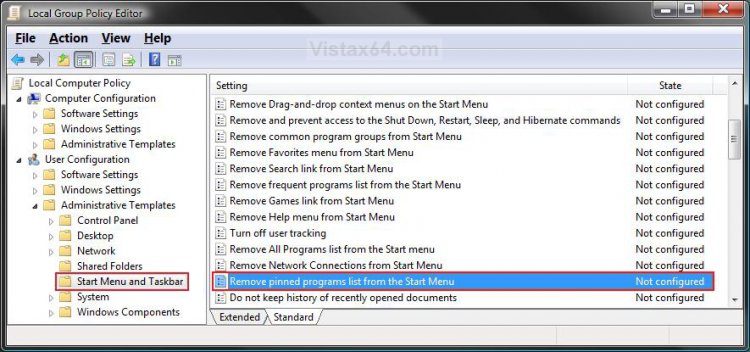
2. In the left pane, click on User Configuration, Administrative Templates, and Start Menu and Taskbar. (See screenshot below)
3. In the right pane, right click on Remove pinned programs list from the Start Menu and click on Properties. (See screenshot above)
4. To Enable Pin to Start Menu
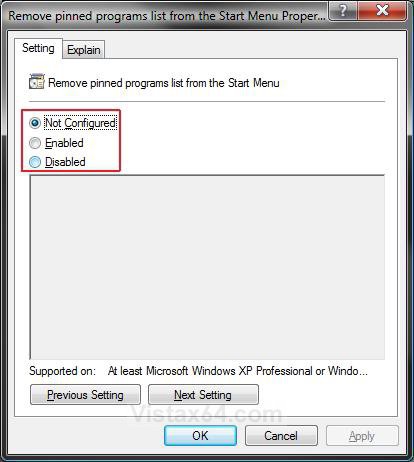
A) Select (dot) Disabled or Not Configured and click on OK. (See screenshot belowstep 5A)
NOTE: Not Configured is the default setting.
B) Go to step 6.
5. To Disable Pin to Start Menu
A) Select (dot) Enabled and click on OK.
6. Close the Local Group Policy Editor window. Your done.
 OPTION TWO
1. To Disable Pin to Start Menu
A) Click on the Download button below to download the file below.
Disable_Pin_To_Start_Menu.reg
B) Go to step 3.
2. To Enable Pin to Start Menu
NOTE: This is the default setting.
A) Click on the Download button below to download the file below.
Enable_Pin_To_Start_Menu.reg
3. Click on Save, and save the .reg file to the Desktop.
4. Right click on the downloaded .reg file and click on Merge.
5. Click on Run, Continue (UAC), Yes, and then OK when prompted.
6. When done, you can delete the downloaded .reg file if you like.
7. Log off and log on, or restart the computer to apply changes.
 OPTION THREE
1. Open the Start Menu.
2. In the white line (Start Search) area, type regedit and press Enter.
3. Click on the Continue button in the UAC prompt.
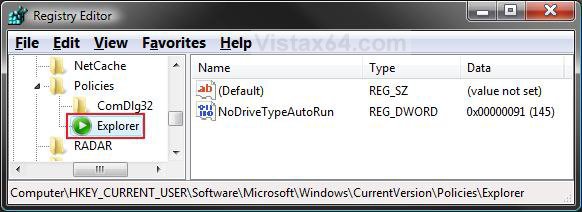
4. In regedit, go to: (See screenshot below)
HKEY_CURRENT_USER\Software\Microsoft\Windows\CurrentVersion\Policies\Explorer
5. To Disable Pin to Start Menu
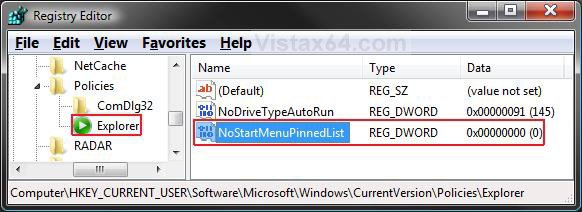
A) In the right pane of Explorer, right click on a empty area and click on New and DWORD (32-bit) Value. Type NoStartMenuPinnedList and press Enter. (See screenshot below)
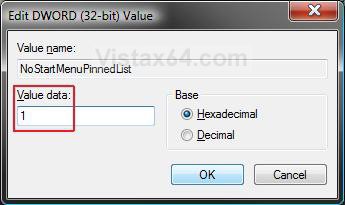
B) Right click on NoStartMenuPinnedList and click on Modify.
C) Type 1 and click on OK. (See screenshot below)
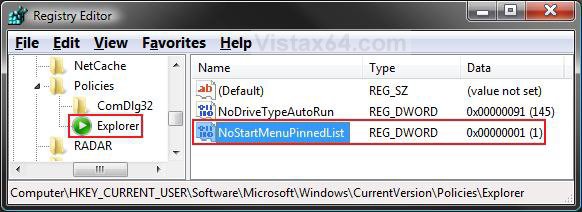
D) The registry will now look like this. (See screenshot below)
E) Go to step 7.
6. To Enable Pin to Start Menu
NOTE: This is the default setting.
A) In the right pane of System, right click on NoStartMenuPinnedList and click on Delete. (See screenshot above)
B) Click on Yes to confirm deletion.
7. Close regedit.
8. Log off and log on, or restart the computer to apply changes.
That's it,Shawn
Related Tutorials
- How to Customize the Start Menu in Vista
- How to Change the Start Menu to Classic View in Vista
- How to Turn the Recent Items List On or Off in Vista
- How to Pin a Program to the Start Menu in Vista
- How to Pin a Folder to the Start Menu in Vista
- How to Reset the Pin To Start Menu Area in Vista
- How to Backup and Restore Pinned Start Menu Items in Vista
- How to Enable or Disable Start Menu Auto Arrange by Name in Vista and Windows 7
Attachments
Last edited:

