How to Import & Export Favorites in Internet Explorer
INFO: This tutorial explains the procedure for exporting and importing your favorites in IE7.NOTE: This tutorial concentrates on favorites, but the same procedure can be applied if you want to follow this method for managing your cookies and feeds. In this case, some of the dialogue boxes may be slightly different, but the principal is the same. See the section on E-mail for information on importing an attachment.
DEFAULT FILENAMES:
FAVORITES bookmark.htm
COOKIES cookies.txt
FEEDS feeds.opml
1) These options are found when you click 'Add to Favorites' (the yellow star with a green plus sign).
2) One of the options here is 'Import and Export...'. Select this option. This starts the 'Import/Export' wizard.
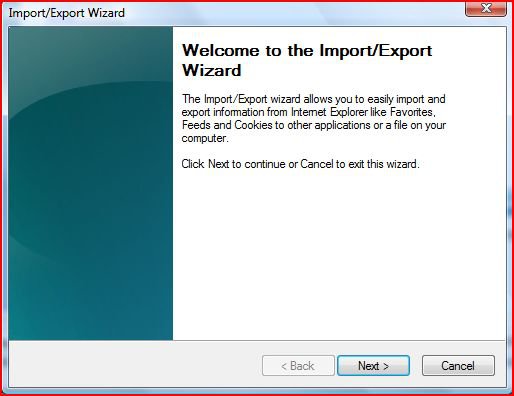
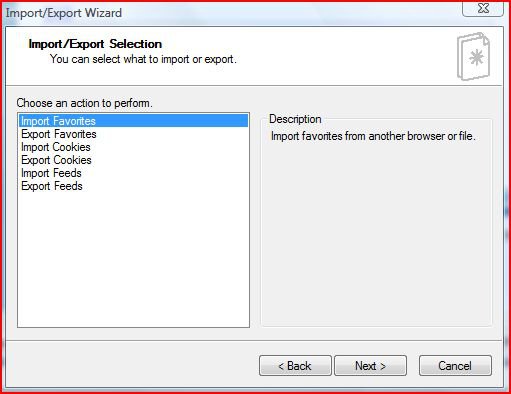
3) Click 'Next >' to continue. On the next screen, 'Import/Export Selection', you can select what to import or export - the options are Favorites, Cookies and Feeds, but the other options are dealt with in exactly the same way. For Exporting, continue to the next section, 'Exporting', else for Importing jump to the section headed 'Importing'.
EXPORTING
4) Exporting Favorites - select 'Export Favorites' and then click 'Next >'.
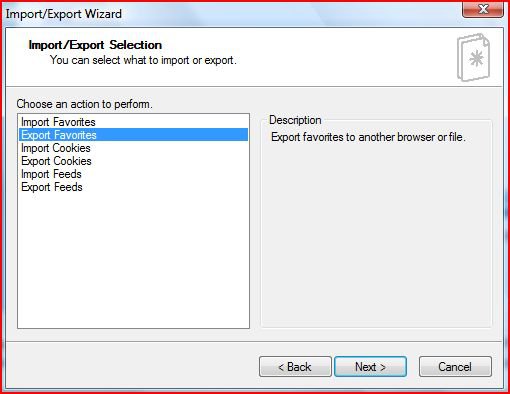
5) The 'Export Favorite Source Folder' dialogue screen appears.
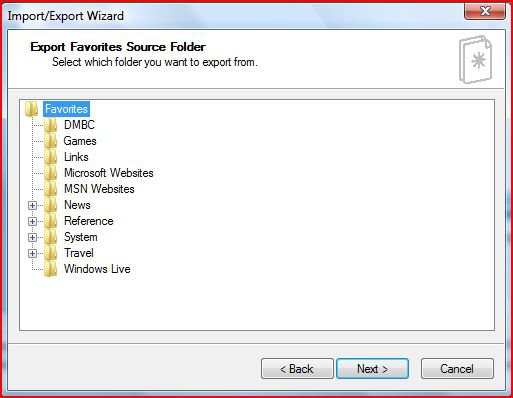
6) You can either choose the default selection, in which case all favorites will be exported, or you can choose a specific item. Note that you cannot select more than 1 item at a time. When you have made your selection, click 'Next >'. This brings up the 'Export Favorites Destination' dialogue, with the option 'Export to a File or Address' already selected.
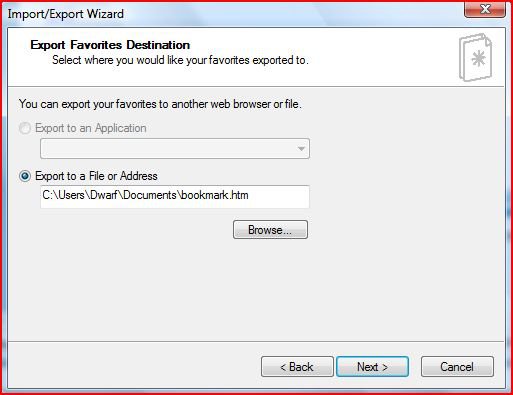
7) Click 'Browse...' and then click to expand the 'Browse Folders' option.
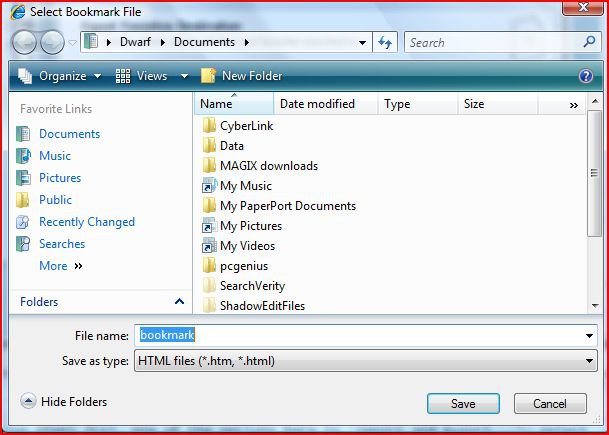
8) Under the section 'Favorite Links', in the left hand panel, click 'More >>'. From the sub-menu that appears, click 'Computer'.
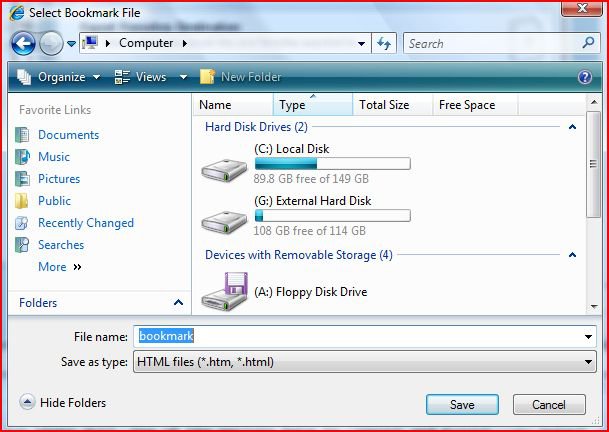
9) In the right hand panel, select the required drive or partition, in this case the 'G' drive/partition.
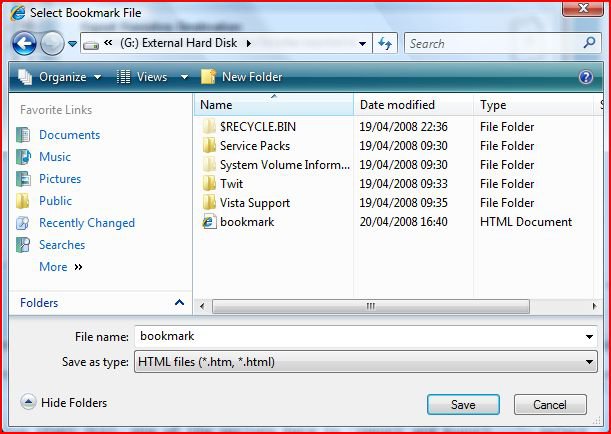
10) You can then select a folder from this destination or you can choose to save the file in the root directory. When you have selected the destination, click 'Save'. This takes you back to the 'Export Favorites Destination' dialogue, with the destination you selected in the 'Export to a File or Address' box.
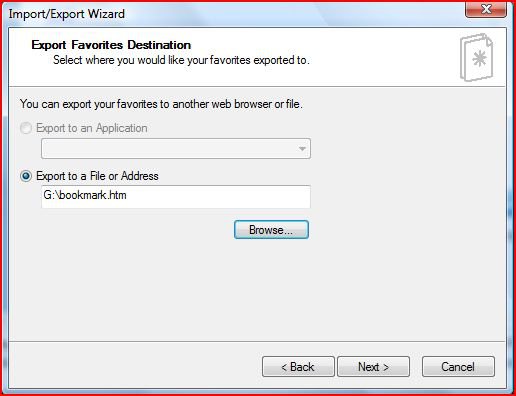
11) If this is correct, click 'Next >', otherwise click 'Browse...' to restart the destination selection process from step 6. You can also change the filename and address manually in the 'Export to a File or Address' box by simply over-writing what is already there - in this case, 'G:\bookmark.htm' will cause the favorites file to be saved under its default filename in the root folder of G:\. When you click 'Next >' you might see a dialogue saying that the file already exists and asking whether or not you want to replace it.
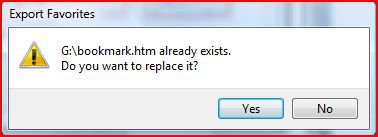
12) If you click 'No' at this point, you are taken back to the 'Export Favorites Destination' dialogue at step 6 so that you can choose another destination. If this dialogue doesn't appear, or you click 'Yes', the 'Completing the Import/Export Wizard' dialogue will appear.
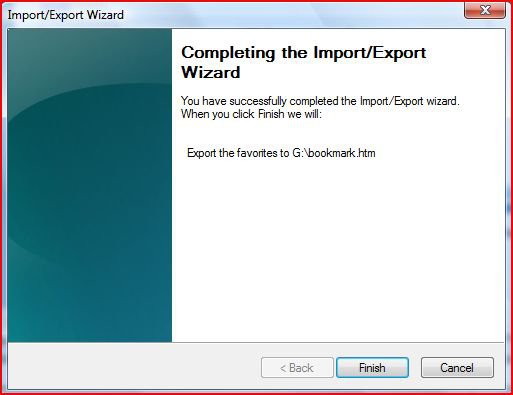
13) Click 'Finish' to confirm the procedure or 'Cancel' to abandon it. When you click 'Finish', a dialogue box will appear confirming your action.

14) Click 'OK' to close the dialogue boxes.
IMPORTING
15) Importing Favorites - select 'Import Favorites' and then click 'Next >'.
16) This brings up the 'Import Favorites Source' dialogue, with the option 'Import from a File or Address' already selected.
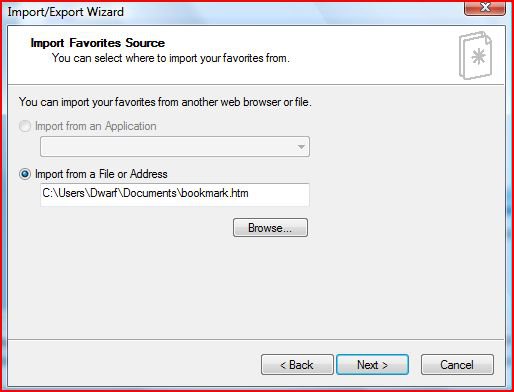
17) You can select the source address using the same method as described in sections 7-9 above. You can also change the filename and address manually as described in section 11. When you have selected the source and returned to the 'Import Favorites Source' dialogue, click 'Next >' to proceed.
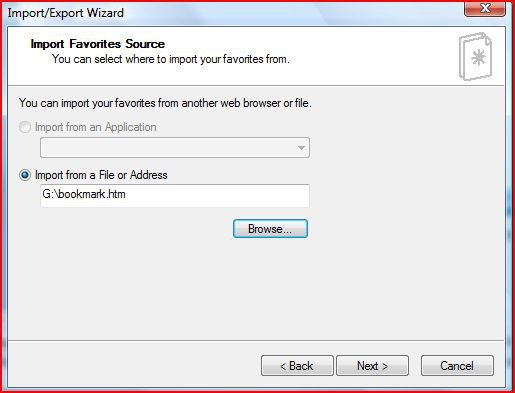
18) In the 'Import Favorites Destination Folder', accept the default.
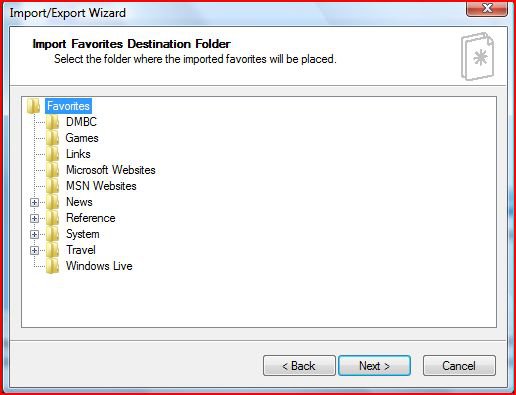
19) Click 'Next >'. The 'Completing the Import/Export Wizard' dialogue will appear.
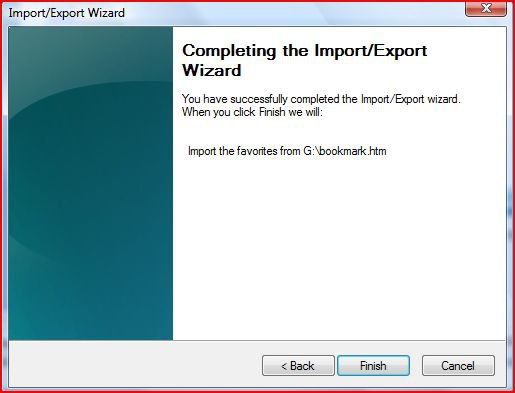
20) Again, click 'Finish' to confirm the procedure or 'Cancel' to abandon it. If you click 'Finish', a dialogue box appears confirming your action.

21) Click 'OK' to close the dialogue boxes.
22) You can, of course, choose to export the file created in the exporting section above as an e-mail attachment. However, on the recipient's machine, this attachment will not import without modification. Firstly, save the e-mailed attachment. Next, right click on it and select 'Edit'. An example of the resultant header is given below. To allow the file to import correctly, you need to delete the first line beginning with '<!-- saved from url=...' and then re-save the file. You should then be able to import the file successfully as described in the importing section above.

Attachments
Last edited by a moderator:


 Ted
Ted