How to Restore the Start Menu Search Button after Installing the Vista SP1
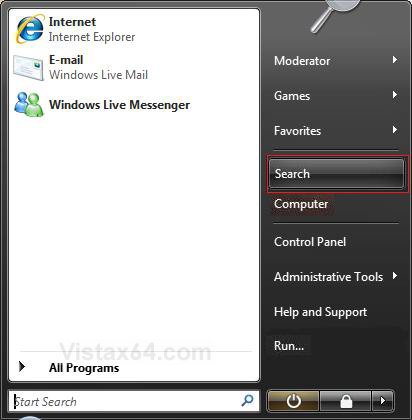
When you install the Vista SP1 it will remove the Search button option from the Start menu. This will show you how to restore the Search button on the right dark side of the Start menu after you installed the Vista SP1.
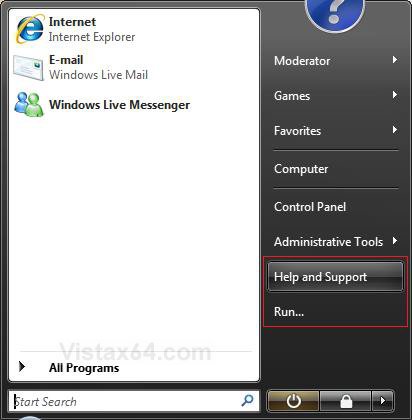
You will be adding Search button back to the right dark side of the Start menu by replacing either the Help and Support button or Run button with Search. If you prefer to not replace either one of these, then you can create a Search shortcut and Pin it to the left side of the Start menu instead. See: How to Create a Search Desktop Shortcut on Vista
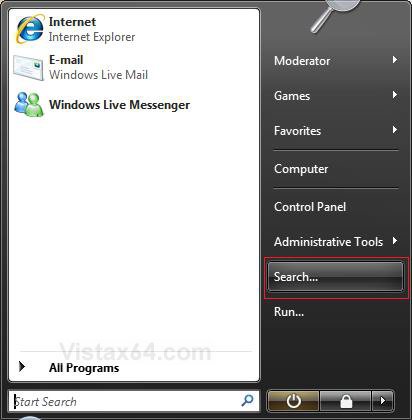
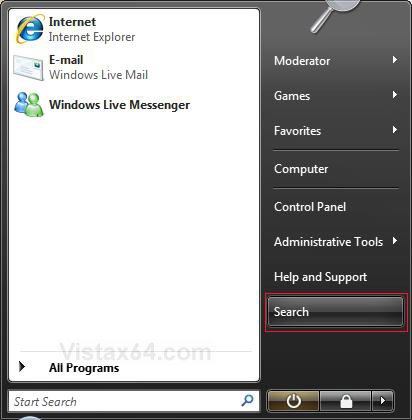
EXAMPLE: Search button in the Start Menu Before and After Installing the Vista SP1
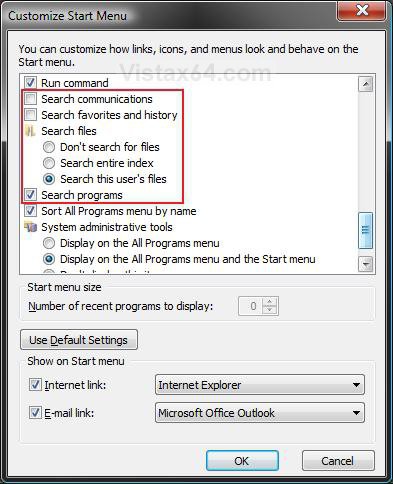
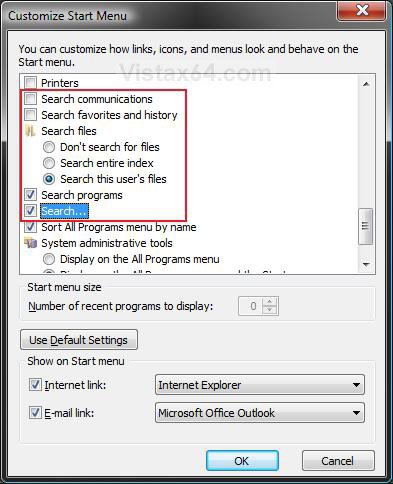
EXAMPLE: Search option in the Customize Start Menu window after Vista SP1NOTE: The left screenshot is after installing the Vista SP1. The right screenshot is after you replaced either Run command or Help and Support with Search. This will show you how to enter the Customize Start Menu window: How to Customize the Start Menu in Vista
 OPTION ONE
1. To Replace Help and Support with Search
A) Click on the Download button below to download the file below.
Replace_Help_with_Search.reg
B) Go to step 3.
2. To Restore Help and Support
A) Click on the Download button below to download the file below.
Restore_Help.reg
3. Click on Save, and save the .reg file to the Desktop.
4. Right click on the downloaded .reg file, and click on Merge.
5. Click on the Run, Continue (UAC), Yes, and then OK when prompted.
6. Log off and log on, or restart the computer to apply the changes.
7. When done, you can delete the downloaded .reg file if you like.
8. Your Start menu will now look like this. (See screenshot below)
 OPTION TWO
1. To Replace Run with Search
A) Click on the Download button below to download the file below.
Replace_Run_with_Search.reg
B) Go to step 3.
2. To Restore Run
A) Click on the Download button below to download the file below.
Restore_Run.reg
3. Click on Save, and save the .reg file to the Desktop.
4. Right click on the downloaded .reg file, and click on Merge.
5. Click on the Run, Continue (UAC), Yes, and then OK when prompted.
6. Log off and log on, or restart the computer to apply the changes.
7. When done, you can delete the downloaded .reg file if you like
8. Your Start menu will now look like this. (See screenshot below)
That's it,
Shawn
Related Tutorials
- How to Open and Change Search Options in Vista
- How to Enable or Disable Search Index in Vista
- How to Use the Indexing Options in Vista
- How to Use the Find Window to Find Text on a Page
- How to Change the Internet Explorer 7 Search Box Settings in Vista
- How to Use Advanced Search Options in Vista
- How to Restore the Search Context Menu Item after Installing the Vista SP1
- How to Create a Search Desktop Shortcut on Vista
- How to Enable or Disable the Taskbar and Start Menu Properties Window in Vista
- How to Restore Missing Default Start Menu Shortcuts in Vista
- How to Fix the Games Explorer Link in the Vista Start Menu
- How to Add "Search" to "My Computer" Context Menu in Vista and Windows 7
Attachments
Last edited:




 LOL
LOL