How to View and Browse a Computer or Device on a Network in Vista
If your computer is connected to a network, you can see all of the computers and devices that are currently part of the network in the Network folder. This will show you how to browse a network so you can share a printer or files on another computer in the network that are allowed to be shared.
- If you change the name of a file or folder after you have shared it with someone, the previous link you sent them will not work. You should send them a link to the new location instead.
- When a computer on the network has password protected sharing turned on (STEP THREE step 8 below), you will need to create a user account with a password on that computer to be able to connect to and browse that computer for sharing.
- To prevent shared folder connection failures, use your same computer user account username and password when creating a user account on each other computer on the network you want to share with.
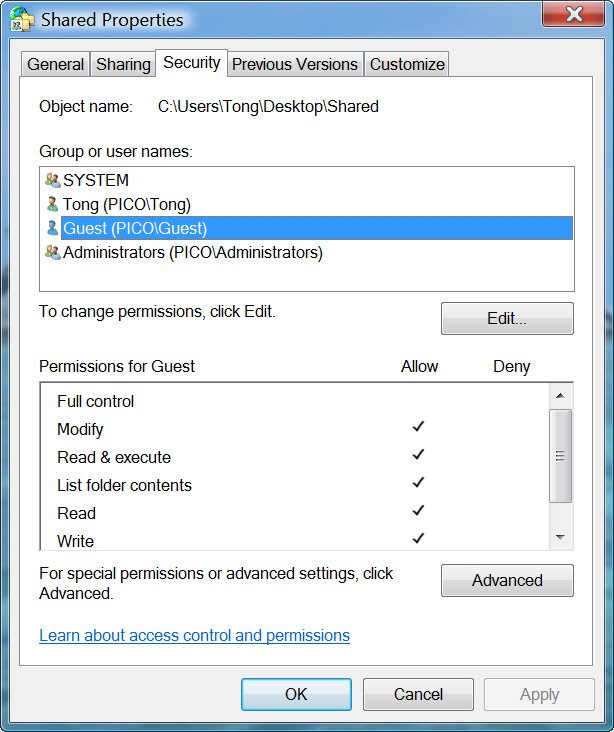
- If password protected sharing is turned off, computers on a network that do not have a user account with a password on your computer will need to use the Guest account. The Guest account must be turned on for them and allowed to share the file or folder.
 STEP ONE
1. Set the Workgroup Settings
A) Make sure all computers on the network have the same workgroup name.
2. Set the Computer Name Settings
A) Make sure that each computer on the workgroup has a unique computer name so they can identify and communicate with each other on the network.
3. Set the Network Location Type Settings
A) Change the network location type to Private.
4. Set the Network Discovery Settings
NOTE: Step 3 should turn this on by default, but it is a good idea to double check to make sure.
5. Set File Sharing Settings
NOTE: Step 3 should this on by default, but it is a good idea to double check to make sure.
A) Turn File Sharing on.
6. Set Windows Firewall Settings
NOTE: If you are using a 3rd party firewall you might have to change its settings to allow File and Printer Sharing to.
A) Check the exception File and Printer Sharing to allow access.
 STEP TWO
1. Through the Control Panel
A) Open the Control Panel (Classic view).
B) Click on the Network and Sharing Center icon.
C) Go to step 3.
2. Through the Network System Tray Icon
A) Right click on the taskbar Network system tray icon.
B) Click on Network and Sharing Center.
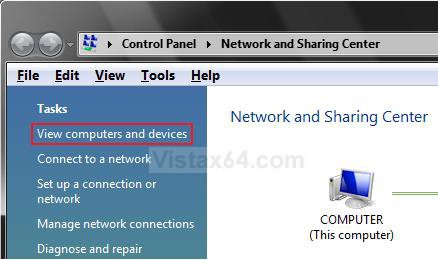
3. Click on View computers and devices. (See screenshot below)
A) Go to step 5.
4. Through the Start Menu Network Button
A) Open the Start Menu.
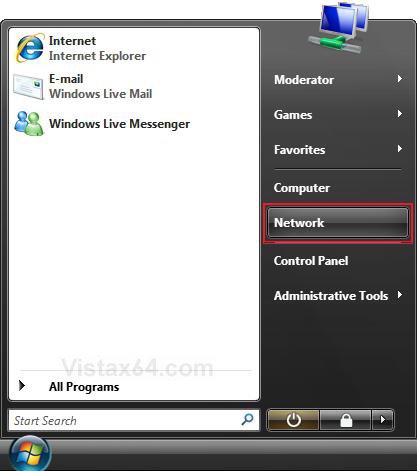
B) Click on the Network button. (See screenshot below)
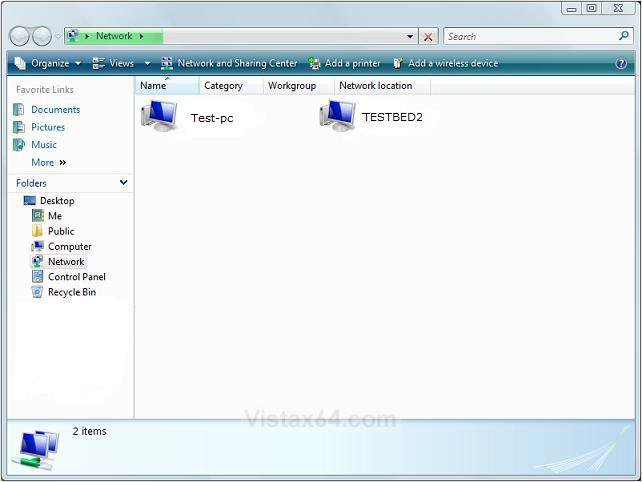
5. After a moment, you should see a list of computers and devices that your computer found on the network. (See screenshot below step 6)
NOTE: It might take several minutes for computers running previous versions of Windows to appear in the Network folder.
 STEP THREE
6. Through the Network Folder
NOTE: From Step Two above.
A) Click on a listed network Computer or Device that you want to browse or connect to. (See screenshot below)
B) Go to step 8.
7. Through the Run Command Window
A) Open Run.
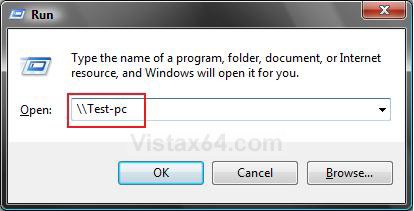
B) Type in the: \\ComputerName or \\Ip Address of the computer on the network. (See screenshot below)
NOTE: For example, this computer name: \\Test-pc
To see what yours is, see: How to Change the Computer Name in Vista and How to Find the Computer IP Address in Vista
C) Click on OK.
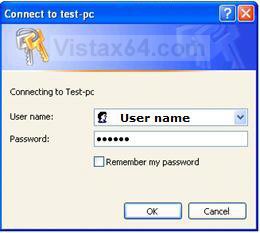
8. If the computer on the network has Password Protected Sharing turned on, then you will be prompted for a username and password before you will be allowed to connect to the computer. (See screenshot below)
A) Type in your username and password for the user account that you have created on that computer.
NOTE: If you do not have a user account created on that computer, then see the WARNING at the top of this tutorial.
B) Click on OK.
9. You will now be connected to the computer or device to be able to browse it.
That's it,Shawn
Related Tutorials
- How to Change the Network Location Type in Vista
- How to Turn Network Discovery On or Off in Vista
- How to Turn Password Protected Sharing On or Off in Vista
- How to Change the Computer Name in Vista
- How to Change the Workgroup Name in Vista
- How to Turn File Sharing On or Off in Vista
- How to Turn Public Folder Sharing On or Off in Vista
- How to Find the Computer IP Address in Vista
- How to Enable Simple File Sharing in Vista
- How to Turn the Guest Account On or Off in Vista
- How to Disconnect a Network User Connection in Vista
- How to Create a Local Area Network Connection Status Shortcut in Vista
- How to Create a Network Connections Shortcut in Vista
- How to Hide or Unhide Your Vista Computer Name in a Network
- How to Change the Network Idle Session Time to Automatically Disconnect in Vista
Attachments
Last edited by a moderator:

