How to Change the Workgroup Name in Vista
When you first set up Vista or connect to a network, Vista automatically creates a workgroup and gives it a default name of WORKGROUP. Computers in a workgroup network must all have the same workgroup name in order to join that workgroup. This will show you how to change your computer workgroup name so you can create or join a workgroup.
In a workgroup all computers are peers; no computer has control over another computer. Each computer has their own user accounts, so you cannot use another computer in the workgroup unless you have a user account setup on that computer.
If you change the name of an existing workgroup, a new workgroup will be created with that name instead. If your computer was a member of a domain before you joined the workgroup, it will be removed from the domain and your computer account on that domain will be disabled. Computers on a workgroup must have a unique computer name so they can identify and communicate with each other.
Here's How:
1. Open the Start menu.
A) Right click on the Computer button and click Properties.
B) Go to step 3.
OR
2. Open the Control Panel (Classic View).
A) Click on the System icon.
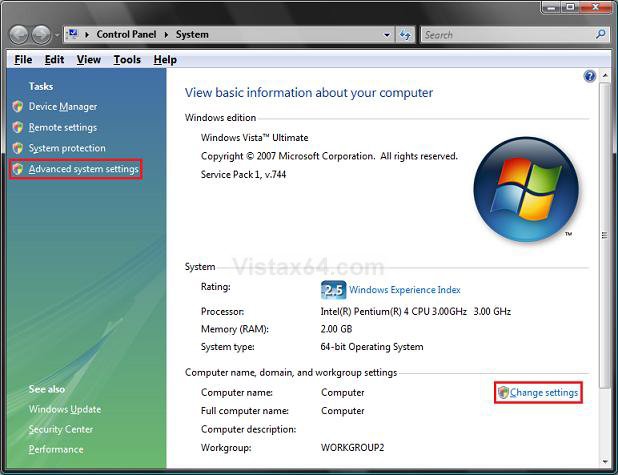
3. Click on either Advanced System Settings in the left column, or Change settings. (See screenshot below)
4. Click on Continue in the UAC prompt.
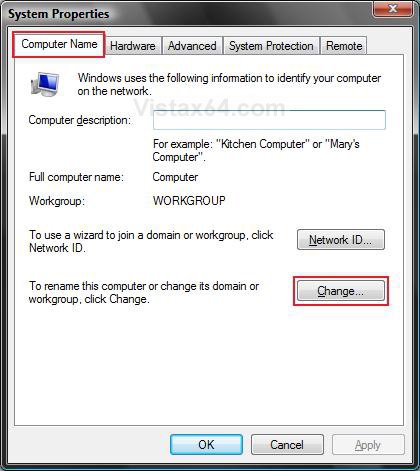
5. Click on the Computer Name tab, then click on the Change button. (See screenshot below)
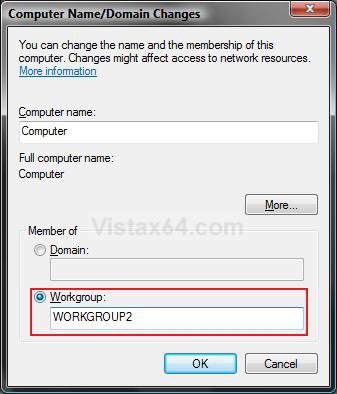
6. Under Member of, dot Workgroup. (See screenshot below)
7. Type in the name of the workgroup that you want to create or join and click OK.
NOTE: Make sure the workgroup name is not more than 15 characters, and do not use characters like these:
` ~ @ # $ % ^ & ( ) = + [ ] { } | ; : , ‘ “ . < > / ?
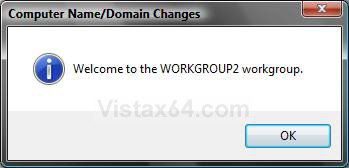
8. Click on OK. (See screenshot below)
NOTE: Notice the new workgroup name.
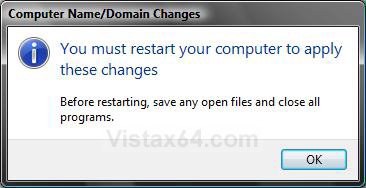
9. Click on OK. (See screenshot below)
NOTE: This does not restart the computer yet.
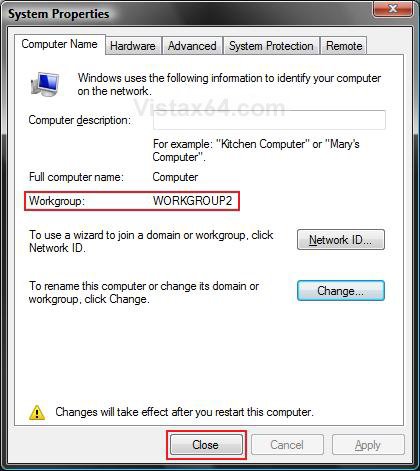
10. Click on Close. (See screenshot below)
NOTE: Notice the new workgroup name.
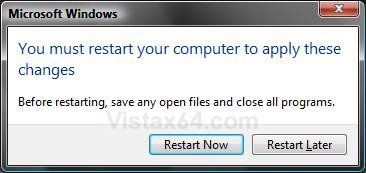
11. Click on Restart Now. (See screenshot below)
WARNING: Be sure to save and close anything else you have open first.
12. After the restart, you can go back to step 3 and verify the new workgroup name.
That's it,Shawn
Related Tutorials
- How to Change the Network Location Type in Vista
- How to Change the Computer Name in Vista
- How to Fix a Password Not Being Accepted When Connecting to a Workgroup Computer in Vista
- How to Turn Network Discovery On or Off in Vista
- How to Turn Public Folder Sharing On or Off in Vista
- How to Turn File Sharing On or Off in Vista
- How to View and Browse a Computer or Device on a Network in Vista
- How to Enable Simple File Sharing in Vista
- How to Disconnect a Network User Connection in Vista
- How to Hide or Unhide Your Vista Computer Name in a Network
- How to Change the Network Idle Session Time to Automatically Disconnect in Vista
Attachments
Last edited:

