How to Restore Previous Versions of a File and Folder in Vista
This will show you how to restore Previous Versions of a file or folder from a list of previous versions (shadow copy) at different points in time to choose from. Shadow copies are automatically saved as part of a system restore point. When System Restore is turned on (it is by default), Vista automatically creates shadow copies of any files that have been changed since the time the last restore point was made. Restore points are created once per day and before significant system events such as program or driver installation. You can also manually create a restore point anytime you want to. For more information, see: Microsoft TechNet: Selected Scenarios for Maintaining Data Integrity with Windows Vista
This is only available for the Ultimate, Business, and Enterprise editions of Windows Vista. For the other Vista editions, you might try this free alternative:
ShadowExplorer.com - About
ShadowExplorer.com - About
- To change the amount of space that shadow copy can use on your hard drive, see: How to Change the System Restore Disk Space Usage in Vista. This is the same space used by System Restore.
- If you run low on disk space and need or want to recover all available space, you can use Disk Cleanup to delete all but the most recent restore point (shadow copy). See step 15 here, How to Use Disk Cleanup in Vista
Previous Versions Requirements
- Turn on System Protection for the drive(s) that you want to have previous versions of it's files and folders available.
- Have any files that are not system files you want to also have previous versions of included in Windows Backups when created.
- Volume Shadow Copy - Service set as default of Manual.
- Server - Service set as default of Started and Automatic.
- TCP/IP NetBios Helper - Service set as default of Started and Automatic.
- Workstation - Service set as default of Started and Automatic.
Here's How:1. For a Current File or Folder
NOTE: To restore a previous version of a file or folder that a is still located in it's location. Not deleted.
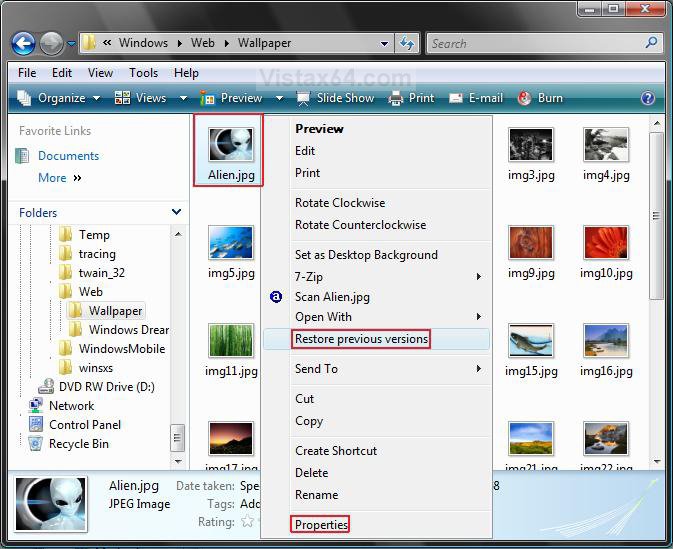
A) Right click on the file or folder.
B) Click on either Properties or Restore previous versions. (See screenshot below)
C) Go to step 3.
2. For a Deleted File or Folder
NOTE: This is for a file or folder that is no longer in the folder where it was originally located. You will need to do this in the folder that the file or folder was originally located to restore it.
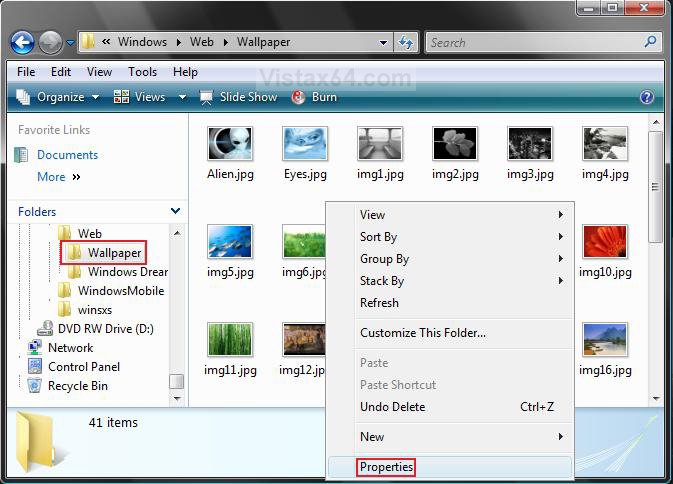
A) Right click on a empty area in a Windows Explorer window for the original folder location. (See screenshot below)
OR
B) Right click on the folder in the Windows Explorer Navigation Pane.
C) Click on Properties.
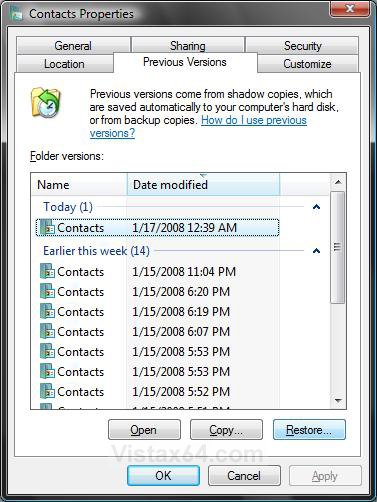
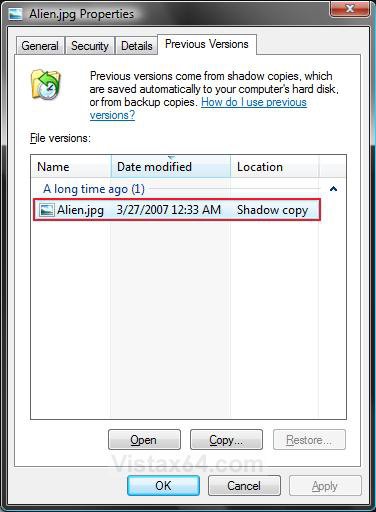
3. Click on the Previous Versions tab. (See screenshots below)
NOTE: All files and folders will have a activated Restore button option except for the ones in C:\Windows.
4. Select a previous version date that you want to restore by letting your pointer hover over it until it is highlighted.
5. To View the File or Folder Previous Versions
NOTE: This will open a separate window where you can view the contents of the selected previous version.
A) Click on the Open button, or on one of the dated previous versions. (See screenshots above)
6. To Copy the File or Folder Previous Version to a Selected Location
NOTE: You can use this to copy a previous version to another location or the same location to replace the original. For example, the C:\Windows location since it does not have a activated Restore button.
A) Click on the Copy button. (See screenshots below step 4)
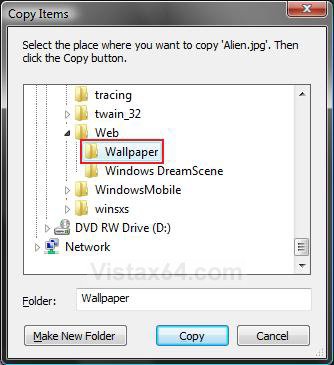
B) Navigate to the location you want to place the copy of the previous version of the file or folder. (See screenshot below)
NOTE: If you would like to create a new folder to put the previous version in at that location first, then click the Make New Folder button and type a name for it.
C) Click on the Copy button.
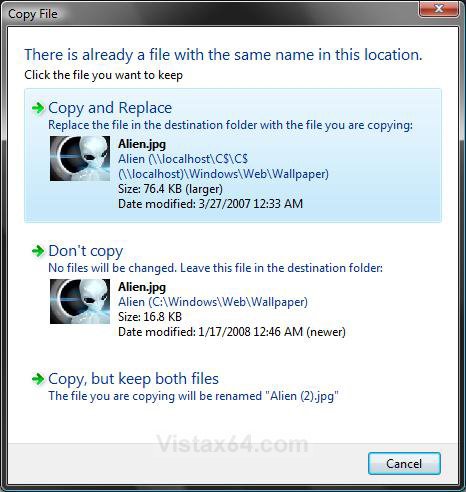
D) If there is a current copy of the file or folder in that same location, then click on the option you want to do. (See screenshot below)
7. To Restore the File or Folder Previous Version
NOTE: This will replace the current file or folder with the selected previous version.
A) Click on the Restore button. (See screenshots below step 4)
NOTE: The Restore button is grayed out for files and folders in the C:\Windows location.
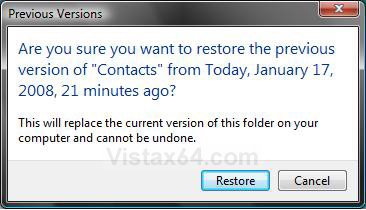
B) Click on the Restore button. (See screenshot below)
C) Click on OK. (See screenshot below)
That's it,
Shawn
Related Tutorials
- How to Do a System Restore in Vista
- How to Change the System Restore Disk Space Usage in Vista
- How to Disable or Enable System Restore in Vista
- How to Create a Complete Computer Backup and Restore Image in Vista
- How to Restore the Complete Computer from a Complete Backup and Restore Image in Vista
- How to Backup Files with Optional Automatic Backups in Vista
- How to Restore Backup Files in Vista
- How to Use Disk Cleanup in Vista
- How to Create a System Restore Point in Vista
- Cannot Rename or Move a File or Folder in Vista Fix
- How to Enable or Disable Backup Status and Configuration in Vista
- How to Restore or Remove Previous Versions Tab from Properties in Vista
- Context Menu - Restore Previous Versions - Restore or Remove from Context Menu
- How to Stop System Restore Points from being Deleted in Vista when Dual Booting with XP
- How to Extract Vista System Image Files Using Virtual PC 2007
- How to Hide or Show Previous Versions of Files from a Backup Location
- How to Hide or Show Previous Versions of Files from File Shares
- How to Delete Shadow Copies in Vista and Windows 7
Attachments
Last edited by a moderator:

