How to Save and Print a Directory List for a File and Folder in Vista
This will show you how to easily create a file and folder directory list that you can print and save to disk as a file. You can include the name of every file on a drive, along with the file's size, date and time of last modification, and attributes (Read-Only, Hidden, System and Archive). The list of files can be sorted by name, size, date created, date last modified, or date of last access.
This way you do not want to mess with the DIR command codes.
I would recommend that you try the Save to Disk option first to adjust your settings and see how it looks in the text file. This way you will see how it will print before wasting any ink and paper in the Print option.
 METHOD ONE
1. For how, see: How to Add View and Print File Directory to the Context Menu in Vista
 METHOD TWO
1. Go to this site: Karen's Directory Printer Download Site
2. Download and install the free Karen's Directory Printer program.
NOTE: Program written by: Karen Kenworthy. The program shortcut will be placed in the Start Menu under All Programs\Karen's Power Tools\K Directory Printer.
 Option One
1. Run the Karen's Directory Printer program.
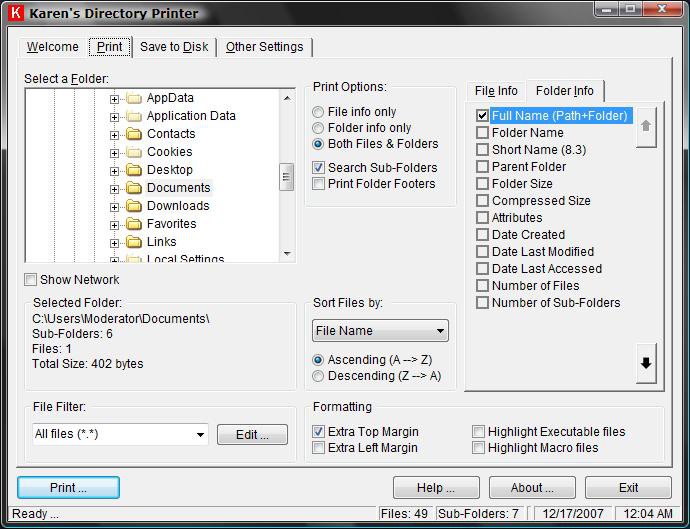
2. Click on the Print tab. (See screenshot below step 4)
3. Select a Folder and Options you want to print.
NOTE: When you hover the pointer over a option it will give you pop-up description of it. If you need more information or help, then click on the Help button.
4. Click on the Print button when done.
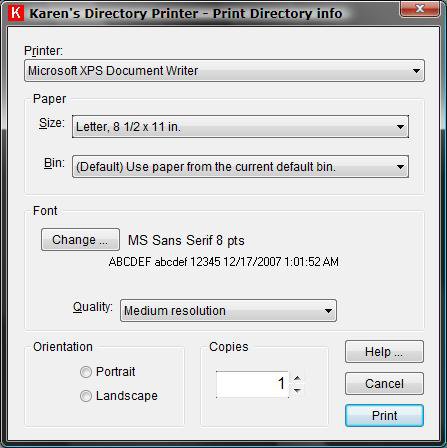
5. Set your printer settings and click on Print. (See screenshot below)
 Option Two
1. Run the Karen's Directory Printer program.
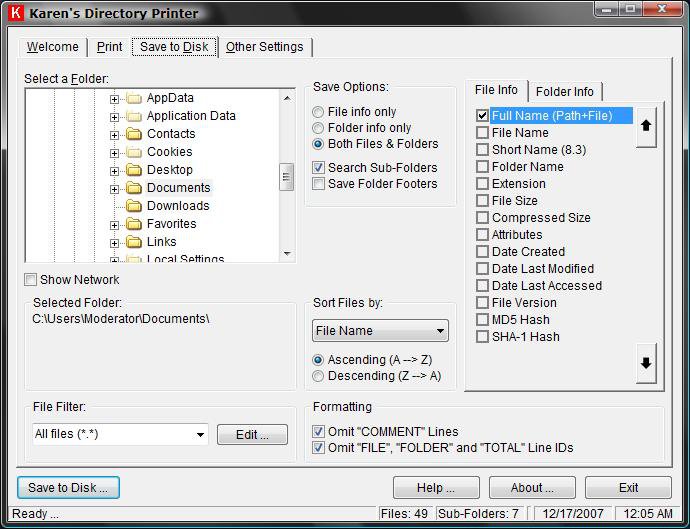
2. Click on the Save to Disk tab. (See screenshot below step 4)
3. Select a Folder and Options you want to save to file. (EX: TXT file)
NOTE: When you hover the pointer over a option it will give you pop-up description of it. If you need more information or help, then click on the Help button.
4. Click on the Save to Disk button when done.
5. Choose a save location and type a name for the file, then click on Save. (See screenshot below)
NOTE: Click on Browse Folders to navigate to another save location.
That's it,
Shawn
Attachments
Last edited by a moderator:


 Also, the /b command only removes the summary and heading, which in some cases is good but if you would like to for detailed purposes, its nice to do without. Again, thanks for the tip!