How to Create a Switch User Desktop Shortcut in Vista
This will show you how to create or download a Switch User shortcut that you can place anywhere you like for easy use. For example, the desktop. The shortcut will take you to the Switch User logon screen where you can select a user account that you would like to logon to.
Fast User Switching or Switch User is a feature in Windows that allows you to switch to a different user account on your computer without having to close any programs and files first in the user account that you are currently logged on to, and then be able to switch right back where you left off. This makes it easier to share a computer with others.
The Vista Home Basic and Home Premium editions do not support this shortcut since they do not have the C:\Windows\System32\tsdiscon.exe file. It is a part of Terminal Services. An alternative for these editions is to create a Lock Computer shortcut instead and click on the Switch User button after clicking on the Lock Computer shortcut.
CREDIT TO: Ronnie Vernon MVP
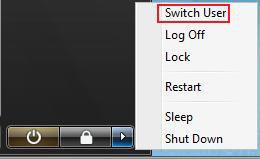
EXAMPLE: Default Switch User Location in the Start Menu
 head
head 
1. Click on the download button below to download the Switch_User.zip file.
2. Click Save and save it to the Desktop.
3. Right click on Switch_User.zip (On desktop) and click on Open.
4. Click on Allow in the UAC prompt.
5. Extract the Switch User shortcut to the desktop.
6. Move the Switch User shortcut (on desktop) to where you like to use it at.
NOTE: If you would like to assign a keyboard shortcut to this shortcut, then see How to Create a Keyboard Shortcut for a Program in Vista.
7. When done, you can delete the Switch_User.zip file.
 METHOD TWO
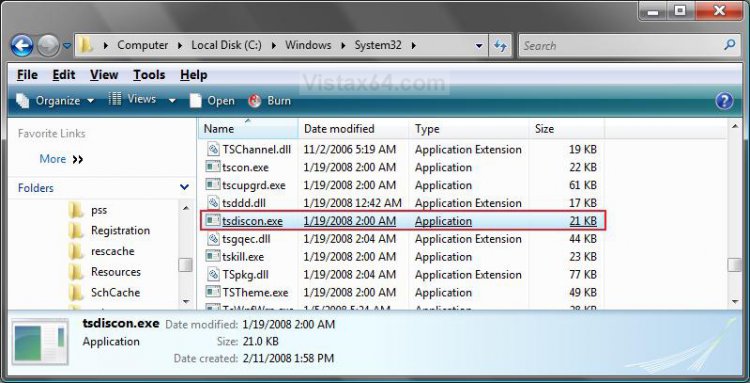
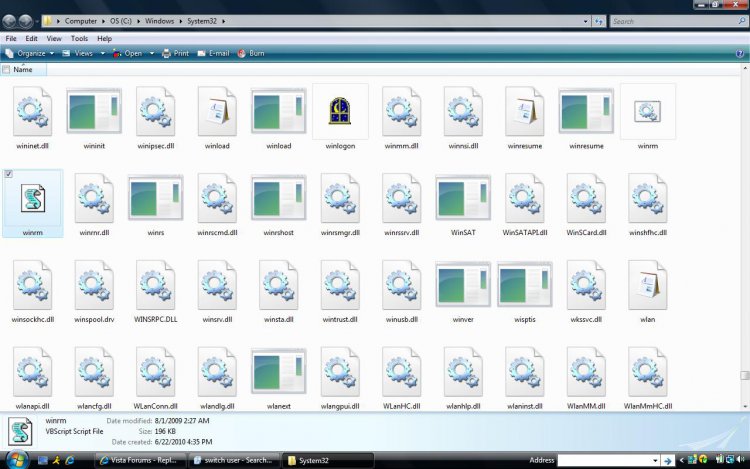
1. Navigate to C:\Windows\System32\tsdiscon.exe in a Windows Explorer window. (See screenshot below)
2. Right click on tsdiscon.exe and click on Send To, then Desktop (create shortcut).
3. Close the Windows Explorer windows.
4. Right click on the new shortcut on the desktop and click on Rename.
5. Type Switch User and press Enter.
NOTE: You can name the shortcut anything you like though.
6. Right click on the Switch User shortcut on the desktop and click on Properties.
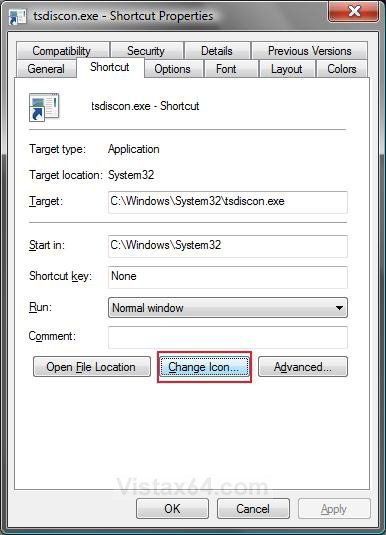
7. Click on the Shortcut tab, then click on the Change Icon button. (See screenshot below)
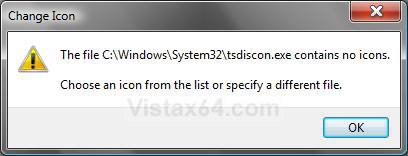
8. Click on OK. (See screenshot below)
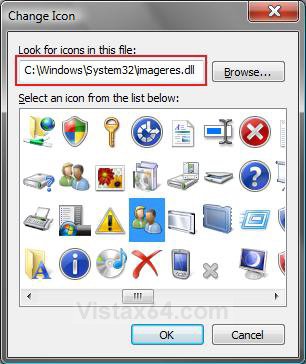
9. Click on Browse and navigate to C:\Windows\System32\imageres.dll. (See screenshot below)
10. Select the icon highlight in blue below and click on OK.
11. Click on OK. (See screenshot below step 7)
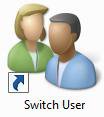
12. You will now have a Switch User shortcut that looks like this. (See screenshot below)
NOTE: If you would like to assign a keyboard shortcut to this shortcut, then see How to Create a Keyboard Shortcut for a Program in Vista.
That's it,
Shawn
Related Tutorials
- How to Create a Hibernate Shortcut in Vista
- How to Create a Log Off Shortcut in Vista
- How to Create a Shutdown Computer Shortcut in Vista
- How to Shutdown, Restart, Switch User, Log Off, Sleep, or Lock Vista from the Keyboard
- How to Disable or Enable Fast User Switching in Vista
- How to Create a Restart Computer Shortcut in Vista
- How to Create a Abort Shortcut in Vista
- How to Add or Remove Lock and Switch User from the Start Menu in Vista
- How to Create a Search Desktop Shortcut on Vista
- How to Create a Lock Computer Shortcut in Vista
- How to Log Off a Local User in Vista
- How to Create a Power Options Shortcut in Vista
- How to Restore the Administrative Tools Shortcuts in Vista
- How to Create a Keyboard Shortcut for a Program in Vista
Attachments
Last edited:

