How to Create a Shortcut for "Show Windows Stacked" or "Show Windows Side by Side"
This will show you how to create a Show Windows Stacked, Show Windows Side by Side, and a Undo Windows shortcut that can be placed where you like them for easy use in Windows 7 and Vista.
These shortcuts will allow you to have open windows on your desktop to either be displayed side by side vertically or stacked horizontally. The UndoWindows shortcut will set the open window back the way they were displayed before clicking on the SideBySide and Stacked shortcuts.
You can minimize the opened windows that you do not want included in the stack to the taskbar before using the scripts below.
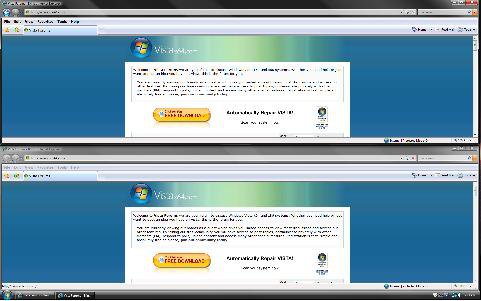
EXAMPLE: Show Windows Stacked on Desktop
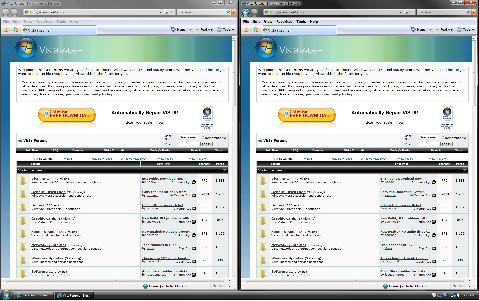
EXAMPLE: Show Windows Side by Side on Desktop
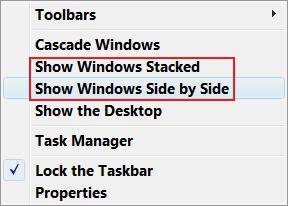
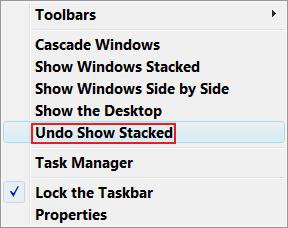
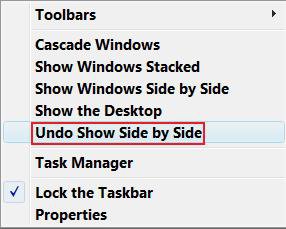
EXAMPLE: Default Shortcuts LocationNOTE: This is the defauly location of these shortcuts. Right click on the taskbar to see these. You will not see Undo Show Stacked or Undo Show Side by Side until after you clicked on either Show Windows Side by Side or Show Windows Stacked.
 OPTION ONE
1. Click on the Download button below to download the
file below.
ShowWindows.zip
2. Click on Save and save it to the Desktop.
3. Right click on the downloaded zip file and click on Open.
4. Click on Allow in the (UAC-Vista).
5. Extract (drag and drop) the Stacked.vbs, SideBySide.vbs, and UndoWindows.vbs files to the desktop.
6. Right click on each extracted vbs file one at a time, and click on Properties, General tab, and on the Unblock button. (See screenshot below)
NOTE: If you do not have a Unblock button under the General tab, then the vbs file is already unblocked.
7. When done, you can delete the Show Desktop.zip (On Desktop) file if you want to.
8. Go to OPTION THREE below.
 OPTION TWO
1. Open the Start menu.
2. To Create the Show Windows Side by Side Shortcut
A) In the white line (Start Search) area type Notepad.exe and press Enter.
B) Copy and Paste this into Notepad: (See code below)
Code:
dim objShell
set objShell = CreateObject("Shell.Application")
objShell.TileVertically
set objShell = nothing
C) In Notepad, click on File and click on Save As.
D) Change the save location to the Desktop.
E) In the File Name line, type SidebySide.vbs and click on Save. (See screenshot below)
NOTE: You can name it anything you would like. Just have .vbs at the end of it.
F) Close Notepad.
3. To Create the Show Windows Stacked Shortcut
A) In the white line (Start Search) area type Notepad.exe and press Enter.
B) Copy and Paste this into Notepad: (See code below)
Code:
dim objShell
set objShell = CreateObject("Shell.Application")
objShell.TileHorizontally
set objShell = nothing
C) In Notepad, click on File and click on Save As.
D) Change the save location to the Desktop.
E) In the File Name line, type Stacked.vbs and click on Save. (See screenshot below)
NOTE: You can name it anything you would like. Just have .vbs at the end of it.
F) Close Notepad.
4. To Create the UndoWindows (Undo Show Side by Side or Stacked) Shortcut
A) In the white line (Start Search) area type Notepad.exe and press Enter.
B) Copy and Paste this below into Notepad: (See code below)
Code:
dim objShell
set objShell = CreateObject("Shell.Application")
objShell.UndoMinimizeALL
set objShell = nothing
C) In Notepad, click on File and click on Save As.
D) Change the save location to the Desktop.
E) In the File Name line, type UndoWindows.vbs and click on Save. (See screenshot below)
NOTE: You can name it anything you would like. Just have .vbs at the end of it.
F) Close Notepad.
5. Go to OPTION THREE below.
 OPTION THREE
NOTE: The .vbs file icons from above cannot be changed. If these .vbs files are ok with you to use as the shortcut, then proceed to OPTION FOUR below.
1. Right click on one of the .vbs files (On Desktop) from OPTION ONE or OPTION TWO above and click Create Shortcut.
2. Right click on the new shortcut (On desktop) and click Properties.
3. For more on how to change a shortcut icon, see: How to Change a Shortcut Folder or File Icon in Vista
 OPTION FOUR
NOTE: Quick Launch would be the easiest way to use these shortcuts, but you can have them where you like.
NOTE: See OPTION ONE under the How to Add or Remove Shortcuts to Quick Launchsection at this link.
2. Move the new shortcuts (On Desktop) from above to inside the Quick Launch folder location.
That's it,Shawn
Related Tutorials
- How to Change the Desktop Background Wallpaper in Vista
- How to Hide or Show Desktop Icon Text in Vista
- How to Restore and Change a Desktop Icon in Vista
- How to Change the Desktop Icons View Alignment and Sort By Order in Vista
- How to Change the Size of Desktop Icons in Vista
- How to Change the Desktop Theme in Vista
- How to Use and Create a Flip 3D Shortcut in Vista
- How to Create a Show Desktop Shortcut in Vista
- How to Create a Fully Functional Internet Explorer Shortcut in Vista
- How to Use Quick Launch in Vista
Attachments
Last edited:

