How to Do a Clean Install and Setup with a Full Version of Vista
This will show you how to do a clean install and setup of a Full Retail or Express installation DVD version of Vista.
- A OEM Recovery installation DVD can only do a clean install. It is just a clone of the hard drive that will set your computer back like it was from day one. The installation process is basically the same though, but can only be reinstalled on the same computer it was originally installed on.
- A Express or Retail Vista can be installed on any one computer at a time for as many times as you like.
- The product key number for the Vista 32 bit version is the same one for it's 64 bit version. You can only have the Product Key activated on one computer and version of 32 bit or 64 bit Vista at a time. See: Microsoft: License Terms for Software Licensed from Microsoft
- Sometimes people have problems installing Vista with more than 2 GB of RAM installed. If you have this problem, then you should install Vista with a maximum of 2GB of RAM installed and add the rest of the RAM after Vista is fully installed.
Be sure to backup anything you do not want to lose from the previous OS, and have all of your device drivers handy for your 32 bit or 64 bit version of Vista before you proceed to install later.
Some Common Installation Problems:
Some Common Installation Problems:
- Windows Help and Support: KB935806 Troubleshooting Stop error messages that may occur when you try to install Windows Vista
- Windows Help and Support: KB929777 Error message when you try to install Windows Vista on a computer that uses more than 3 GB of RAM: "STOP 0x0000000A"
- Microsoft Help and Support: KB925481 This computer's hardware may not support booting to this disk
MINIMUM SYSTEM REQUIREMENTS FOR VISTA
NOTE: For more information, see: Microsoft Windows Vista: Recommended System Requirements
Vista Home Basic
NOTE: For more information, see: Microsoft Windows Vista: Recommended System Requirements
Vista Home Basic
- Processor: 1GHz (32 or 64 bit)
- System Memory (RAM): 512MB
- Hard Drive: 20GB with 15GB available for Vista
- Video Card: 32MB Memory and DirectX 9 Support
- DVD-ROM Drive
- Processor: 1GHz (32 or 64 bit)
- System Memory (RAM): 1GB
- Hard Drive: 40GB with 15GB available for Vista
- Video Card: 128MB Memory, DirectX 9 Support with: WDDM Driver, Pixel Shader 2.0, 32bits per pixel
- DVD-ROM Drive
 STEP ONE
Before doing this clean install, you should download and save all of your device drivers to DVD, or some other media, to have them handy to make setting Vista back up easier.
1. Boot the computer from your Vista installation DVD.
NOTE: Make sure that the CD/DVD drive is selected first in the boot order in the BIOS.
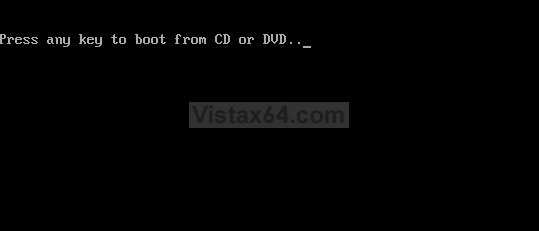
2. When prompted, press any key to start Vista from the installation DVD. (See screenshot below)
NOTE: You will only have about 8 seconds to press this key. If you miss it, you will have to restart the computer.
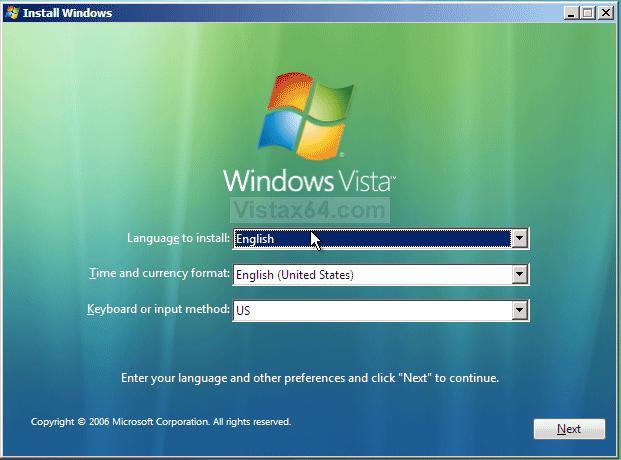
3. Set up your language preferences and click on Next. (See screeshot below).
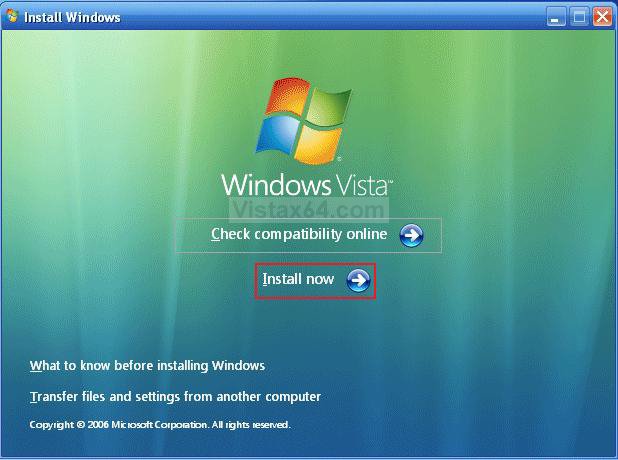
4. Click on Install Now to start the installation. (See screenshot below)
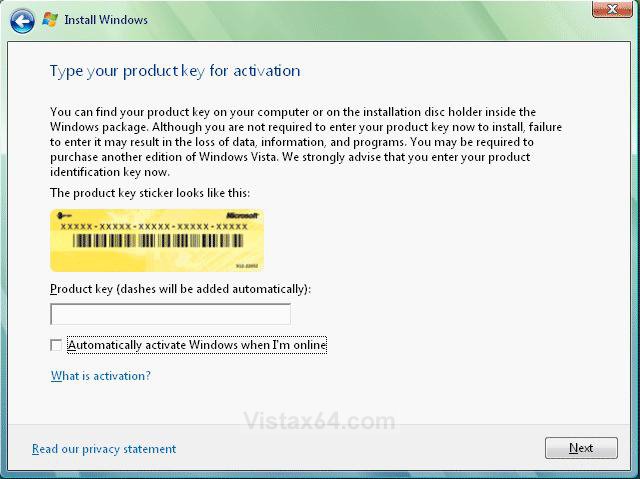
5. Type in your product key number. (See screenshot below)
6. Leave the Automatically activate Windows when I'm online box unchecked.
NOTE: You can activate Vista later when you make sure it is running properly. (See STEP TWO step 11 below)
7. Click on Next.
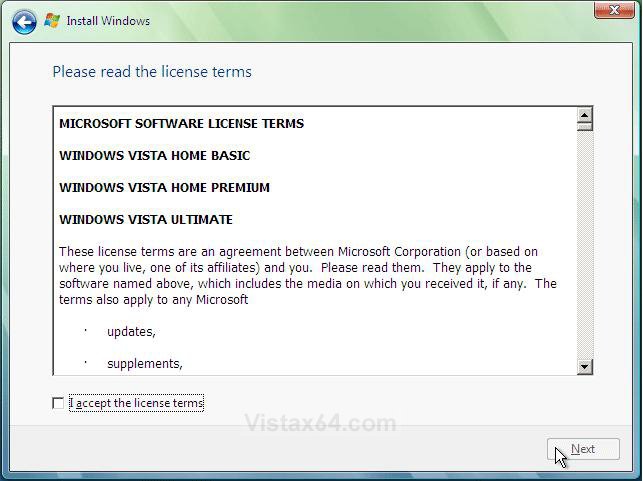
8. Check I accept the license terms box and click Next. (See screenshot below)
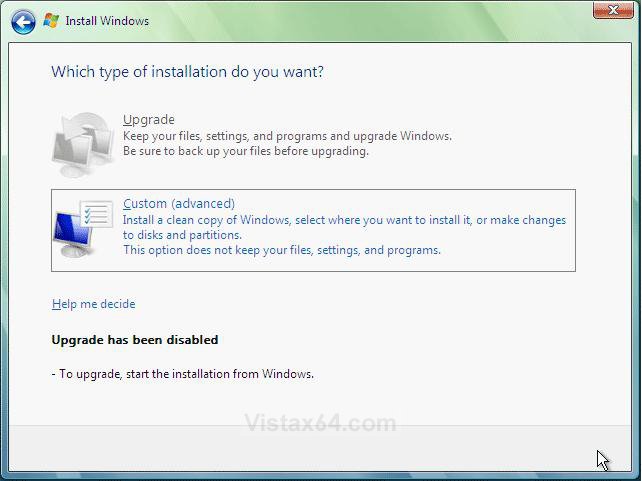
9. Click on Custom (advanced). (See screenshot below)
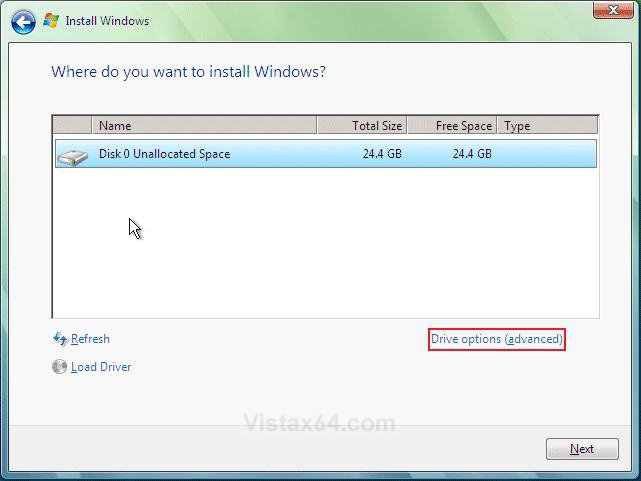
10. Select the hard drive or partition that you want to install Vista on and click on the Drive Options (advanced) link. (see screenshot below)
NOTE: If the hard drive or partition that you have selected is unallocated, then you can just click on the Next button instead and go to step 12 since it is already empty.
WARNING: You may not have the Drive options (advanced) option unless the installation is done at boot, and not running the installation from within your current OS.
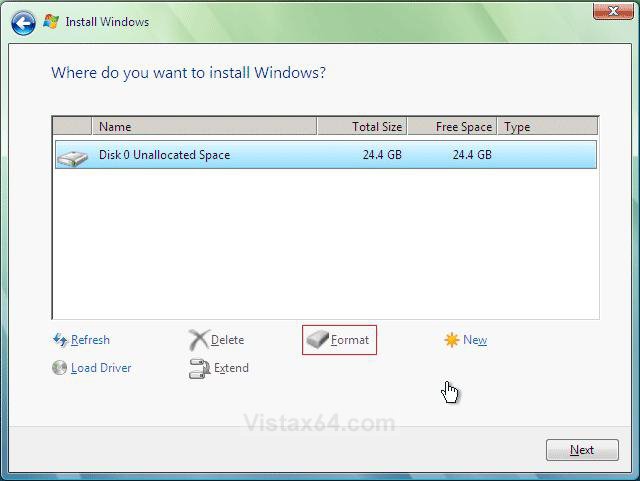
11. Select a hard drive or partition that you want to do a clean install of Vista on, do what Drive options (advanced) you want if any, and click on the Next button when finished. (See screenshot below)
NOTE: If you have your hard drives in a RAID setup, then connect your USB key with the RAID drivers on it, click on Load Driver, select the folder on the USB key that contains the RAID drivers to install them. Afterwards, your RAID drives will be available to select from to install Vista on.
Drive options (advanced)
- If you have more than one partition for a disk # (hard drive) and want to get rid of them to make that disk # one partition drive again, then select a partition with that disk # and click on the Delete option for each partition with the same disk # until there is only one "unallocated space" with that disk # left as in the screenshot below.
- To shrink an existing partition to create another partition to install Vista on instead, select the partition you want shrink and click on the Extend option. Type in how much in MB (1 GB = 1024 MB) that you want to shrink it by. Now select the new extended partition.
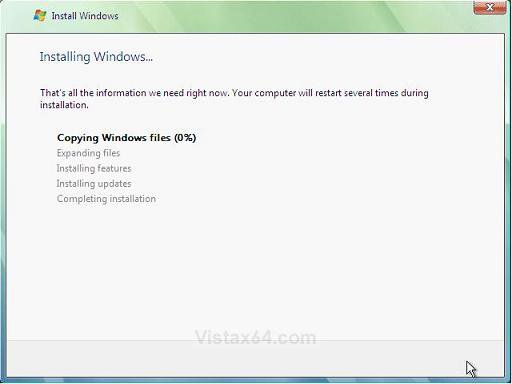
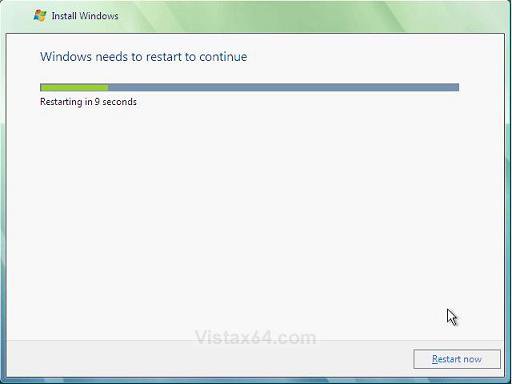
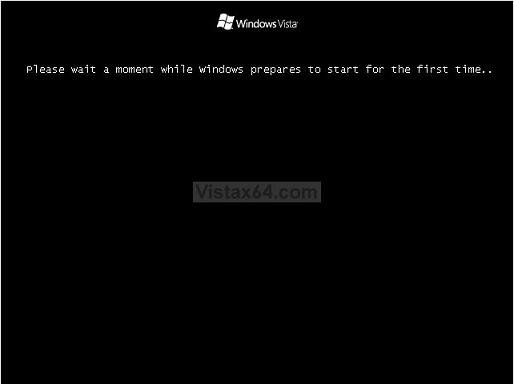
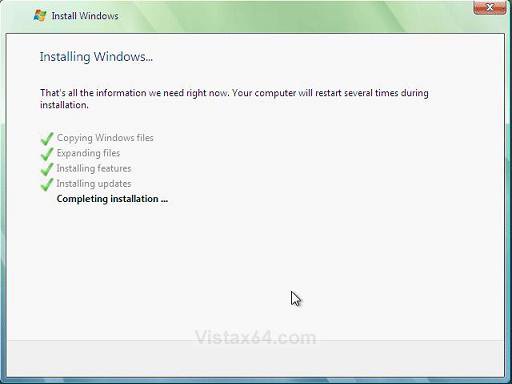
12. The installation of Vista will now start. Below are screen shots of what you’ll see during the install.
 STEP TWO
NOTE: Now that Vista is installed, it is time to set it up.
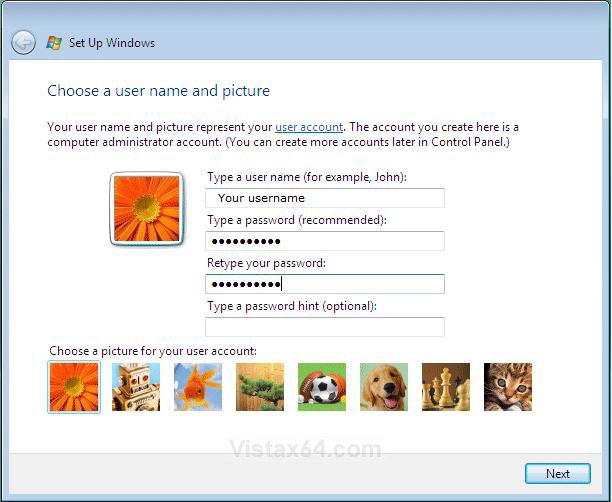
1. Type in a user name, password, optional password hint, and select a display picture for your administrator user account. (See screenshot below)
2. Click on Next.
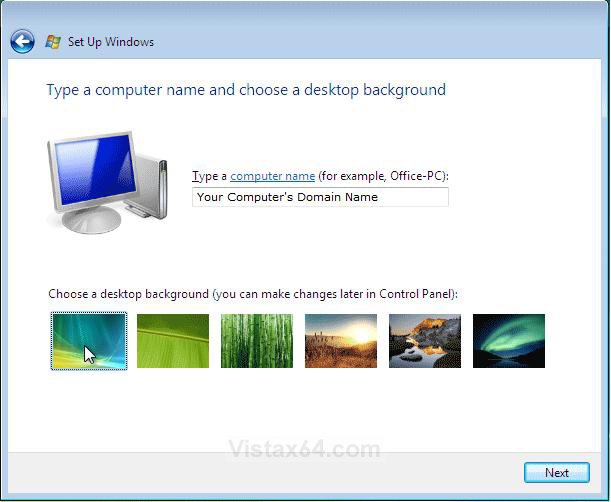
4. Click on Next.
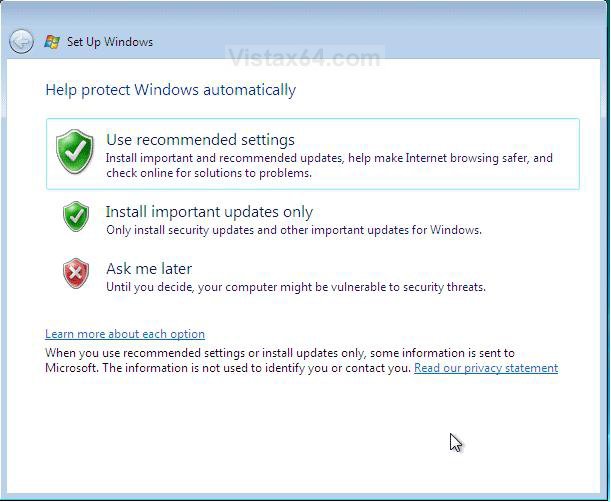
5. Click on Use recommended settings. (See screenshot below)
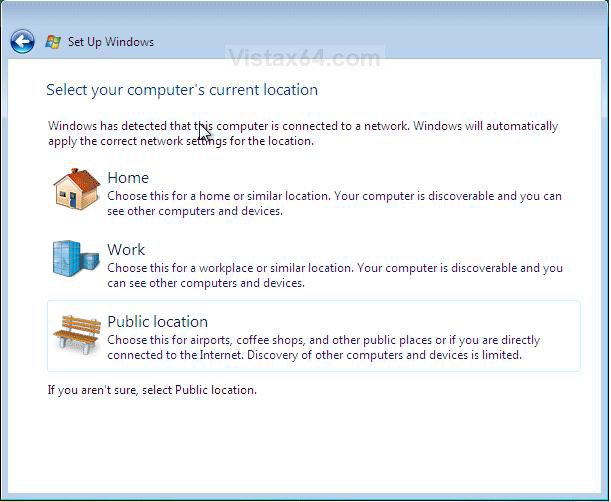
7. Click on your computer's location to select it for the network location settings. (See screenshot below)
NOTE: It is best to select Public location for the best security. If Vista doesn't detect your network connection, then you may not see this screen during setup.
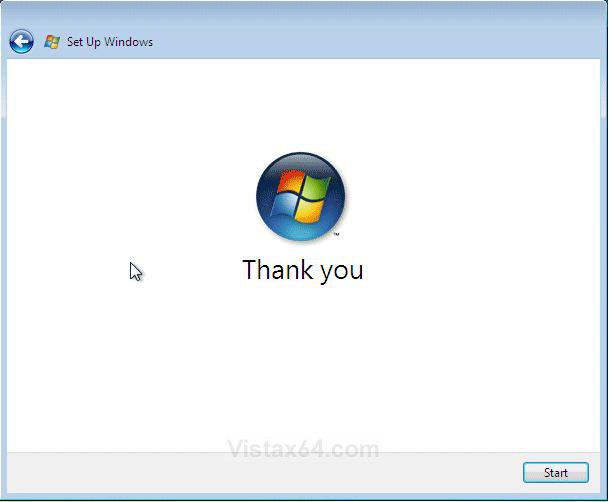
8. Click on Start to boot Vista for the first time. (See screenshot below)
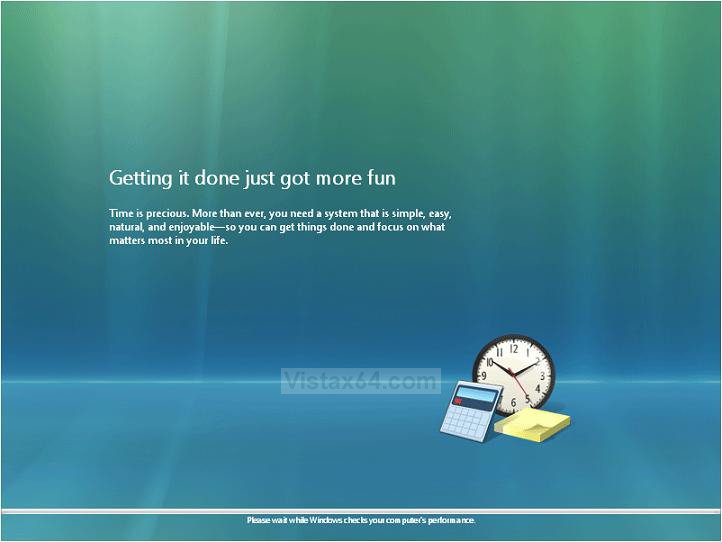
9. Before Vista boots for the first time it must perform a performance check to see what features to turn on or off. (See screenshot below)
10. Install all of your device drivers, then Windows Updates.
11. Update your WEI score.
12. When it is done, all you will need to do is to activate Vista.
A) Right click on Computer in the Start Menu and click on Properties.
B) Scroll down a bit and click on Activate Windows Now. (See screenshot below)
That's it,
Shawn
Related Tutorials
- How to Perform a Repair Installation for Vista
- How to Activate Vista Normally and by Phone Activation
- How to Reset a User Account Password in Vista
- How to Do a Clean Install of Vista with a Upgrade Version
- How to Extend Vista Trial Period for Up to 120 Days
- How to Get Out of Reduced Functionality Mode in Vista
- How to Change the Network Location Type in Vista
- How to Create a Vista SP1 Slipstream Installation DVD
- How to Create a Bootable USB Flash Thumb Drive to Install Vista
- How to Setup a Dual Boot Installation with Windows 7 and Vista
- How to Setup a Dual Boot Installation with Windows Vista and XP
- How to Do a Upgrade Installation with Windows 7
- How to Do a Custom Installation of Vista
Attachments
Last edited by a moderator:



 .
.